Handmade Christmas Characters
Explore our dedicated Christmas Arts and Crafts blog for step-by-step instructions to make your favourite Christmas characters.
Posted on
Monday 17th
November 2025
Christmas Characters
Explore our dedicated Christmas Arts and Crafts blog for step-by-step instructions to make your favourite Christmas characters.

Get inspired by the characters from Christmas songs and stories and create magical Christmas displays with these fun festive art projects. The activities below show you how to make:
- Cute Christmas 3D Card Mice Decorations
- Cheeky Robin Decoration-Quick Make
- Christmas Gnome Character
- 3D Reindeer Christmas Decoration
- 3D Penguin and Chick Decoration
- Penguin Chick-Quick Make
- Christmas Nativity Character- Quick make
Making Christmas Characters
Here are the step-by-step instructions:
Cute Christmas 3D Card Mice Decorations
Children will love crafting these fun little card characters. They are quick to make and require very few steps and materials to create a 3D basic mouse shape. Children’s imaginations can then be used to decorate and accessorise!
What you will need:
Colour Shades Pom Poms
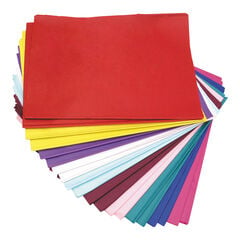
Coloured Card Pack
Pipe Cleaners
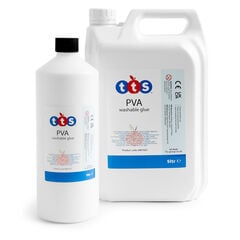
TTS PVA Glue
Clear Tape
Wiggly Eyes
How to make:
Step 1
 Draw a circle on card and cut it out (I used the bottom of a recycled yogurt pot to draw around!), these are approx. D10cm, but you can scale this up to work on a larger scale just by drawing a larger circle.
Step 2
 Fold neatly in half then quarter, then open out back into half and turn sideways so that the fold is on the lefthand side. Measure approx. 1cm in along the quarter fold and in pencil from that point draw a ½ heart shape.
Step 3
 Cut from the bottom of the line up to the top (this makes the head and ears) then cut along the folded line on the righthand side removing the lower piece of card.
NB. Put this piece to one side to keep and use later!
Step 4
-

-

Unfold the shape you’ve cut out. Bring the two straight side pieces together and join using clear tape to make the body.
Step 5
Fold the head shape down and the ‘ears’ forward a little to give the mouse’s head extra character. Take the left-over card shape and cut ‘v’s into the top to create the mouse’s hands. Using PVA glue stick the hands on the back lining up the folds so a hand goes either side of the body.
Step 6
 Bring your mouse to life by adding wiggle eyes, nose and curly pipe cleaner tail. Use coloured card/paper to add extra colour on the ears then personalise further and make a Santa hat, a felt scarf, cloak, Christmas things to hold e.g. present, Christmas pudding, Christmas tree, sledge etc. – wherever a child’s imagination takes them!
Make a Cheeky Christmas Robin Decoration – Quick Make
A cheeky little bird who is really simple and ‘quick’ to make but due to drying time needed when applying the papers would ideally be completed over a couple of craft sessions.

What you will need:
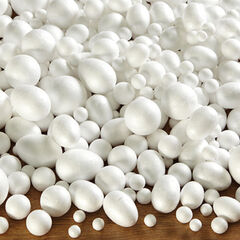
Polystyrene Eggs
TTS PVA Glue
Pipe Cleaners
Assorted Coloured Tissue Paper
Brown Craft Paper
Wiggly Eyes
Coloured Card
How to make:
Step 1
Ready for pasting onto the shape, tear lots of smallish pieces of craft paper (or recycled brown packing paper) to save having to do this when in the middle of ‘making’.
Step 2
 Cover one half at a time (so little fingers aren’t getting stuck in glued surfaces and spoiling what they are doing!). Start on the top, brush PVA onto the polystyrene shape followed by a piece of torn paper followed by PVA again to seal and smooth the surface. Continue piece by piece making sure there are no gaps until the top half is covered. Allow to dry.
Step 3
 Once touch dry then cover the bottom half of the egg layering on the paper with PVA then brushing the surface again using PVA. Leave to dry.
Step 4
Tear white and red/orange tissue paper into small pieces ready to paste onto the shape now fully covered in brown paper. Look at pictures of Robins so children can then decide where to put the red tissue paper for the head and chest and where to put the white. Repeat the process used for the brown paper i.e. PVA-tissue paper-PVA over the top. Leave to dry.
Step 5
Cut wings, tail and beak from coloured card. Stick with PVA glue (or for speed a low melt glue gun under supervision of course!)
Step 6
 Add the final details of wiggly eyes to bring the little Robin to life and make some huge pipe cleaner feet! To stick the feet onto the body either make 2 small holes in the base of the Robin, add a blob of PVA glue then push the legs/feet in or again use a glue gun. You could even make a felt scarf or hat too!
Make a Christmas Gnome Character
 What you will need:
A4 Red Card
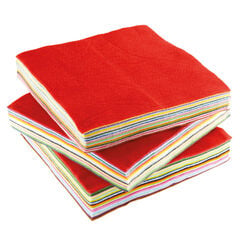
Felt Squares
Pipe Cleaners
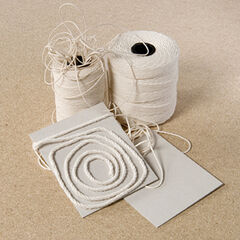
Cotton String
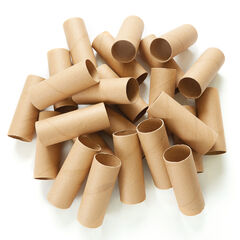
Recycled Sturdy Cardboard Craft Rolls
Assorted Polystyrene Balls and Eggs
Pop poms Assorted
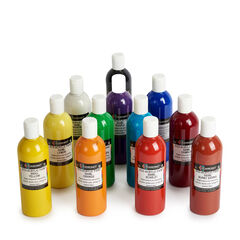
TTS Ready Mixed Paint
Red Acrylic Paint
TTS Glue Stick
TTS PVA Glue
Craft Glitter
How to make:
Step 1
Cut a cardboard roll in half to make the body of the gnome, paint with red ready mixed paint or acrylic paint and leave to dry.
Step 2
 Use a polystyrene egg and small ball painted with skin toned paint for the head and nose (if using ready mixed paint mix not acrylic, a little PVA with the paint will help it cover the surface). Leave to dry.
Step 3
Make the beard using string/yarn and a white 15cm pipe cleaner. Cut pieces of string/yarn approx. L20cm into 10-15 pieces. Take each piece, fold in two forming a loop on one end. From the middle of the pipe cleaner, place a loop behind the pipe cleaner and pass the two ends of the string through the ‘loop’, pull to form a knot. Keeping each knot close to the others tie the rest of the pieces onto the pipe cleaner.
Once complete twist the two ends of the pipe cleaner together so it forms a ‘ring’ and place over the head to sit in position, stick with PVA to secure. The hat should cover the pipe cleaner. Trim beard to shape/length once stuck on the face.
Simplify:
If this is too difficult for your children to complete simply cut a beard shape from white felt, it’ll be just as cute!!
Step 4
Take a piece of red card and draw a circle (mine was diam. 13cm), cut in half, fold one half into a cone. Use a glue stick to stick the two sides together forming the cone shape. Add decoration, spots, stripes, sparkles – you decide!
Step 5
Twist two pipe cleaners together and bend in the middle to make the legs.
Step 6
Make the boots from red card W4cm x L7cm. Fold a piece of card in half and cut out a boot shape then ‘sandwich’ the end of the pipe cleaner at the top of the boot, stick together with PVA or use a glue stick (I’ve not glued the bottom of the boot to make them look more 3D!). Add a piece of white pipe cleaner at the top to decorate the boot.
Step 7
Cut arms and gloves out of coloured felt or card. Decorate the cuffs of the sleeves with a piece of twisted pipe cleaner for a fluffy finish! Stick all elements of the ‘sleeves’ together with PVA, then when dry stick onto the body.
Step 8
Stick the ‘loop’ of the legs on to the inside of the cardboard tube using PVA (or for a stronger more instant stick a cool melt glue gun (under supervision). Stick the hat and nose in place with PVA glue. Add decoration to the Christmas gnome ‘suit’ e.g. coloured buttons, pom poms etc.
Make a 3D Reindeer Christmas Decoration
 What you will need:
Recycled Sturdy Cardboard Craft Rolls
Polystyrene Egg/Ball
Felt Squares
Pipe Cleaners
TTS Ready Mixed Paint
Pom poms
Wiggly Eyes
TTS PVA Glue (either Washable PVA or TTS Black PVA glue which dries quicker and has a stronger stick but once dry isn’t washable)
(NB. For a quicker stick a low melt glue gun could be used on key areas e.g. sticking legs/arms/hat etc under careful supervision)
How to make:
Step 1
Cut approx. 1/3 off a cardboard roll using the larger part to make the body. Paint with brown ready mixed paint (either pre-mixed or mix a brown using the 3 primary colours). Leave to dry then add texture by brushing a little white ready mix on the tummy area.
Step 2
 Paint the polystyrene shape with the same colour ready mix. (Tip: As this is a nonporous surface it is a good idea to add some PVA with the paint to help the paint stick to the surface). Leave to dry.
Step 3
 Stipple white ready mixed paint onto part of the head (under the nose & jaw area) and body (give him a fluffy tum!) to give the impression of a little furry texture. Twist together two pipe cleaners to make the legs and arms. Use one pipe cleaner to make the antlers.
Step 4
Paint around the edge of the cardboard craft roll with PVA and stick the head to the body. Leave to dry.
Step 5
Cut a long length of felt to make the Reindeer a scarf, a felt circle to make the hat, 4x ’hoof’ shapes, a heart shape for the chest and two small triangles to make ears.
Step 6
Cut the felt circle into two pieces, fold half of one into a cone shape, add a line of PVA and stick together to make the hat (under supervision a cool melt glue gun is also ideal for a quicker stick). Once dry add a pompom.
Step 7
Push the end of the pipe cleaner ‘antlers’ firmly into each side of the head to create a hole in the polystyrene. Remove the antlers then add a dab of PVA on to the ends and push back into the head to stick them securely in place.
Step 8
Stick arms and legs in place, a low melt glue gun is ideal for this as it’s a ‘quick stick’. This of course needs to be done under adult supervision.
Step 9
Stick on the hat, hooves, pompom nose, wobbly eyes etc using PVA glue or glue gun. Tie on the scarf and add any further decoration to personalise using assorted collage materials.
Make A Snowman Christmas Decoration
 What you will need:
Double Knit Yarn Assorted
Recycled Sturdy Cardboard Craft Rolls
Polystyrene Egg/Ball
Felt Squares
Wiggly Eyes
Acrylic Paint
Coloured Card Assorted
TTS PVA Glue
Black Permanent Marker Pen
Cotton Wool
How To make:
Step 1
Cut approx. 2cm off the top of the cardboard craft roll and keep for making the scarf later.
Step 2
Paint the largest piece of cardboard roll in two layers of white acrylic paint, allowing the first layer to dry completely before brushing on the next.
Step 3
Brush PVA glue onto the bottom half of the roll leaving the top part clear of adhesive. Whilst the glue is wet, add a thin layer of cotton wool to add a soft snowy texture. Leave to dry.
Step 4
Measure the circumference of the craft roll and cut a rectangle of craft felt to make a waistcoat which wraps around the top third of the snowman. Cut two small armholes in the felt on each side to enable the pipe cleaner arms to be pushed through the felt, hooked over the side of the cardboard roll and stuck to the body.
Step 5
 Cut a pipe cleaner into 4 creating two longer pieces to make the arms, 2 smaller pieces to make the ‘stick’ fingers. Twist a long and short piece together to make each arm and hand.
Step 6
 To make the head paint a polystyrene ball with white acrylic paint, stick on wiggly eyes, a carrot nose cut from card and draw on a mouth with a black permanent marker. Make a hat from felt to add more character.
Step 7
 To make the scarf paint the 2cm cardboard roll with acrylic paint. Get 2 lengths of contrasting colours of yarn, tie them onto the roll then wrap around two thirds of the roll (leaving a gap in the middle to make the ends of the scarf) making the ‘stripes’ on the scarf. Secure the ends of the yarn with clear tape or glue.
Step 8
To make the rest of the scarf cut lengths of wool in both colours to tie onto the roll approx. L30cm. Fold a piece of the wool in half, pass the middle ‘loop’ under the ring, next pass both ends through the loop and pull tight and keep the ‘tie’ at the bottom of the roll. Repeat until the gap is filled, alternating colours. Finish by dividing the yarns into two & tying a knot in them. Snip the ends to tidy up!
Simplify: If this stage is too time-consuming or you need a simpler technique cut a colourful scarf from craft felt, ribbon or fabric, it’ll still look adorable!
Step 9
Stick everything together head, scarf, body using PVA glue or supervised use of a glue gun to make the drying time much quicker!
Make a 3D Penguin & Chick Decorations
 What you will need:
Recycled Sturdy Cardboard Craft Rolls
Polystyrene Egg/Ball
Felt Squares
Wiggly Eyes
Acrylic Paint
Coloured Card Assorted
TTS PVA Glue
Cotton Wool
How to make:
Step 1 – Adult Penguin
 Decorate the body using acrylic paint. Paint the ‘tummy’ white and black on all the rest of the cardboard craft roll. Two coatings of each may be needed for a solid colour.
Step 2
 Using a polystyrene egg to make the head, paint the back & top of the head in black acrylic and white paint onto the ‘face’. Leave to dry in between each layer of paint. Stick on the wiggly eyes and a beak made from orange coloured card using PVA glue.
Step 3
Cut out 2 wing shapes from craft felt. Black felt on the outside and a smaller piece of white felt on the inside stuck together with PVA glue. If you want to make your figure slightly ‘posable’ stick a black pipe cleaner in the middle, inside of the wings in between the black and white felt pieces.
Step 4
 Make a scarf from a length of craft felt with the ends snipped and dipped in PVA and glitter. The bobble hat is made using a ½ circle of craft felt rolled into a cone and glued, finished off with a pompom. Add glitter for added sparkle!
Step 5
 To finish off cut large, funny feet from brightly coloured orange card.
Penguin Chick – Quick Make
Step 1
 Using a polystyrene egg paint the bottom half of the egg grey using a mix of white and black acrylic. Paint the face using black acrylic for the head and white for the face.
Step 2
Stick wiggly eyes and a beak cut from orange card onto the face using PVA glue.
Step 3
Once all the paint on the body is dry, paint on a layer of PVA glue then add a thin layer of cotton wool (so that the grey on the chick’s body will still show through) to create a soft fluffy texture.
Step 4
 Make a set of cute ear warmers by twisting together two pipe cleaners, bend, measure and cut to size to they sit in a curve on top of the head. Stick 2 pom poms on to each end.
Step 5
 Cut a pair of funny feet from orange card and stick on the body with PVA glue.
Christmas Nativity Characters – Quick Make
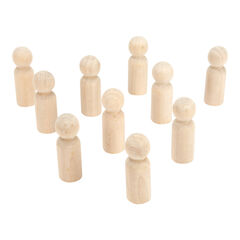
Children can enjoy transforming these sturdy wooden shapes into any Christmas character they choose with some simple steps. The unvarnished wood could be painted with acrylic paint before decorating if required. Here I’ve used a basic ‘cloak’ shape to dress the figures using coloured felt and ‘made’ accessories to show who the character is, e.g. angel wings, crown for the King, shepherd’s crook etc. 
What you will need:
Wooden People Craft Pack
Felt Squares
Pipe Cleaners
Glitter
TTS PVA Glue
Pom Poms
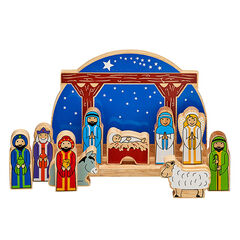
For inspiration see our Starry Night Nativity Set
How to make:
(NB. it’s the same technique really for all these characters so follow the steps and adapt depending on who/what character you wish to make).
Step 1
 Decide on your character and then choose the colour of your felt to ‘match’ that character. Make the ‘cloak’ by cutting a rectangular piece of felt these are L12cm x W6cm.
Step 2
Fold the piece of felt in half and to make the ‘tie’ cut into the folded felt approx. 2.5cm (cutting from the two open ends not the folded side), then cut from the bottom of the felt up to the end of the line you’ve just cut to remove a triangle of fabric. You now have the basic cloak shape. Add a line of PVA along the edge of the cloak and sprinkle with glitter to give your characters a little sparkle.
Step 3
 Decide what accessories you need for your character e.g. headdress, crown, halo, wings or sheep! Here the headdresses are made using a piece of felt secured with either a ‘ring’ of pipe cleaner or in the case of my ‘shepherd’ string/twine. The Kings crown, wings, and halo have all been modelled from tinsel pipe cleaners.
Step 4
 Fluffy pom poms offer endless possibilities for making animals, insects, monsters etc or here for sheep to accompany the shepherd! Easily made with 1 x large white pompom, 1 x black pompom and small length of pipe cleaner for the legs, finished off (of course!!) with some wiggly eyes for fun.
We hope you enjoy making these Christmas characters and they add to the festive magic and sparkle.
Merry Christmas.

If you have enjoyed this blog also look out for our Christmas How To blog for more fun Christmas craft ideas.
Blog created by Rachel Betteridge with art activity ideas written by Nicky Mountcastle.
Rachel is a Content Editor for TTS. She is a qualified Primary School Teacher with 26 valuable years of experience, teaching from Early Years to year 6.
Nicky is a Content Editor for TTS for Art & Commodities. With a love for art & craft from a young age Nicky trained in Art & Design and has enjoyed a variety of creative jobs throughout her career. Making, discovering and sharing ideas is one of her favourite things to do!


 Draw a circle on card and cut it out (I used the bottom of a recycled yogurt pot to draw around!), these are approx. D10cm, but you can scale this up to work on a larger scale just by drawing a larger circle.
 Fold neatly in half then quarter, then open out back into half and turn sideways so that the fold is on the lefthand side. Measure approx. 1cm in along the quarter fold and in pencil from that point draw a ½ heart shape.
 Cut from the bottom of the line up to the top (this makes the head and ears) then cut along the folded line on the righthand side removing the lower piece of card.


 Draw a circle on card and cut it out (I used the bottom of a recycled yogurt pot to draw around!), these are approx. D10cm, but you can scale this up to work on a larger scale just by drawing a larger circle.
 Fold neatly in half then quarter, then open out back into half and turn sideways so that the fold is on the lefthand side. Measure approx. 1cm in along the quarter fold and in pencil from that point draw a ½ heart shape.
 Cut from the bottom of the line up to the top (this makes the head and ears) then cut along the folded line on the righthand side removing the lower piece of card.


 Bring your mouse to life by adding wiggle eyes, nose and curly pipe cleaner tail. Use coloured card/paper to add extra colour on the ears then personalise further and make a Santa hat, a felt scarf, cloak, Christmas things to hold e.g. present, Christmas pudding, Christmas tree, sledge etc. – wherever a child’s imagination takes them!
 Cover one half at a time (so little fingers aren’t getting stuck in glued surfaces and spoiling what they are doing!). Start on the top, brush PVA onto the polystyrene shape followed by a piece of torn paper followed by PVA again to seal and smooth the surface. Continue piece by piece making sure there are no gaps until the top half is covered. Allow to dry.
 Once touch dry then cover the bottom half of the egg layering on the paper with PVA then brushing the surface again using PVA. Leave to dry.
 Add the final details of wiggly eyes to bring the little Robin to life and make some huge pipe cleaner feet! To stick the feet onto the body either make 2 small holes in the base of the Robin, add a blob of PVA glue then push the legs/feet in or again use a glue gun. You could even make a felt scarf or hat too!
 What you will need:
  Use a polystyrene egg and small ball painted with skin toned paint for the head and nose (if using ready mixed paint mix not acrylic, a little PVA with the paint will help it cover the surface). Leave to dry.


 What you will need:
  Paint the polystyrene shape with the same colour ready mix. (Tip: As this is a nonporous surface it is a good idea to add some PVA with the paint to help the paint stick to the surface). Leave to dry.
 Stipple white ready mixed paint onto part of the head (under the nose & jaw area) and body (give him a fluffy tum!) to give the impression of a little furry texture. Twist together two pipe cleaners to make the legs and arms. Use one pipe cleaner to make the antlers.

 What you will need:


 Cut a pipe cleaner into 4 creating two longer pieces to make the arms, 2 smaller pieces to make the ‘stick’ fingers. Twist a long and short piece together to make each arm and hand.
 To make the head paint a polystyrene ball with white acrylic paint, stick on wiggly eyes, a carrot nose cut from card and draw on a mouth with a black permanent marker. Make a hat from felt to add more character.
 To make the scarf paint the 2cm cardboard roll with acrylic paint. Get 2 lengths of contrasting colours of yarn, tie them onto the roll then wrap around two thirds of the roll (leaving a gap in the middle to make the ends of the scarf) making the ‘stripes’ on the scarf. Secure the ends of the yarn with clear tape or glue.


 What you will need:
  Decorate the body using acrylic paint. Paint the ‘tummy’ white and black on all the rest of the cardboard craft roll. Two coatings of each may be needed for a solid colour.
 Using a polystyrene egg to make the head, paint the back & top of the head in black acrylic and white paint onto the ‘face’. Leave to dry in between each layer of paint. Stick on the wiggly eyes and a beak made from orange coloured card using PVA glue.
 Make a scarf from a length of craft felt with the ends snipped and dipped in PVA and glitter. The bobble hat is made using a ½ circle of craft felt rolled into a cone and glued, finished off with a pompom. Add glitter for added sparkle!
 To finish off cut large, funny feet from brightly coloured orange card.
 Using a polystyrene egg paint the bottom half of the egg grey using a mix of white and black acrylic. Paint the face using black acrylic for the head and white for the face.
 Make a set of cute ear warmers by twisting together two pipe cleaners, bend, measure and cut to size to they sit in a curve on top of the head. Stick 2 pom poms on to each end.
 Cut a pair of funny feet from orange card and stick on the body with PVA glue.

 Decide on your character and then choose the colour of your felt to ‘match’ that character. Make the ‘cloak’ by cutting a rectangular piece of felt these are L12cm x W6cm.
 Decide what accessories you need for your character e.g. headdress, crown, halo, wings or sheep! Here the headdresses are made using a piece of felt secured with either a ‘ring’ of pipe cleaner or in the case of my ‘shepherd’ string/twine. The Kings crown, wings, and halo have all been modelled from tinsel pipe cleaners.
 Fluffy pom poms offer endless possibilities for making animals, insects, monsters etc or here for sheep to accompany the shepherd! Easily made with 1 x large white pompom, 1 x black pompom and small length of pipe cleaner for the legs, finished off (of course!!) with some wiggly eyes for fun.
