Halloween Arts & Craft How To’s
Enjoy this year’s Halloween with a range of frightfully fun festive art projects. Read this blog to discover ten chilling children’s art and craft activities for Halloween.
With eerily easy-to-follow step-by-step instructions you’ll be able to make your own spooky decorations. Here are some Halloween activities for Early Years, KS1 and beyond. We hope everyone will love these creepy creations.
- Flying Ghost Paper Plate Halloween Decoration
- Halloween Lantern
- Early Years Monster/Ghost Halloween Lantern
- Halloween Light up Mod Roc Ghost Models
- Air Dry Clay Tealight Ghost
- Pop-Up Halloween Ghost Card
- Ghostly Halloween Monoprint Leaf Card
- Halloween ‘Boo’ Card- Quick Make
- Halloween Dementor Hanging Decoration- Quick Make
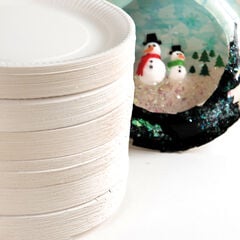
- Ghostly Halloween Mini World- Quick Make
Have a go at these creative Halloween activities!
Halloween How To’s
Flying Ghost Paper Plate Halloween Decoration
What you will need:
How to make:
Step 1
Fold the plate in half and draw the shape of the ghost you want, adding in a small half circle on the fold to cut out for a ‘spooky’ mouth.
Step 2
Cut along the pencil line cutting the shape of the body and keep all leftover pieces (as you’ll be using those to make the ghost 3D later).
Step 3
Use a single hole punch or paper drill to create the eyes whilst the plate is still folded so the eyes are symmetrical.
Step 4
Unfold the cut-out shape to reveal the base shape of the ghost’s body. The fold creates a 3D effect which will be enhanced using the offcuts of the plate to extend the overall shape by adding arms and lengthening the robe.
Step 5
Tear tissue paper into strips to decorate the piece. Tear long and short strips in different shapes and lengths to give a ‘raggy’ effect. From the bottom upwards build up layers of tissue strips on the main body of the ghost, adding PVA at the top of the tissue paper allowing the rest of the tissue paper to hang free for movement & texture.
Step 6
Add more tissue strips to the additional arm & body pieces and leave to dry.
Step 7
Stick the additional ‘arm’ pieces into place at a slight angle upwards and the additional piece to the bottom of the ghoul to make your Halloween ghost look larger and scarier!
Step 8
Stick a paper dowel to the back of the ghost so it can be ‘zoomed’ through the air!
Halloween Lantern
What you will need:
- A4 Tracing Paper
- Tissue Paper Assorted
- Coloured Card
- Clear Book Cover Film
- Permanent Marker Pen
- Double Sided Tape
- TTS Adhesive Tack
- Battery Tealights
How to make:
Step 1
Cut out some basic Halloween themed shapes eg bats, pumpkins, spiders, ghosts etc from the tissue paper assortment.
Step 2
Cut an A4 piece of clear book covering film. This self-adhesive film will be used as the ‘glue’ to hold the Halloween shapes in place and form the body of the lantern. Add four pieces of adhesive tack to each corner (shiny side) and press onto the table-top to hold in place whilst working.
Step 3
Peel off the backing then press your tissue Halloween shapes onto the self-adhesive film to create your design. NB. Don’t cover the whole of the surface as you need to leave space in between the shapes so the outer cover of tracing paper will stick to the film.
Step 4
Add more colour and pattern using lengths of cotton, sequins etc.
Step 5
When decoration is complete, take the piece of tracing paper and place it exactly over the top of your design then press down firmly smoothing with your hand to press the tracing paper onto the adhesive areas of the film available.
Step 6
Remove the tack from each corner and turn over so you see the clear, shiny side of the design. Using a permanent marker add detail to the Halloween shapes (this will show through the lantern when lit up).
Step 7
Create the supporting ‘top’ and ‘bottom’ of the lantern by cutting 2 strips of black card: L29.5cm x W2.5cm. Add lengths of double-sided sticky tape to one side of each black card strip, peel off the backing and stick to the top and bottom of the lantern (on top of the tracing paper side).
Step 8
Keeping the shiny side of the film on the inside, roll the sheet into a ‘tube’ and use more sticky tape to stick both sides together forming the lantern shape. Light up with a battery tealight and let the spooky designs shine through!
If you’d prefer a hanging lantern stick a circle of card to the base, punch a couple of holes each side at the top (using a single hole punch) and add a pipe cleaner, ribbon or string!
EY’s Monster/Ghost Halloween Lantern
What you will need:
- Assorted tissue paper
- Pom poms
- Pipe cleaners
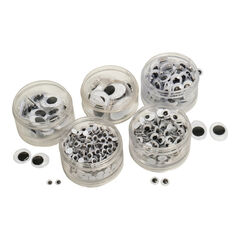
- Stick-on Wiggly Eyes
- TTS Washable PVA
- Black Permanent Marker
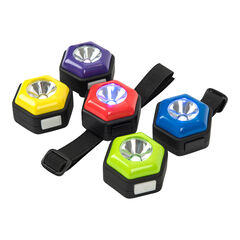
- Battery Tealights or TTS Colour Changing Torches
- 1 x Clear Plastic Cup
How to make:
Step 1
Draw large scary eyes and mouth onto your cup and colour using the permanent black marker (when lit from the inside these will show through the translucent tissue paper).
Step 2
Tear pieces of the tissue paper into a variety of long strips & shapes (to make the ghoulish ‘robe’).
Step 3
Work from the bottom of the cup upwards painting PVA directly onto the cup then pressing only the top area of a piece of tissue paper into the glue. Cover all of the cup. This creates a 3D ‘torn’, layered effect creating movement as the Halloween lantern is carried.
Step 4
Using a single hole punch make a hole on each side of the lantern thread the ends of the pipe cleaner through the holes and twist the ends onto the main piece of pipe cleaner to secure creating a handle.
Step 5
Create the spider’s cutting lengths of pipe cleaners into 4 pieces. Line up the pieces then twist in the middle to create 8 spider legs and the base of the body. Add a pom pom for the body and wiggly eyes. Pumpkins…just add pom poms and funny teeth!
Step 6
For safety use a battery tealight or colour changing torches to illuminate!
Halloween Light Up Mod Roc Ghost Models
What you will need:
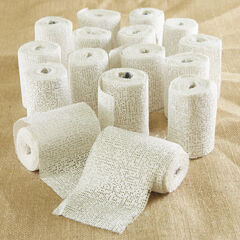
- Mod Roc
- Scissors
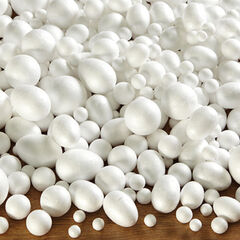
- Polystyrene Ball/Egg
- Masking Tape or clear tape
- Colour Changing Torches or Battery Operated Tealights
- Whiteboard
- Recycled Cardboard
- Recycled Plastic Bottle
- ‘Dipping’ tray for the Mod Roc
How to make:
Step 1
Create a mould for the ghost model using ‘found’ products. For the large model I’ve used a full recycled 250ml water bottle, polystyrene ball to make ‘the head’ and cardboard triangles to make the arms, for the small model approx. ½ bottle and polystyrene ball. Use masking tape or clear tape to firmly attach the ball to the bottle.
Step 2
Cut the Mod Roc roll into manageable strips – depending on the size of model being made make the strips just longer than the height of the model from the top of the head to the table allowing for extra at the base of the model.
Step 3
Cover the structure loosely with cling film making the bottle shape less defined for a more ‘ghostly’ shape and to enable it to be removed easily once the mod roc has dried.
Step 4
Fill a plastic tray with water. Work with 3 or 4 pieces of mod roc at a time dropping them into the water to activate the Plaster of Paris on the bandage ready for use. One by one lift out the strips, run your finger and thumb down the strip to remove excess water and from the top of the head lay the pieces onto the structure overlapping and smoothing the edges of the strips right the way to the bottom of the figure to make the structure sturdy and prevent gaps as you work around the model.
Step 5
You may choose to add more than one layer of mod roc (though one layer is surprisingly sturdy if the pieces have been overlapped and joined!) in some places to strengthen it e.g. the ‘arm’s joining onto the main body, but don’t make it too thick as it will prevent light passing through the dried plaster bandage. Once the whole figure is covered leave to dry overnight.
N.B. Because of the ‘arms’ the larger figure needs to be left open slightly at the sides to allow the inner structure to be removed.
Step 6
The dried mod roc ghost lanterns could be either left plain or painted with acrylic paint – white for a ghost, black for a dementor? This will also protect it and give it a slight sheen. The choice is yours!
Step 7
Draw on eyes and mouth using a permanent marker and finally light it up! Add a tealight or a colour changing torch to really bring your figure to life!
Air Dry Clay Tealight Ghost
What you will need:
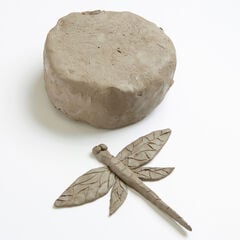
- TTS Air Dry Clay Stone
- Polystyrene Ball/Egg
- Masking Tape/Clear Tape
- Modelling Board
- Recycled Plastic Bottle
- Acrylic Paint
How to make:
Step 1
Make a mould. A cut down recycled bottle with a polystyrene ball for a head taped together makes a sturdy structure! Cover with cling film to give the ghost more shape and enable the structure to be removed easily once the air-dry clay has dried out.
Step 2
Use a piece of air-dry clay approx. fist size (this can be scaled up or down depending on the mold you’ve created to ‘drape’ the clay over) and shape into smooth ball.
Step 3
Roll out the clay keeping to an even thickness, then use a circular template to cut a circle (you could also cut a ‘wobbly circle’ so it’s not too neat! Smooth out the edges, a little water on a sponge/fingers helps to do this.
Step 4
Centre over the mould and press down gently around the clay to form the ghostly shape. Use a clay tool to create the eyes and mouth pushing right through the clay to allow light through when it is lit from within. Leave to dry overnight.
Step 5
When dry, paint with acrylic paint (this seals the clay with colour and a soft, water-resistant sheen) black inside to make the light more noticeable when you add a tealight, mix white and grey for the outside.
Step 6
Light up with our colour changing torches or battery operated tealights.
Pop Up Halloween Ghost Card
What you will need:
- 1 x A4 White Card
- 1 x A4 Black Card
- Assorted Coloured Card
- Scissors
- Ruler
- Black Felt Tip
- Graphite Pencil
- TTS Glue Sticks
How to make:
Step 1
Cut 2cm off the top and side of your white piece of card (this is for the inside of your card) making the character you’re about to make ‘pop’ on the black card background. Next turn your card landscape and fold in half making the ‘inner’ piece of your Halloween card.
Step 2
To make the pop-up mouth first measure approx. 8cm along the fold from the top of the white card and make a small mark with your pencil/pen.
Step 3
From that 8cm mark now measure 5cm down towards the centre of the card and draw a line (this will be your ‘cut’ line to make the basic pop-up mouth shape)
Step 4
Either side of that line on the fold now measure 5cm and make a mark, next draw a dotted line from the 5cm marks to the point of the drawn line (drawn as a dotted line to remind you that this is not a ‘cut’ line but a ‘fold’ line.
Step 5
Cut up the line solid pencil line making the opening for the mouth.
Step 6
Take one side of the ‘mouth’ and fold back carefully along the dotted line forming a triangle, do this on both sides. Turn the card over onto the other side and fold the ‘triangles’ back again. This makes it easier to open into the pop-up shape.
Step 7
This is the fiddly bit! Open up the card and push the folded parts forward so when the card is closed there is a deep V on the outside and the pop-up mouth is hidden inside the folded card.
Step 8
Choose whether to simply draw onto or cut the basic shape of a ghost from the white card.
Step 9
Take your black piece of card and fold in half. Using a glue stick carefully stick your ‘pop up’ ghost into the centre of the card, put glue either side of the ghost (avoiding the mouth area so it can ‘pop’ up!).
Step 10
Add ‘creepy’ decoration to the inside and outside of the card to make a very scary handmade Halloween card!
NB. Once you’ve tried this ‘pop up mouth’ technique, the colour and design can be changed to make a pumpkin, monster, skull etc. enabling children to truly design and personalise their Halloween card.
Ghostly Halloween Monoprint Leaf Card
What you will need:
- White Printing Ink
- Ink Roller
- Paint & Inking White Plastic Tray
- A4 Black Sugar Paper
- A4 Assorted Coloured Card
- TTS Assorted Colouring Pens
- Wiggly Eyes
- TTS PVA Glue
- TTS Glue Stick
- Selection of real leaves
How to Make:
Step 1
Add some printing ink onto the inking white plastic tray (or a whiteboard also works!) and roll out into a fine even layer. When the ink makes a ‘rasping’ sound the ink is evenly spread on the roller and ready to use).
Step 2
Place a leaf, vein side up, onto some wastepaper and ink up carefully rolling over the leaf as evenly as possible to pick up every bit of detail of the leaf ready for printing.
Step 3
Carefully move the inked-up leaf onto a sheet of black sugar paper (ink side down) then place a sheet of paper over the leaf. Anchor the papers with one hand and slowly but firmly rub the surface of the paper with the heel of your hand to produce the leaf print.
Step 4
Remove the top sheet and carefully peel the leaf off the paper to reveal the print. Place to one side to dry. (NB. Try printing from a selection of leaves to see which gives the best ghost shapes!)
Step 5
Once fully dried, cut out the print and choose a piece of A4 coloured card to mount the leaf print onto. Fold the card in half and stick the print onto the card using a glue stick.
Step 6
Stick wiggly eyes, draw pictures or write on your handmade Halloween card to personalise!
Halloween ‘Boo’ Card – Quick Make
Simple but effective, the following easy ‘quick make’ Halloween crafts could be used for fun lunchtime or after-school children’s craft activities.
What you will need:
- Black Gloss Card Display Letters
- A4 White Card
- TTS Colouring Pens
- Pipe cleaners
- Pom Poms
- Wiggly Eyes
How to make:
Step 1
Choose the word/letters you want to use to decorate the front of the card from the pre-cut letter pack and using a glue stick glue to the front of the card eg boo!, eek!, ‘oo’ to make scary blood shot eyes.
Step 2
Use a variety of collage & craft materials eg pom poms, pipe cleaners and wiggly eyes etc to create 3D Halloween characters.
Step 3
Use colouring pens to add further decoration.
Halloween Dementor Hanging Decoration – Quick Make
What you will need:
How to make:
Step 1
Choose the size of polystyrene egg you are going to use then cut a large square/piece of tissue paper. Enough to cover the egg and hang down like a dark robe.
Step 2
Paint the top half of the egg with PVA glue, then place the egg in the centre of the tissue paper and press the tissue into the PVA. Leave to dry.
Step 3
Snip into the bottom of the tissue paper to create a raggy effect. Rub a little chalk dust into the tissue paper to give a dusty/aged finish.
Step 4
Use PVA to stick on big wiggly eyes and fierce spikey ‘eyebrows’ made from card. Use cotton thread stuck to the top of the head to hang the decoration.
Ghostly Halloween Mini World – Quick Make
What you will need:
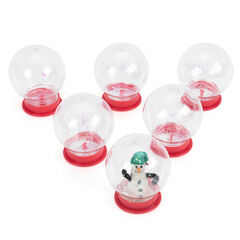
- Make Your Own Snow Globes
- Black Acrylic Paint
- Halloween Spiders & Sequin Mix
- White Tissue Paper
- Polystyrene Eggs & Balls
- TTS PVA
- Bio-glitter Shaker Pots Assorted
How to make:
Step 1
Paint half of the snow globe and the outside of the globe base with black acrylic paint. When dry paint small amounts of PVA onto the inside of the globe and add glitter to make a starry night sky.
Step 2
Use part of a bamboo stick or wooden matchstick and push into the base of a small polystyrene ball, (this will be used as a stand to make the ghost look like is ‘floating’ in the globe). Paint PVA onto the top half of the ball and cover with tissue paper to create the ghost, add wiggly eyes and leave to dry.
Step 3
Use a small amount of air-dry clay or modelling clay and press into the base of the globe. Push the stand of the ghost into the clay at the centre of the globe base. As the clay will be sticky, add a thin layer of cotton wool and a sprinkle of glitter.
Step 4
Add twigs, Halloween and spider sequins for the final spooky finish!
We hope you enjoy making these spooktacular Halloween crafts.
Happy Halloween
Blog written by Rachel Betteridge with art activity ideas provided by Nicky Mountcastle.
Rachel is a Content Editor for TTS. She is a qualified Primary School Teacher with 26 valuable years of experience, teaching from Early Years to year 6.
Nicky is a Content Editor for TTS for Art & Commodities. With a love for art & craft from a young age Nicky trained in Art & Design and has enjoyed a variety of creative jobs throughout her career. Making, discovering and sharing ideas is one of her favourite things to do!


