What you’ll need
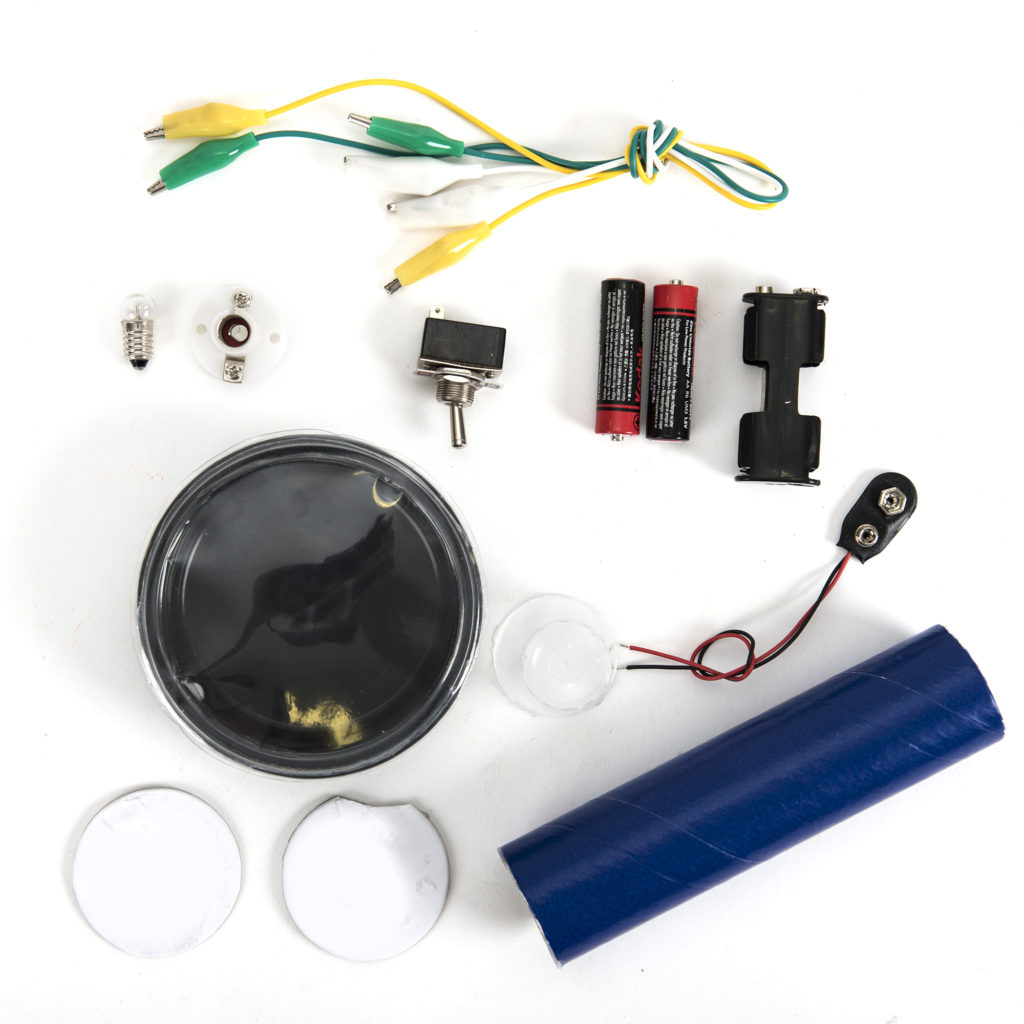
Components and materials:
- The whole kit is available here
- Bulb
- Bulb holder
- 3 crocodile leads
- Toggle switch
- 2 AA cells* (zinc chloride, not alkaline or re-chargeable) – *not included in the class kit. (Do not use alkaline or rechargeable cells – if you accidentally short circuit your battery these will get hot.)
- Battery holder
- 2 card wheels
- Circular plastic food container with lid* e.g. pâté pot – * not included in the class kit
- Small transparent plastic shot glass* (A translucent lid from a shampoo bottle or similar would also work.) – *not included in the class kit
- Blue cardboard tube
- A4 sheet of white paper
Tools:
- Large scissors
- A pair of pointed nail scissors
- Transparent sticky tape
- Low melt temperature glue gun (If you don’t have a glue gun you can use double-sided foam sticky tape.)
Step 1
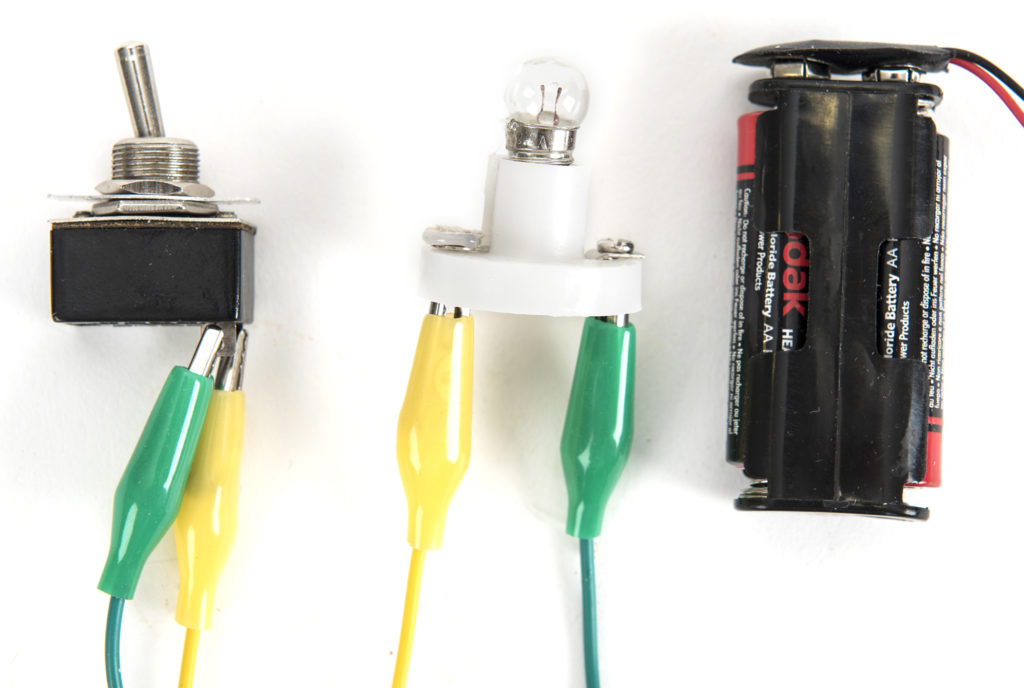
Make the circuit shown above and check that the bulb lights up when you switch on. Be careful not to short circuit your battery (i.e. connect the wires from your battery directly together) – they must go via the lamp. Ensure the switch is left in the off position.
Step 2
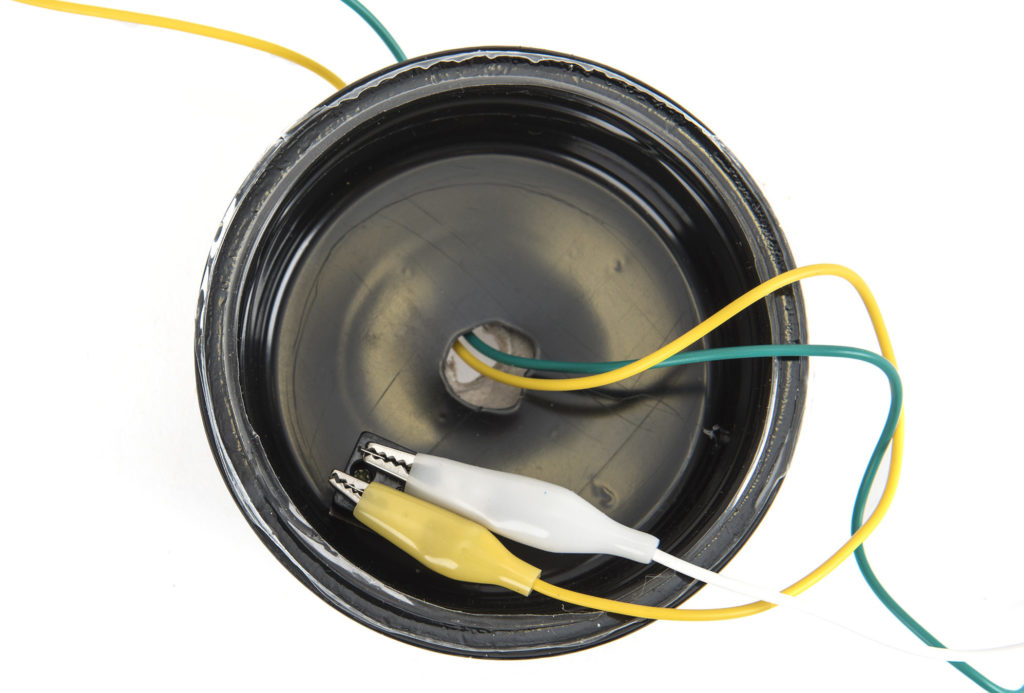
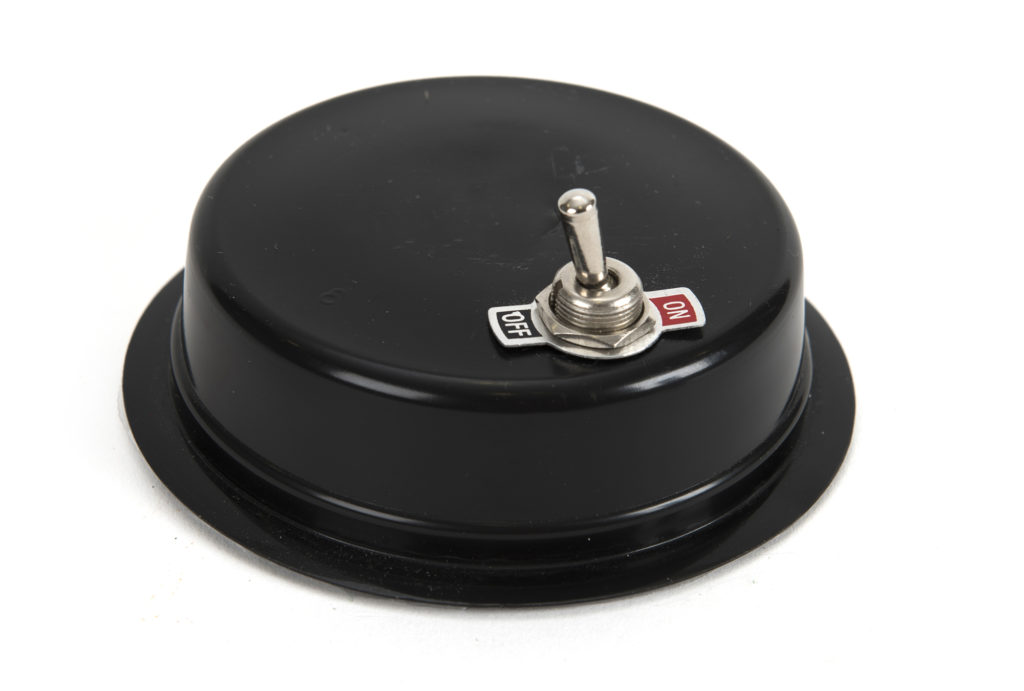
Take the lid from the plastic food container and turn it over. Use a pair of nail scissors to make a hole in the middle of about 1cm in diameter (big enough for the crocodile leads to go through). Make another hole on the side just big enough for the part of the switch with the screw thread to go into. Mount the switch by unscrewing the nut and removing the on-off label. Push the threaded part of the switch through the hole from the inside. Place the label back and screw the nut back on firmly.
Step 3
Use a large pair of scissors to enlarge the hole in one of the card wheels to at least 1cm in diameter so that it is big enough for the crocodile leads to go through. To do this, push the nose of the scissors through the hole and twist the scissors round and round. Trim the rough edges using a pair of nail scissors. Glue the card wheel to the middle of the upside-down pot. Glue the blue cardboard tube onto the wheel.
Step 4
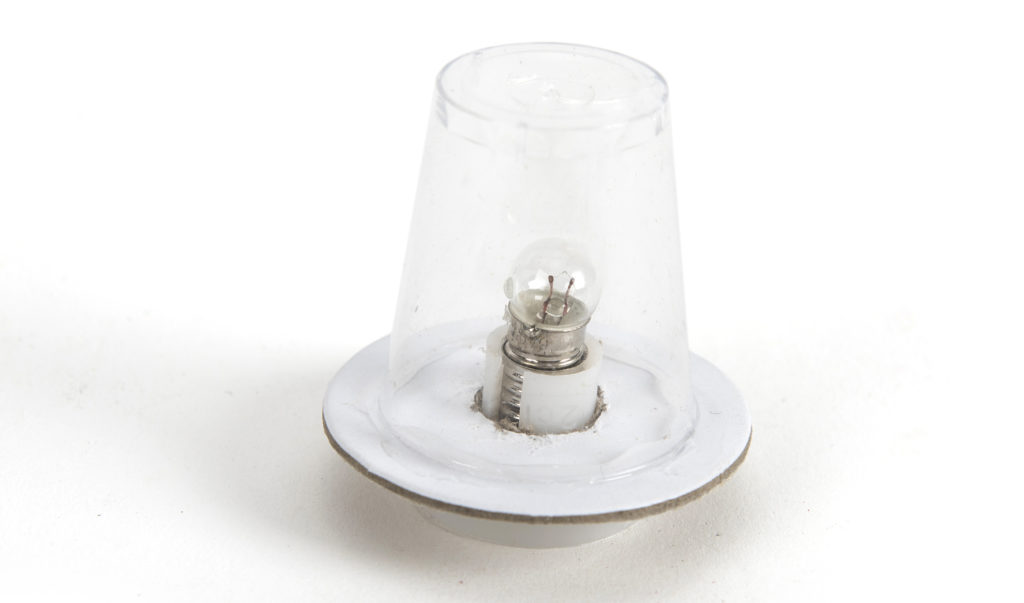
Enlarge the hole in the second card wheel until it just slides onto the bulb holder. Trim the rough edges and glue it onto the top of the screws. Glue the shot glass (or lid from shampoo bottle) upside down onto the top of the card circle.
Step 5
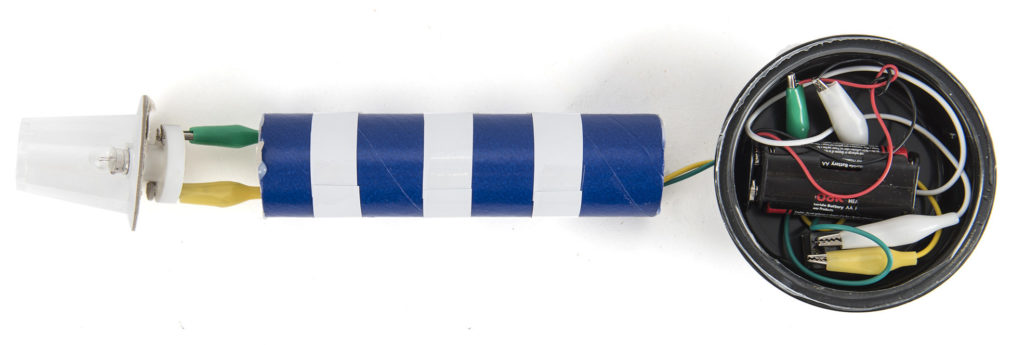
Turn the plastic pot and tube assembly upside down. Use a crocodile lead to attach the battery holder to the switch. Attach a second crocodile lead to the second switch contact, and a third crocodile lead to the second battery lead. Feed the two loose ends down through the tube until they are sticking out the other end.
Step 6
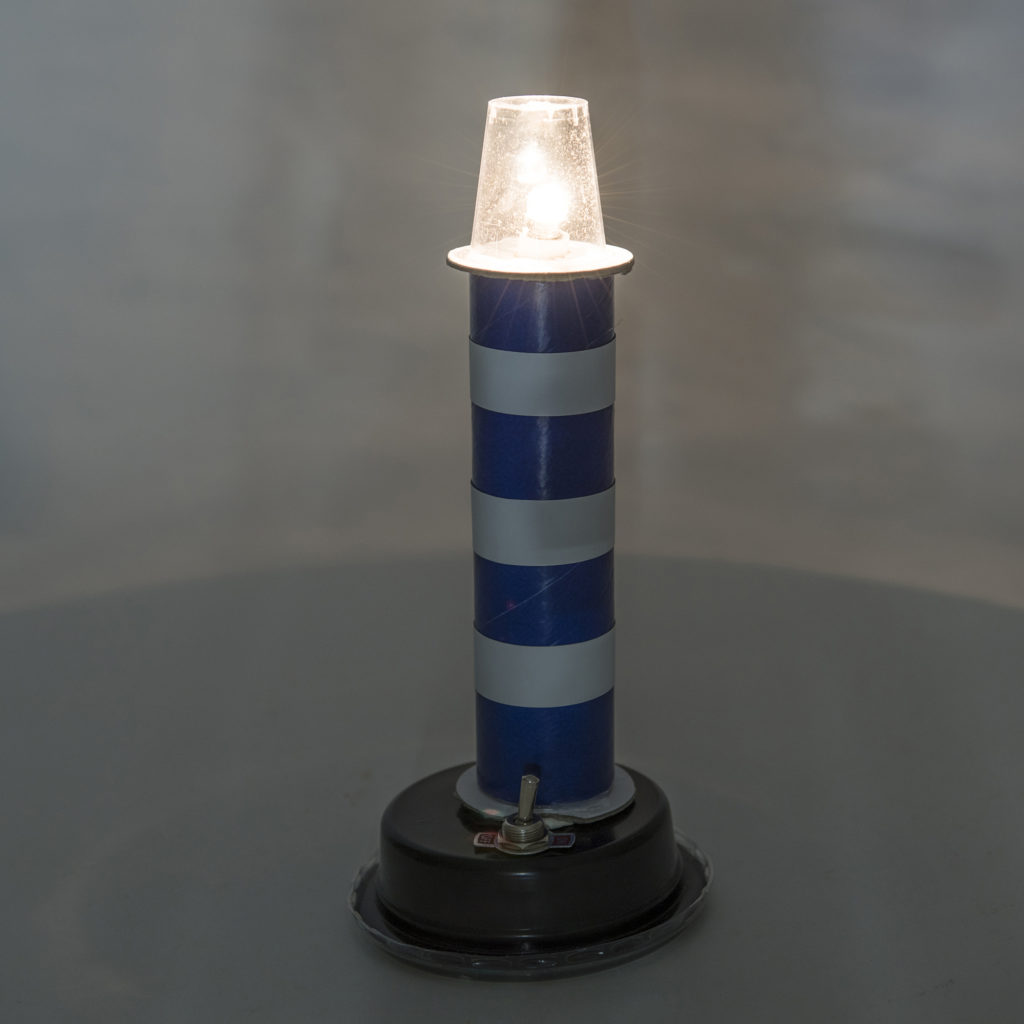
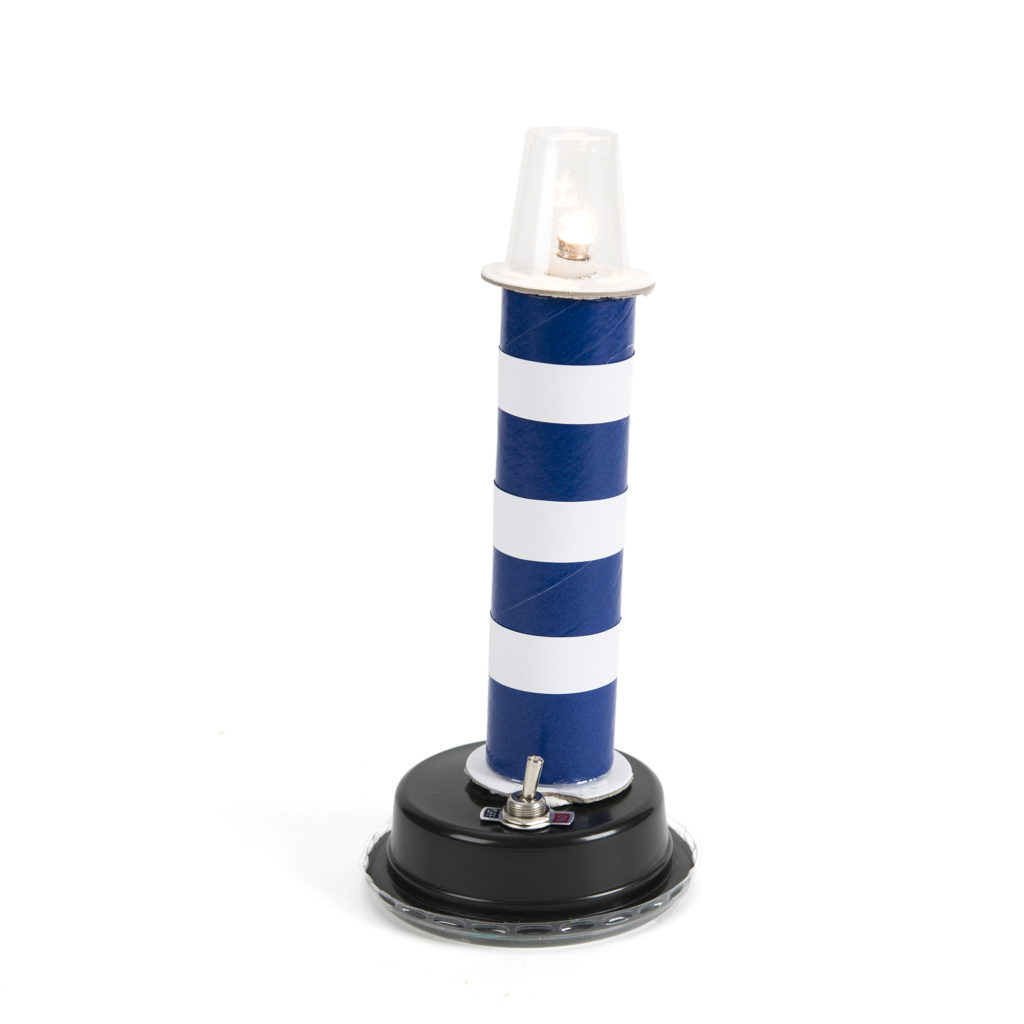
Clip the crocodile clips onto the screws in the bottom of the bulb holder. Switch on and check that the bulb lights up. Glue to the top of the lighthouse. Lay the wires neatly round the inside of the plastic pot without the metal crocodiles touching, place the battery on top and snap on the lid. Try out you lighthouse in a dark room.
With thanks to Caroline Alliston, Technology for Fun, for writing this blog.
Caroline Alliston, is a professional engineer and technical author with a degree from Cambridge and twenty four years experience in industry. Whilst on a career break to spend more time with her two boys, she started a club at their school to enthuse children about science and engineering. Before long there were more children on the waiting list than in the actual club!
Caroline now spends her time running hugely popular workshops for teachers, pupils, home educated children, holiday clubs, Scout groups etc. Unable to be in three places at once, she has written the Technology for Fun series of books incorporating her favourite and most successful projects, to give even more children the opportunity to have fun making things that really work.


