

What you’ll need
Electrical parts:
- Battery holder with AA zinc chloride cell fitted (do not use alkaline or rechargeable cells – if you accidentally short circuit your battery these will get hot)
- AA Zinc cell
- Toggle switch
- Motor
- 3 crocodile leads

Mechanical parts:
- Focused task box
- Rubber band ~ 1.5mm x 1.5mm x 6cm long
- Plastic pulley 30mm diameter
- 35mm diameter wheel
- 11 giant lolly sticks
- Dowel 5mm diameter x 25cm long
- 2 lengths of square section wood 60cm long
- Sheet of 3mm thick corrugated plastic sheet 17 m x 17cm
- 6 passengers (lightweight plastic figures, small soft toys, bugs or similar – try to use pairs with roughly equal weight so that they balance)
- 3 cable ties 30cm long
Tools and consumables:
- Ruler
- Pencil
- Pencil sharpener
- Blu Tack
- Pair of compasses or a plate about 16-17 cm diameter
- Protractor
- Large scissors
- Junior hacksaw and vice
- Sandpaper
- Sellotape
- Low melt temperature glue gun
- Secateurs (optional – to be used by adults only)
Associated Resources:
- Fairground Rides Lesson Plan
- Fairground Rides Lesson Presentation
- Fairground Rides Lesson Presentation with Notes
- Fairground Rides Worksheet & Suggested Answers
- Fairground Rides Design Sheet
- Chair-o-plane Instructions
- Ferris Wheel Instructions
- Merry-go-round Instructions
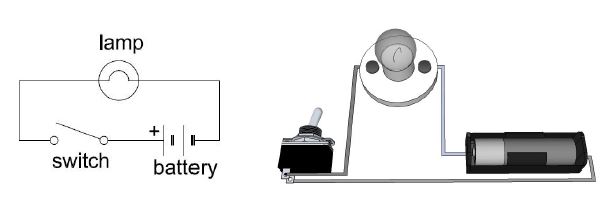
Step 1
Make the circuit and check that the motor shaft goes round when you switch on. Be careful not to short circuit your battery (i.e. connect the wires from your battery directly together) – they must go via the motor, and ensure that the switch is in the off position.
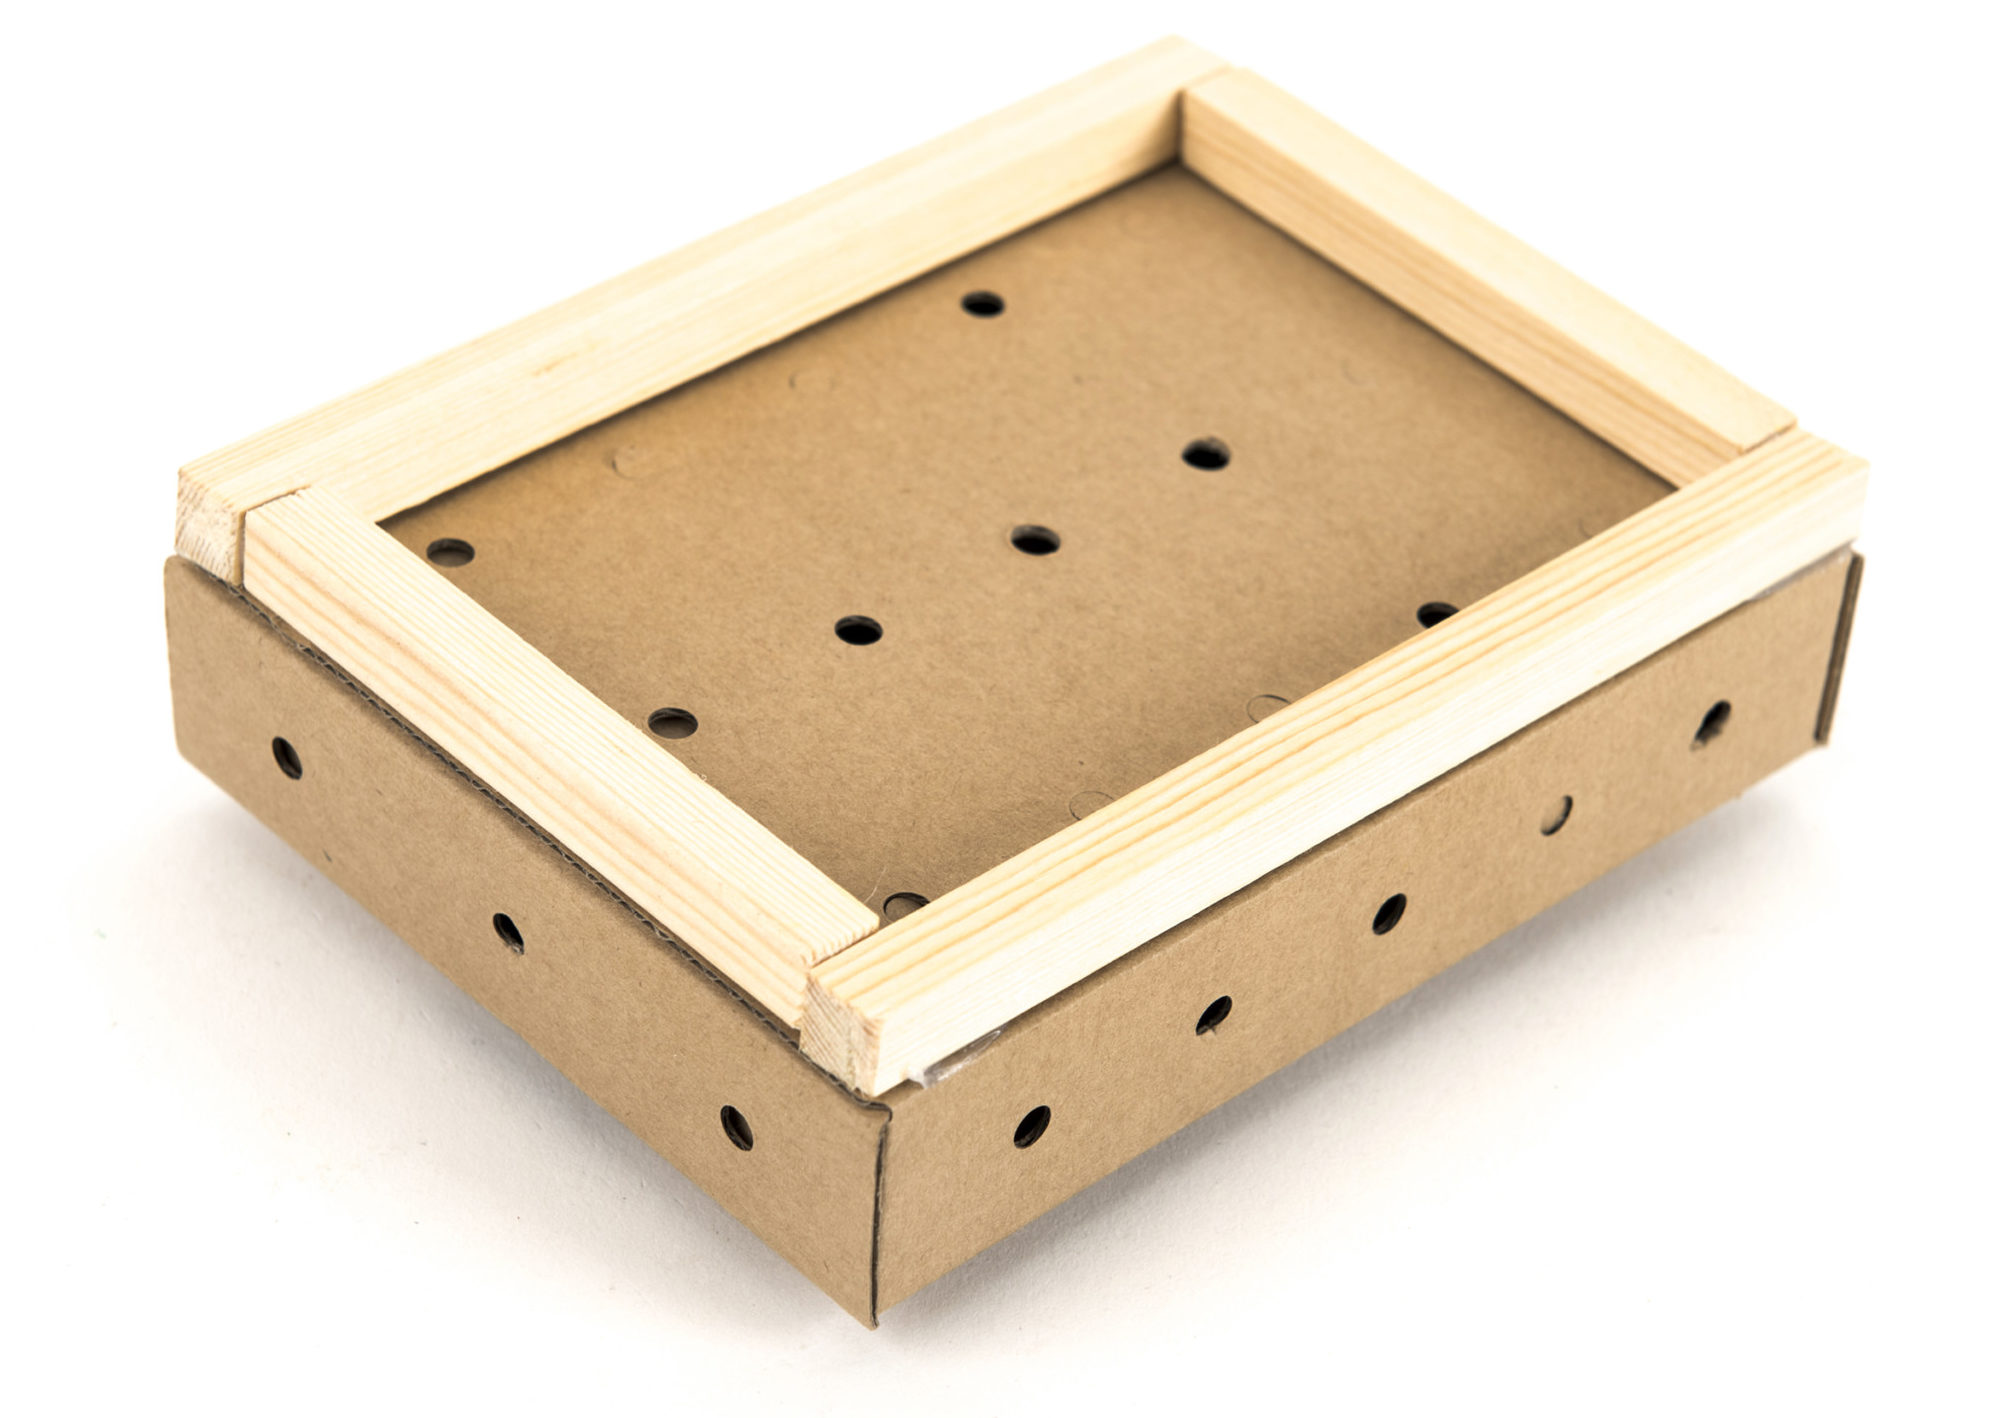
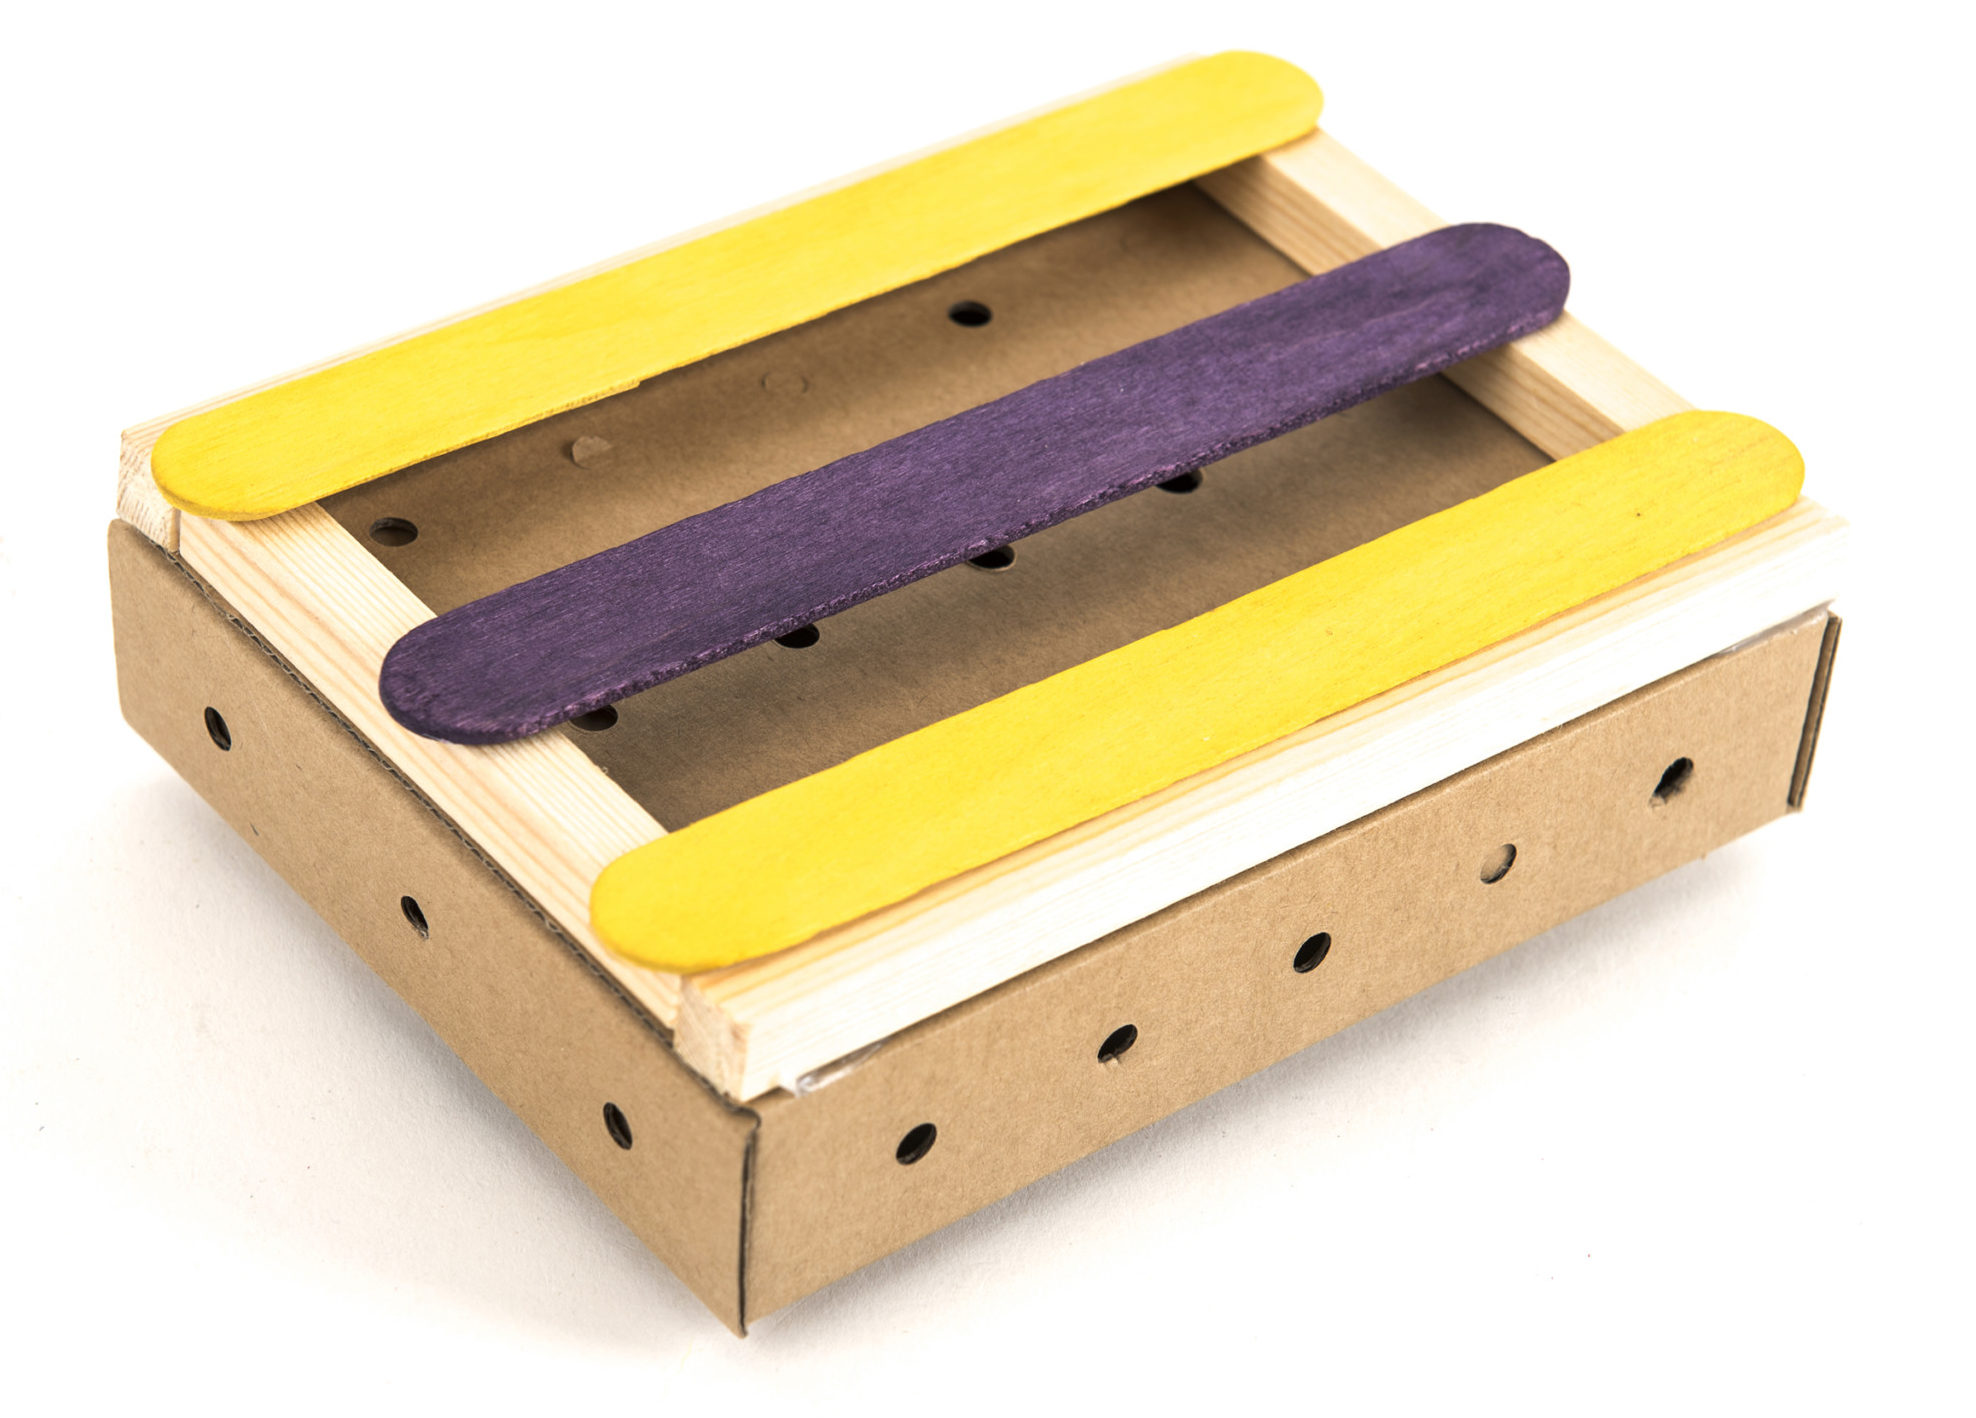
Step 2
Fold up the focused task box and glue the final seam to make a cardboard base. Cut two 14cm lengths and two 8.5cm lengths of square section wood and smooth the ends using sandpaper. Make a rectangular frame out of the wood and glue it to the base as shown. Take three giant lolly sticks and glue them onto the frame, with one stick either side and one in the middle. Turn the base over.

Step 3
Use the pencil sharpener to sharpen the wooden rod slightly at the top and bottom. Slide it down through the two holes in the base so that it rests on the central lolly stick. Using this as a guide, take one of the wheels with a 6 mm hole (it should be very loose on the wooden rod) and glue it to the top of the base, without getting glue on the rod or in the central hole.
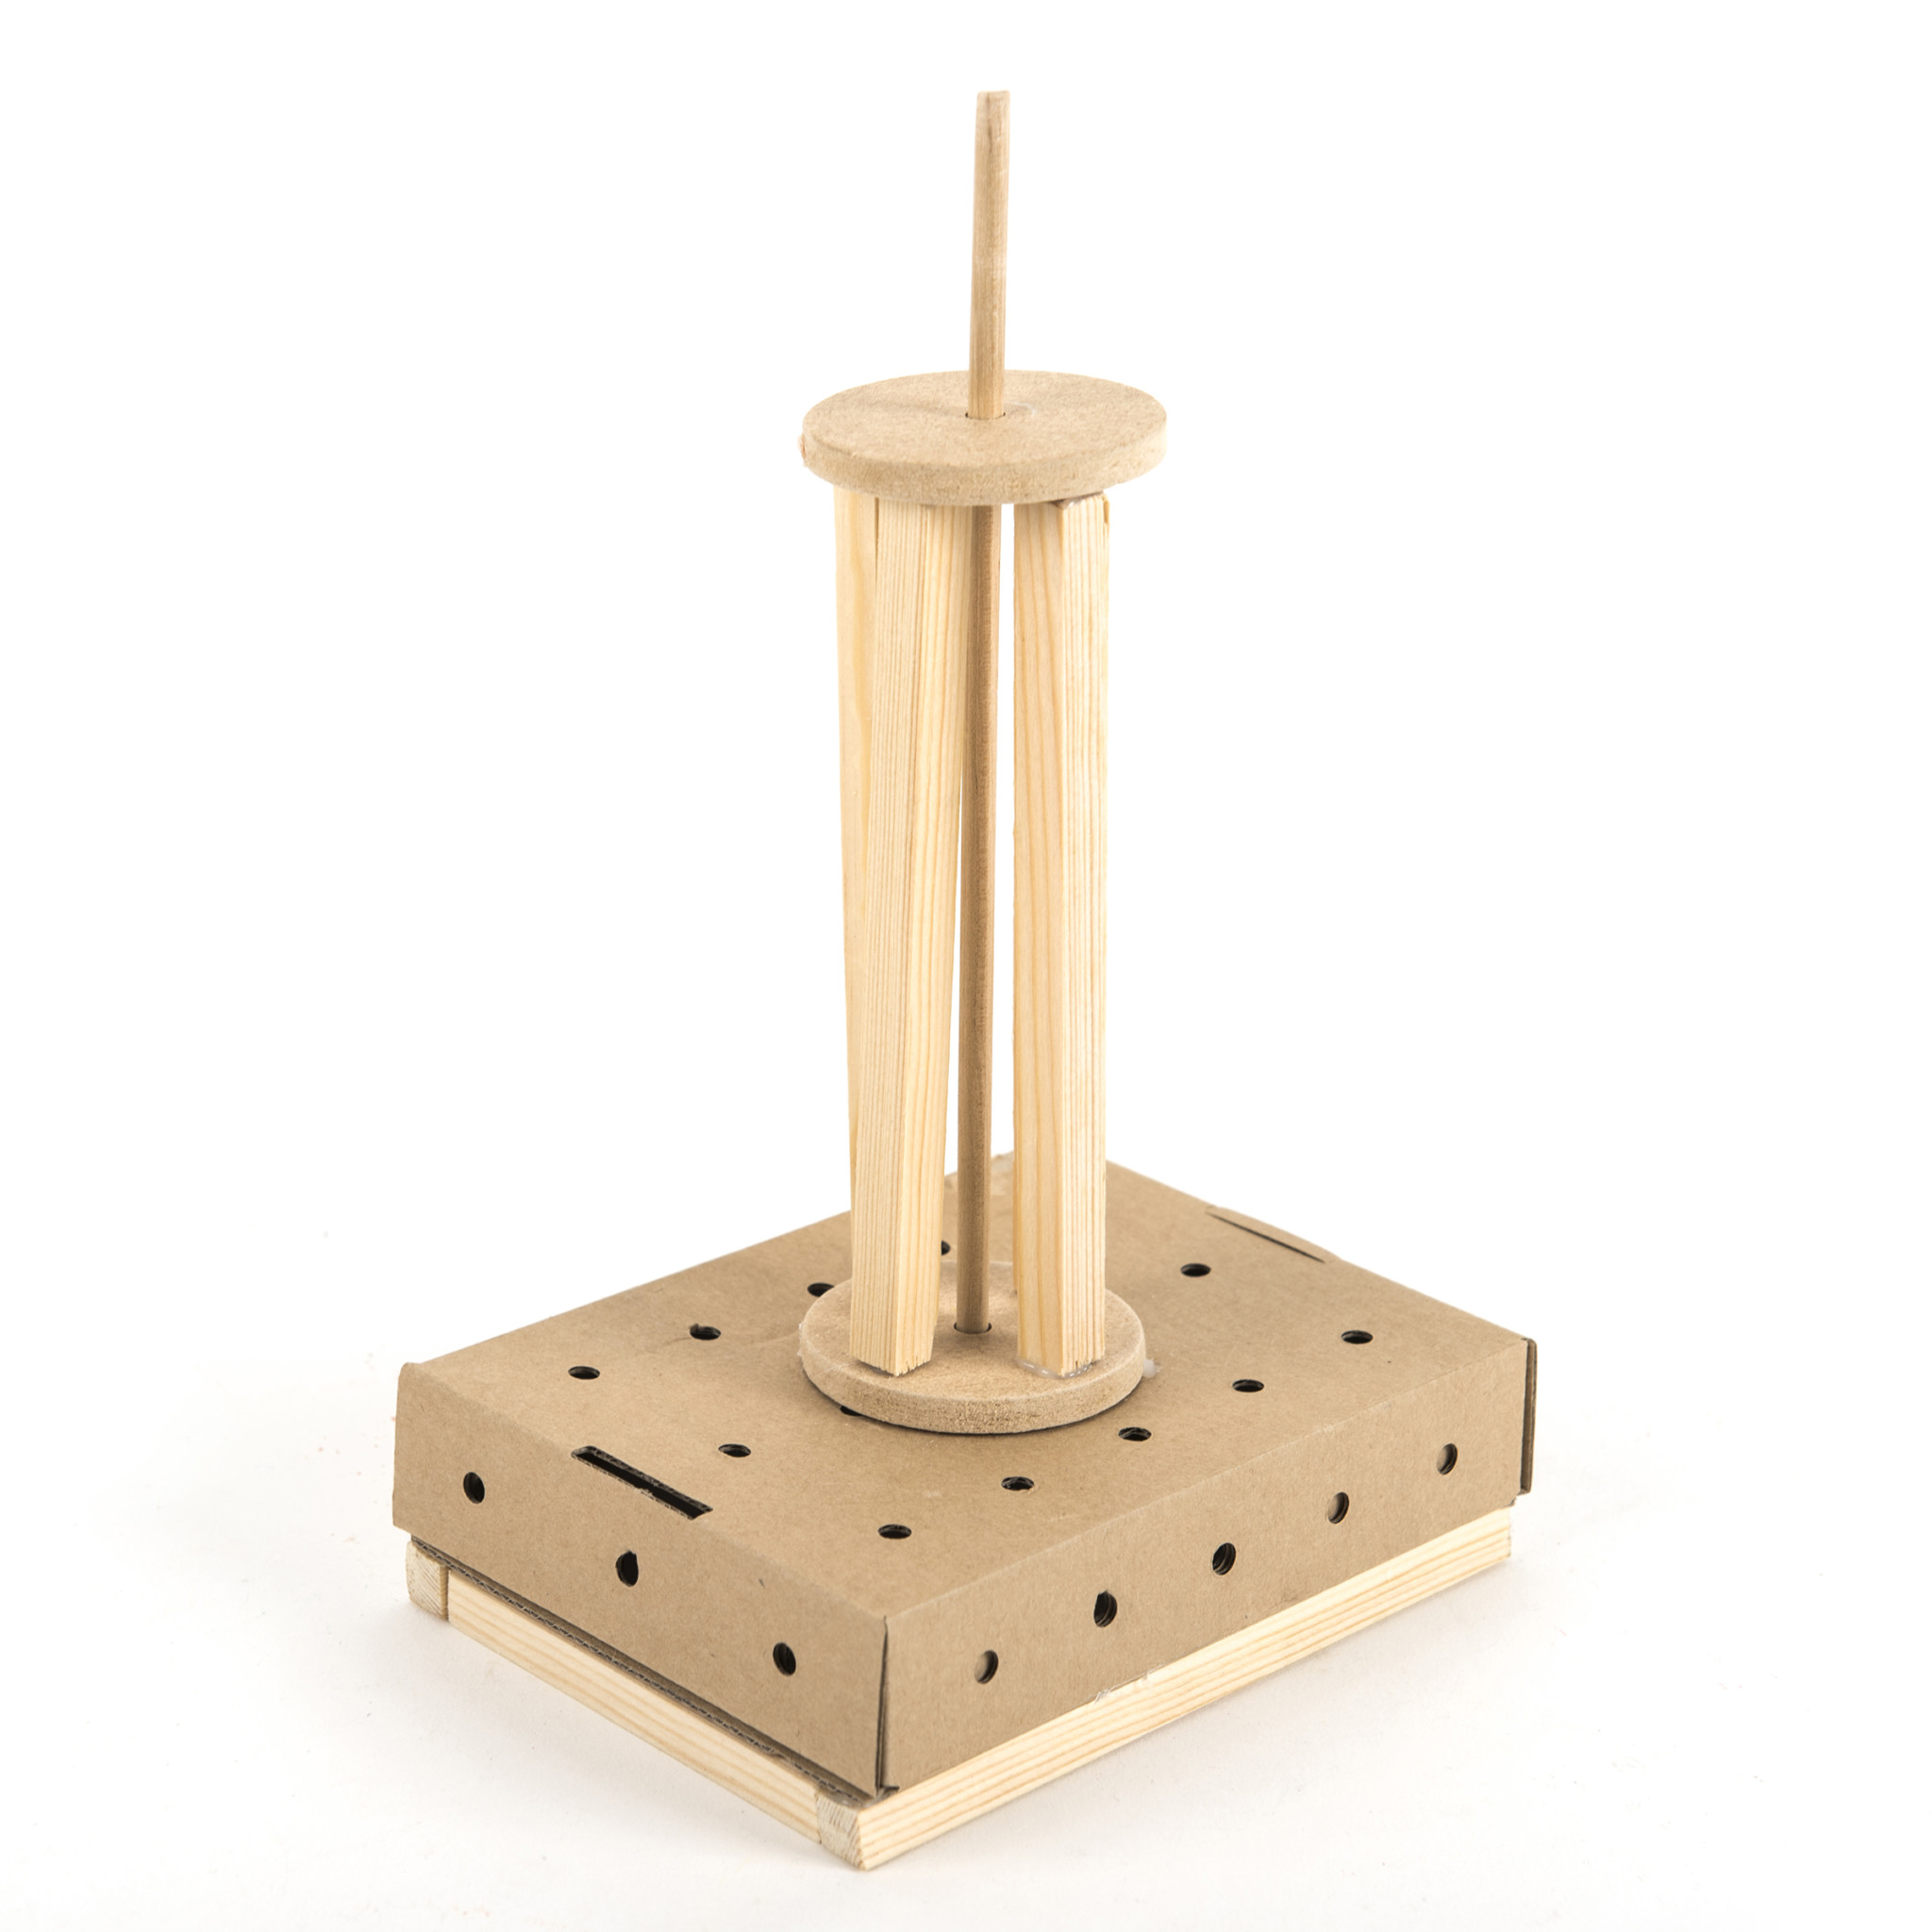
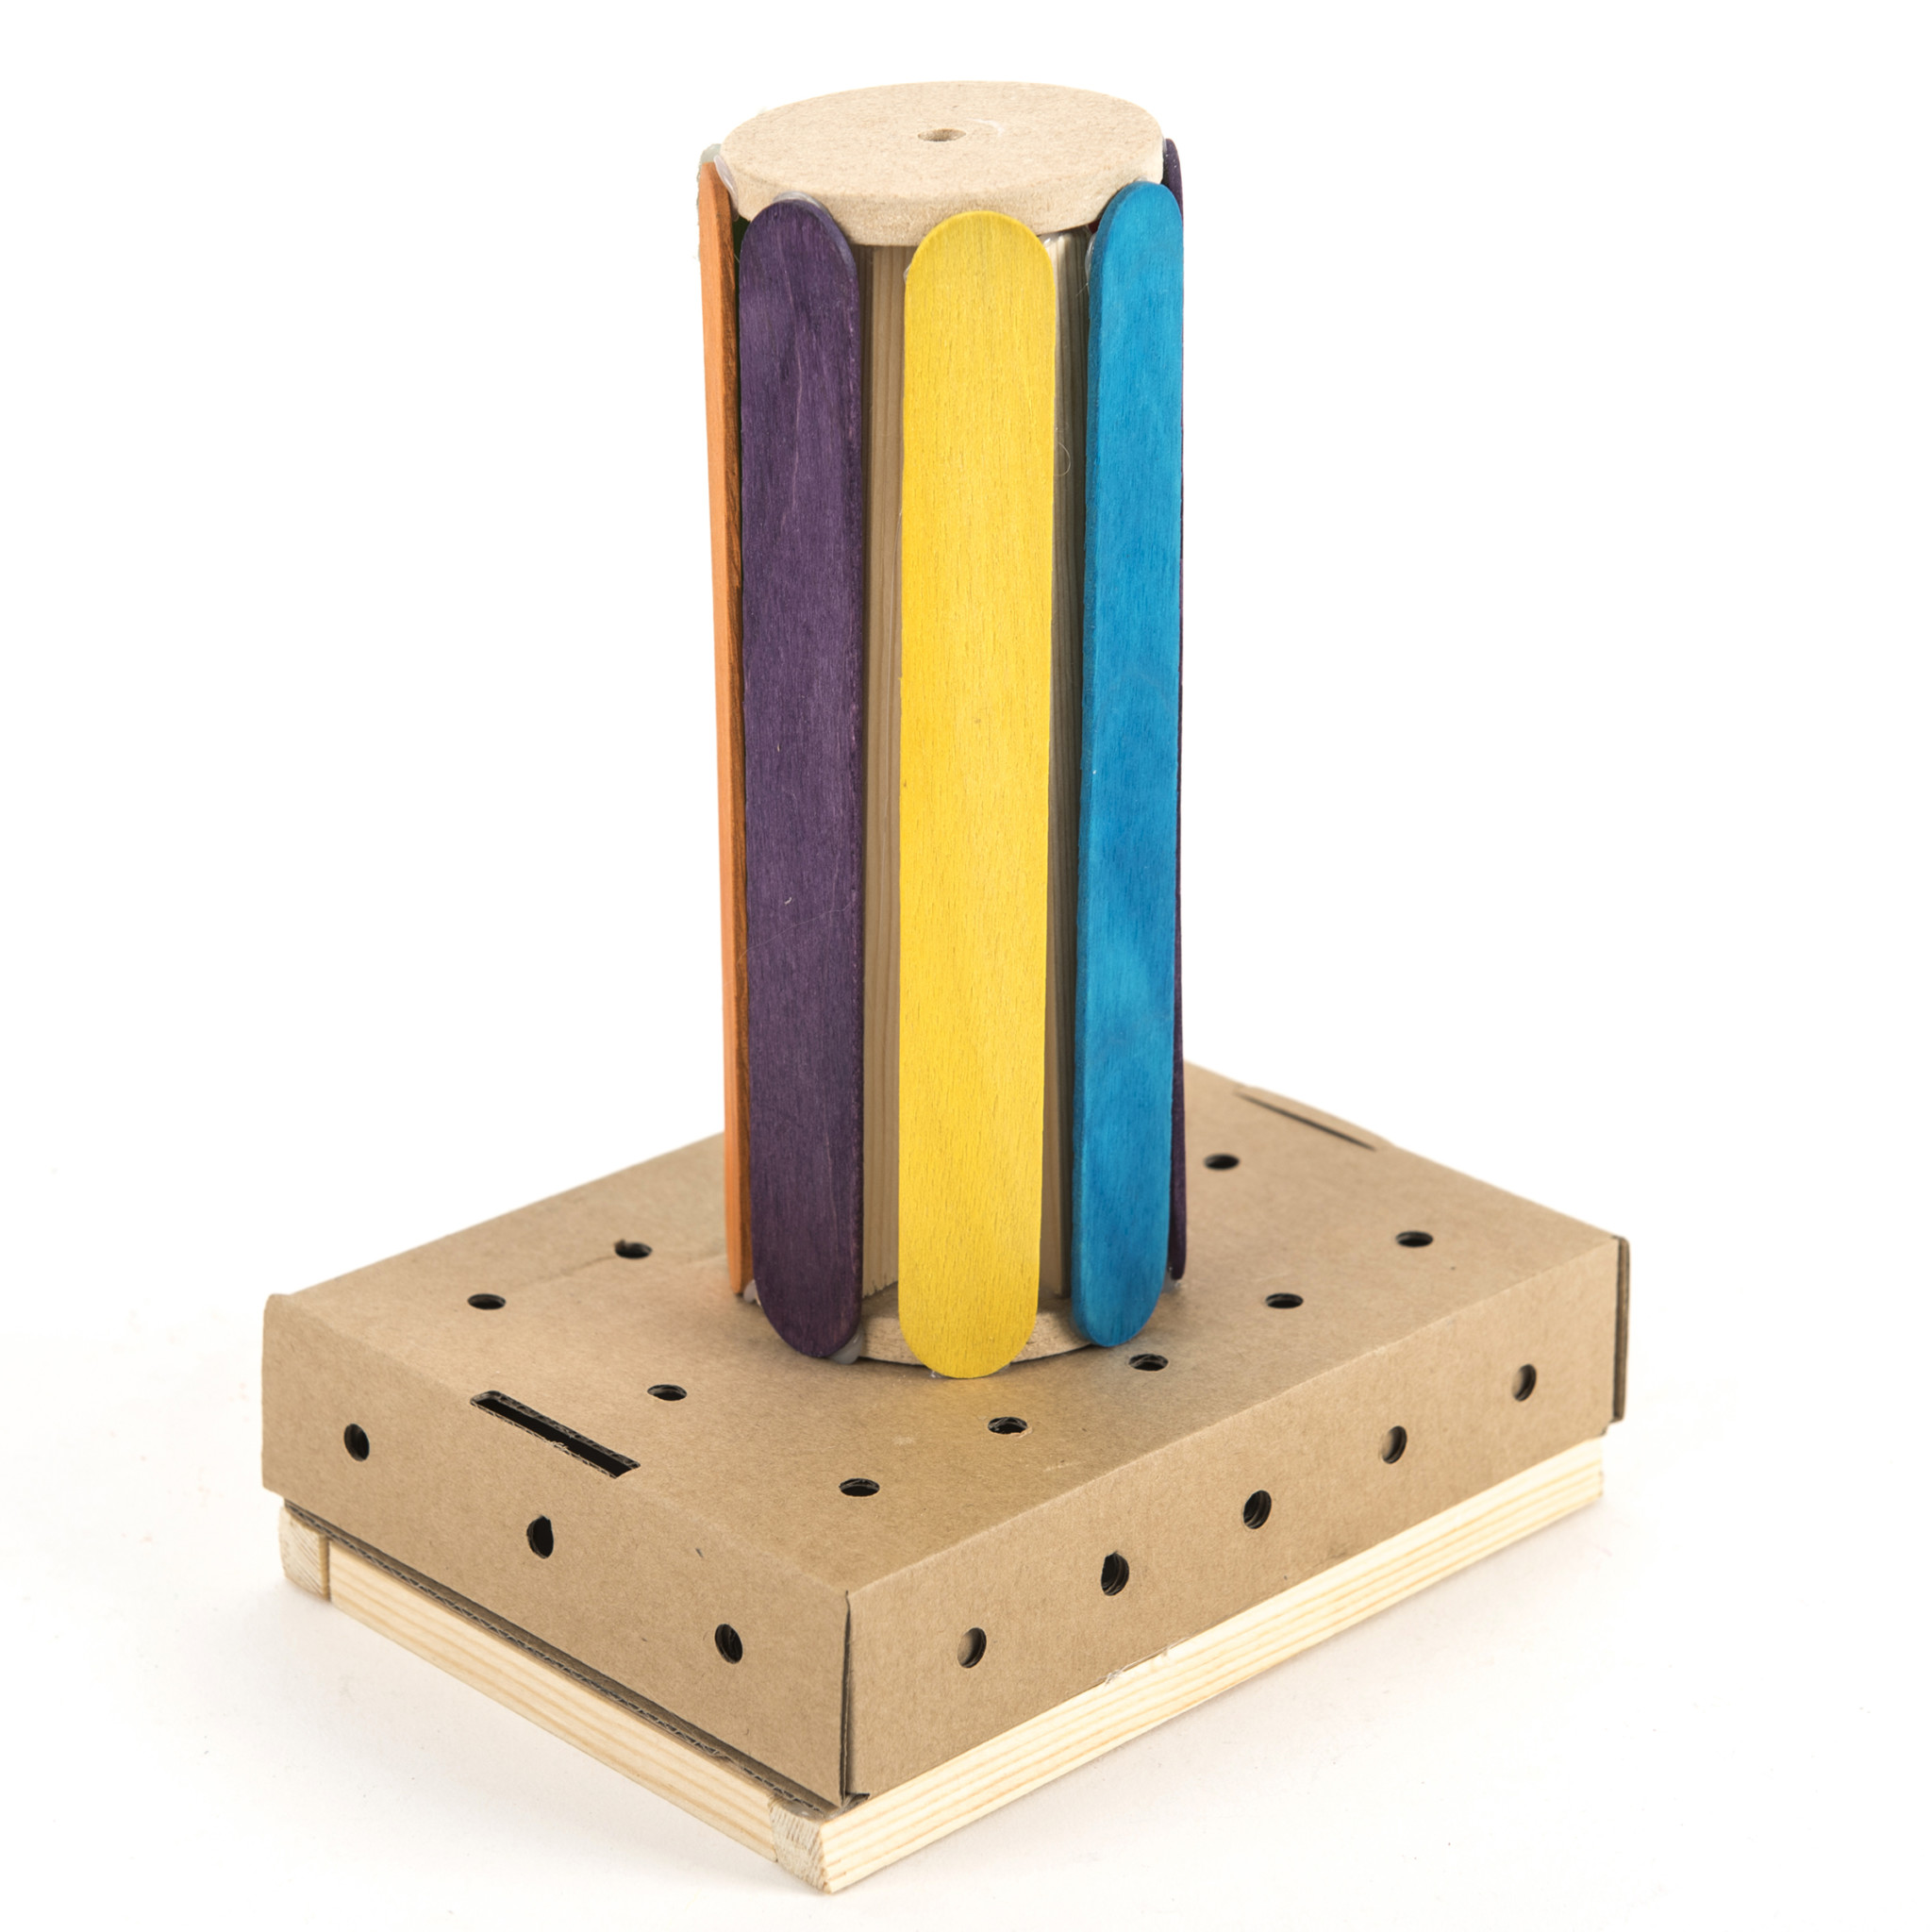
Step 4
Mark and cut four 14cm lengths of wood, trying to make them the same length and the ends square. Smooth the ends using sandpaper. Glue the ends of the lengths of wood onto the wheel, then glue the second wheel with the 6mm hole onto the top, again using the rod as a guide. Remove the rod so that you don’t get glue on it. Glue the ends of the eight remaining giant lolly sticks onto the two wheels as shown.

Step 5
Mark 5cm from the end of the rod and push on the pulley so that it covers the mark. The pulley can be a very tight fit. You can use a 5mm drill or reamer to open up the hole in the pulley; alternatively clamp the rod in a vice so that the mark is just showing, use your weight to push the pulley down the rod. Push the 35mm diameter wheel onto the short end of the rod until it is about 1cm from the pulley. Sharpen the end of the rod furthest from the pulley to a point to reduce friction – it should be tapered but not spiky.

Step 6
Clip the motor into the motor mount, then stick it to the top of one of the lolly sticks as shown. Attach it firmly with a cable tie. Use a second cable tie to attach the crocodile leads to the central column to stop them getting in the way of the rotating parts.
Step 7
Fit the rubber band over the pulley and slide the rod down through the holes until it rests on the lolly stick under the base. Check that the pulley is in line with the middle of the motor shaft; you can slide the motor up or down in its mount to achieve this. Stretch the rubber band over the motor shaft, turn on and check that the rod rotates. If the holes on the base are too tight sand the rod down a little.

Step 8
Glue the switch and battery box to the base. Tidy the crocodile leads up and cable tie them to the base. Mark out a 17cm in diameter circle on the Corriflute and cut it out using a pair of scissors. Draw a line through the centre then mark out lines at 60° to this. Place the disc on a lump of Blu Tack and use a sharp pencil to make a hole in the centre just big enough to fit onto the shaft. Glue the disc onto the top of the 35mm wheel.

Step 9
Design and make chairs for your passengers using offcuts and spare materials, then Sellotape them firmly to the outside of the disc in the positions you have marked. The Sellotape should act as a hinge so that the chairs can fly out as the disc rotates. Make sure passengers of roughly equal weight are opposite one another and the chairs are the same length, so that the forces are balanced. You can make seat belts for your passengers using small rubber bands, cable ties or sticking on small offcuts of card or corrugated plastic. Try out your chair-o- plane to make sure it works. You can then decorate it and make any adjustments.

Step 10
You could stick a piece of brightly coloured insulating tape onto the fairground ride (near the middle so that you can see it as it rotates) and time 10 revolutions, to work out the number of revolutions per minute (rpm). You could estimate the diameter of the circle travelled by the passengers, work out the circumference, multiply by the rpm, then convert your units into miles per hour to find out how fast the passengers are travelling. For example:
10 revolutions takes 8 seconds, so revolutions per minute = 8 x 60/ 10 = 48 rpm
Diameter of circle travelled by passengers = 0.38 m, so circumference = π x 0.38 = 1.2 m
Distance travelled in one minute = 48 x 1.2 = approximately 58 m
Distance travelled in one hour = 60 x 58 m = approximately 3500 m = 3.5 km
Distance travelled in one hour (in miles) = 3.5 x 5 / 8 = 2.2 miles.
Speed = 3.5 kilometres per hour, or 2.2 miles per hour.
Fancy a go at one of our other DT projects and fairground rides?
Shop the DT project kits here
With thanks to Caroline Alliston, Technology for Fun, for writing this blog.
Caroline Alliston, is a professional engineer and technical author with a degree from Cambridge and twenty four years experience in industry. Whilst on a career break to spend more time with her two boys, she started a club at their school to enthuse children about science and engineering. Before long there were more children on the waiting list than in the actual club!
Caroline now spends her time running hugely popular workshops for teachers, pupils, home educated children, holiday clubs, Scout groups etc. Unable to be in three places at once, she has written the Technology for Fun series of books incorporating her favourite and most successful projects, to give even more children the opportunity to have fun making things that really work.


