
I always started by finding a picture of a card online that I wanted to try and recreate with my class. We would end up with 30 cards that were so similar that the children could often not even recognise their own!
The process of making our cards can be just as important as the final product. Children develop their own creativity, expression, and artistic skills.
So, why not turn your Christmas card making into a project?
Let children explore a variety of examples (you could have a theme such as Christmas Trees), and then design and create their own individual card to really reflect their creativity.
Here is a selection of Christmas cards you could use to inspire your class.
Christmas Tree
- Cut a triangle of green paper.
- Accordian/concertina fold the paper. When it is folded, punch a hole through the middle.
- Thread a sparkly pipe cleaner through the hole and decorate your Christmas Tree.
- Stick it onto the front of your chosen card and add your own festive message.
Christmas Tree Collage
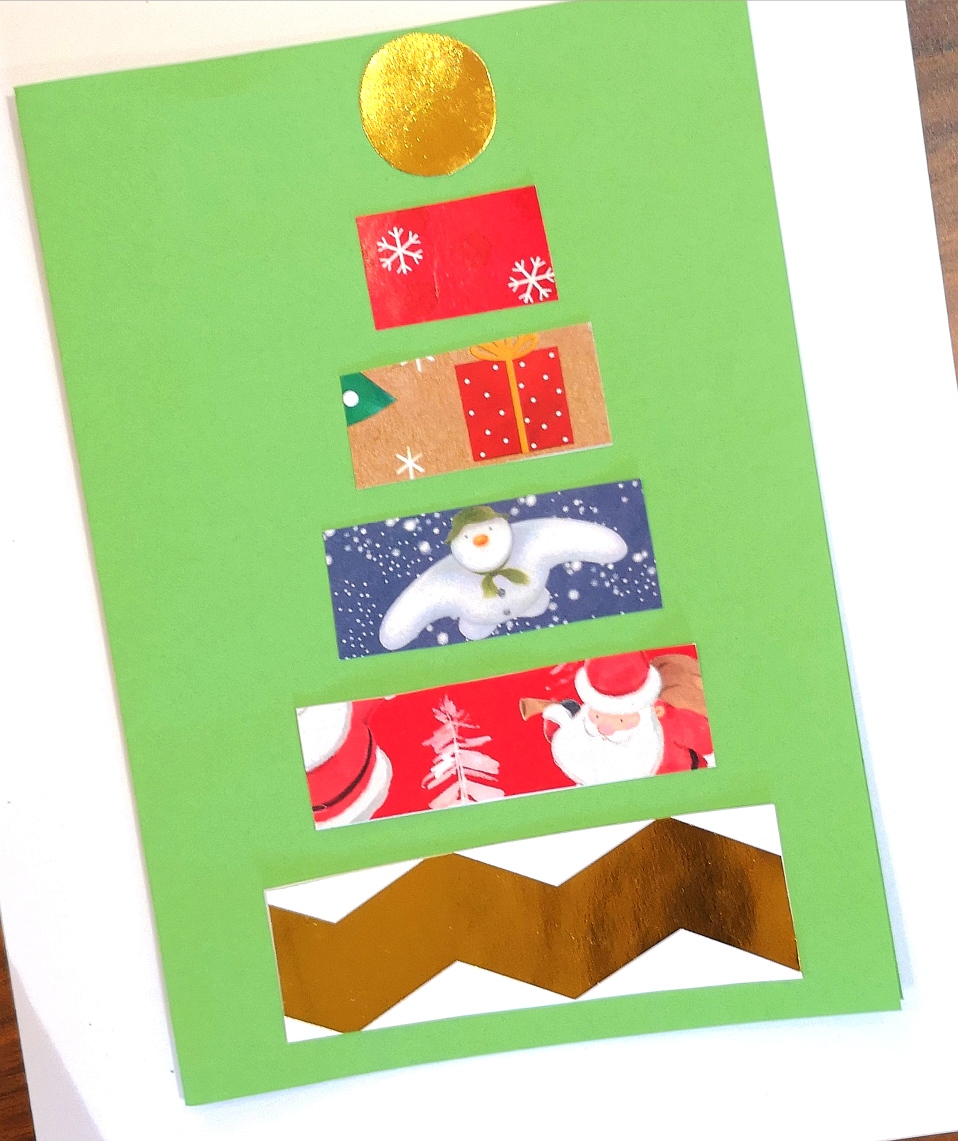
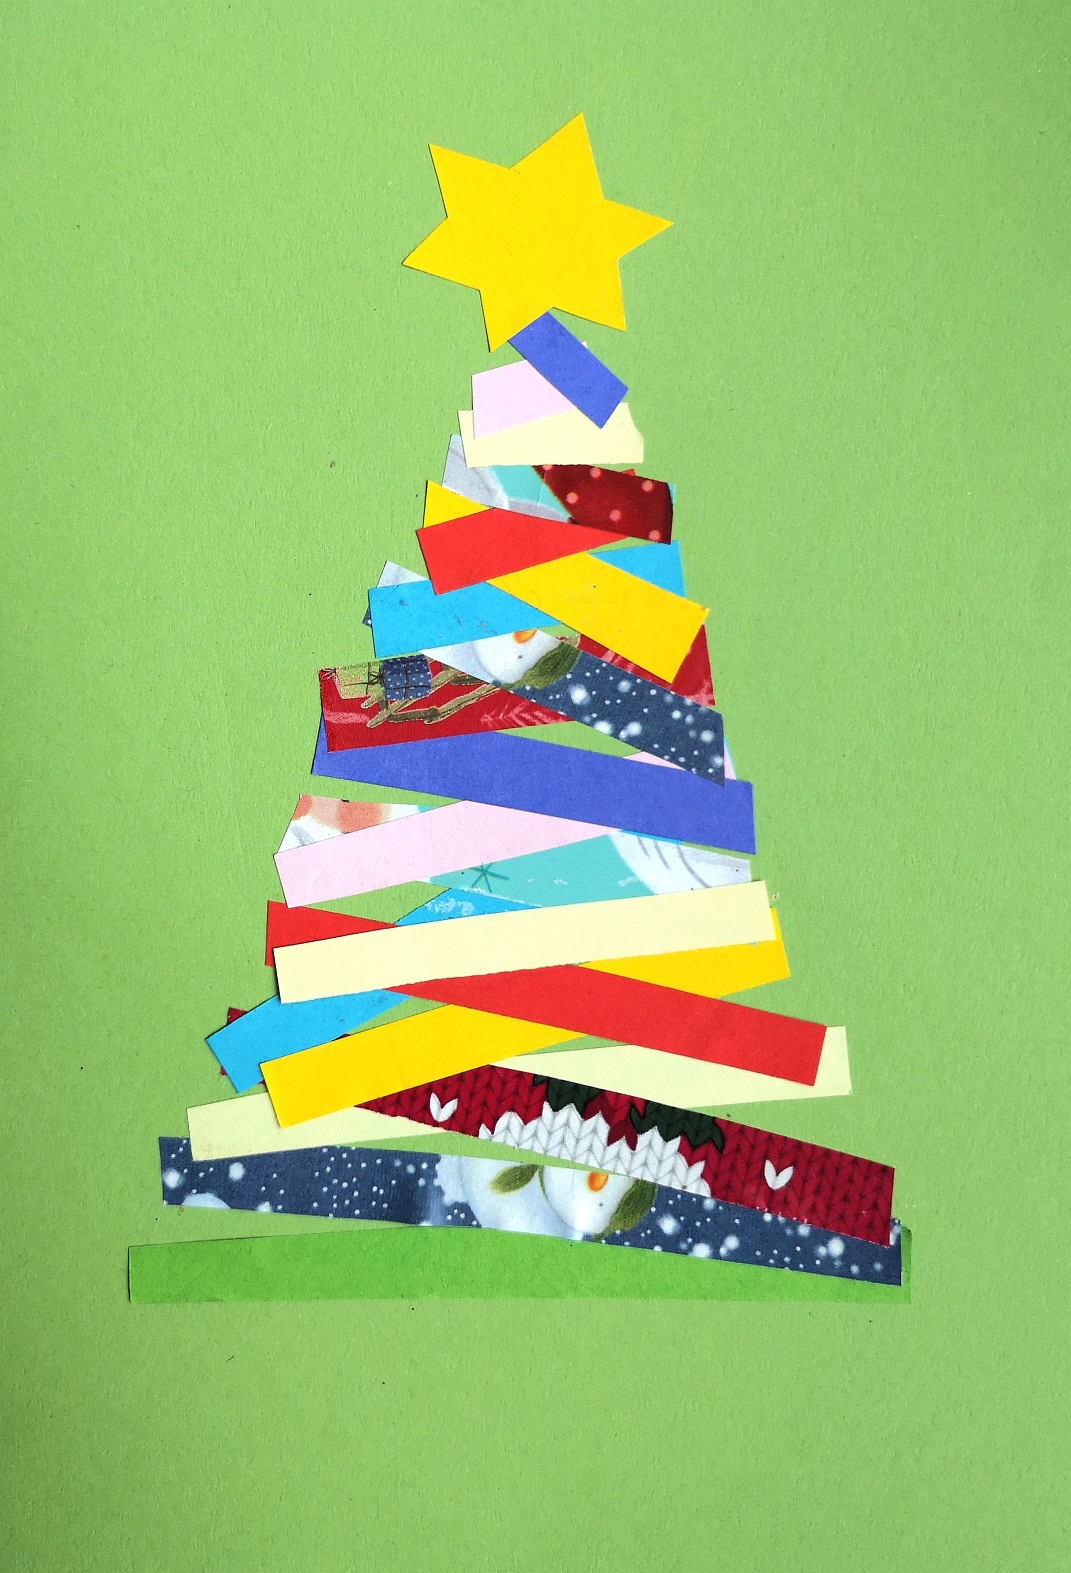
- Choose some Christmas themed paper and cut it into strips of different sizes.
- Arrange and stick your strips into the shape of a tree.
Threading Christmas Tree
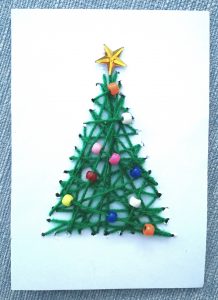
- Choose your card
- Place a Christmas tree shape template onto your card and push a needle through around the edges of the template to create an outline of holes.
- Using a needle, thread the yarn in and out of the holes, adding beads or decorations as you go, until you have a completed Christmas tree.
Angels
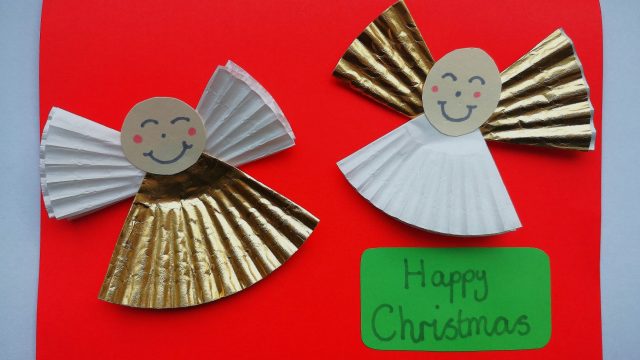
- Take two different colour cupcake cases.
- To make the angel body, fold a cupcake case in half and then half again.
- To make the angel wings, cut out two triangles from a cupcake case or keep folding the case until you have the right sized wings.
- Stick them together and then add a circle of card to create the angel’s face.
Penguin
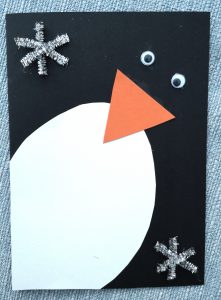
- Fold a piece of black card in half.
- Cut out and stick on the different shapes to make the penguin’s tummy and nose.
- Add some googly eyes and any other festive decorations!
Baubles
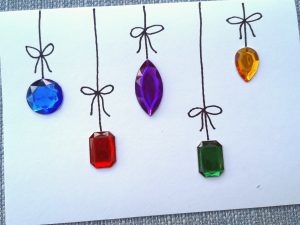
Use super sparkly gems to create a simple, but effective bauble card.
This could be a great starting point to inspire your pupils’ creativity!
Lolly Stick Cards
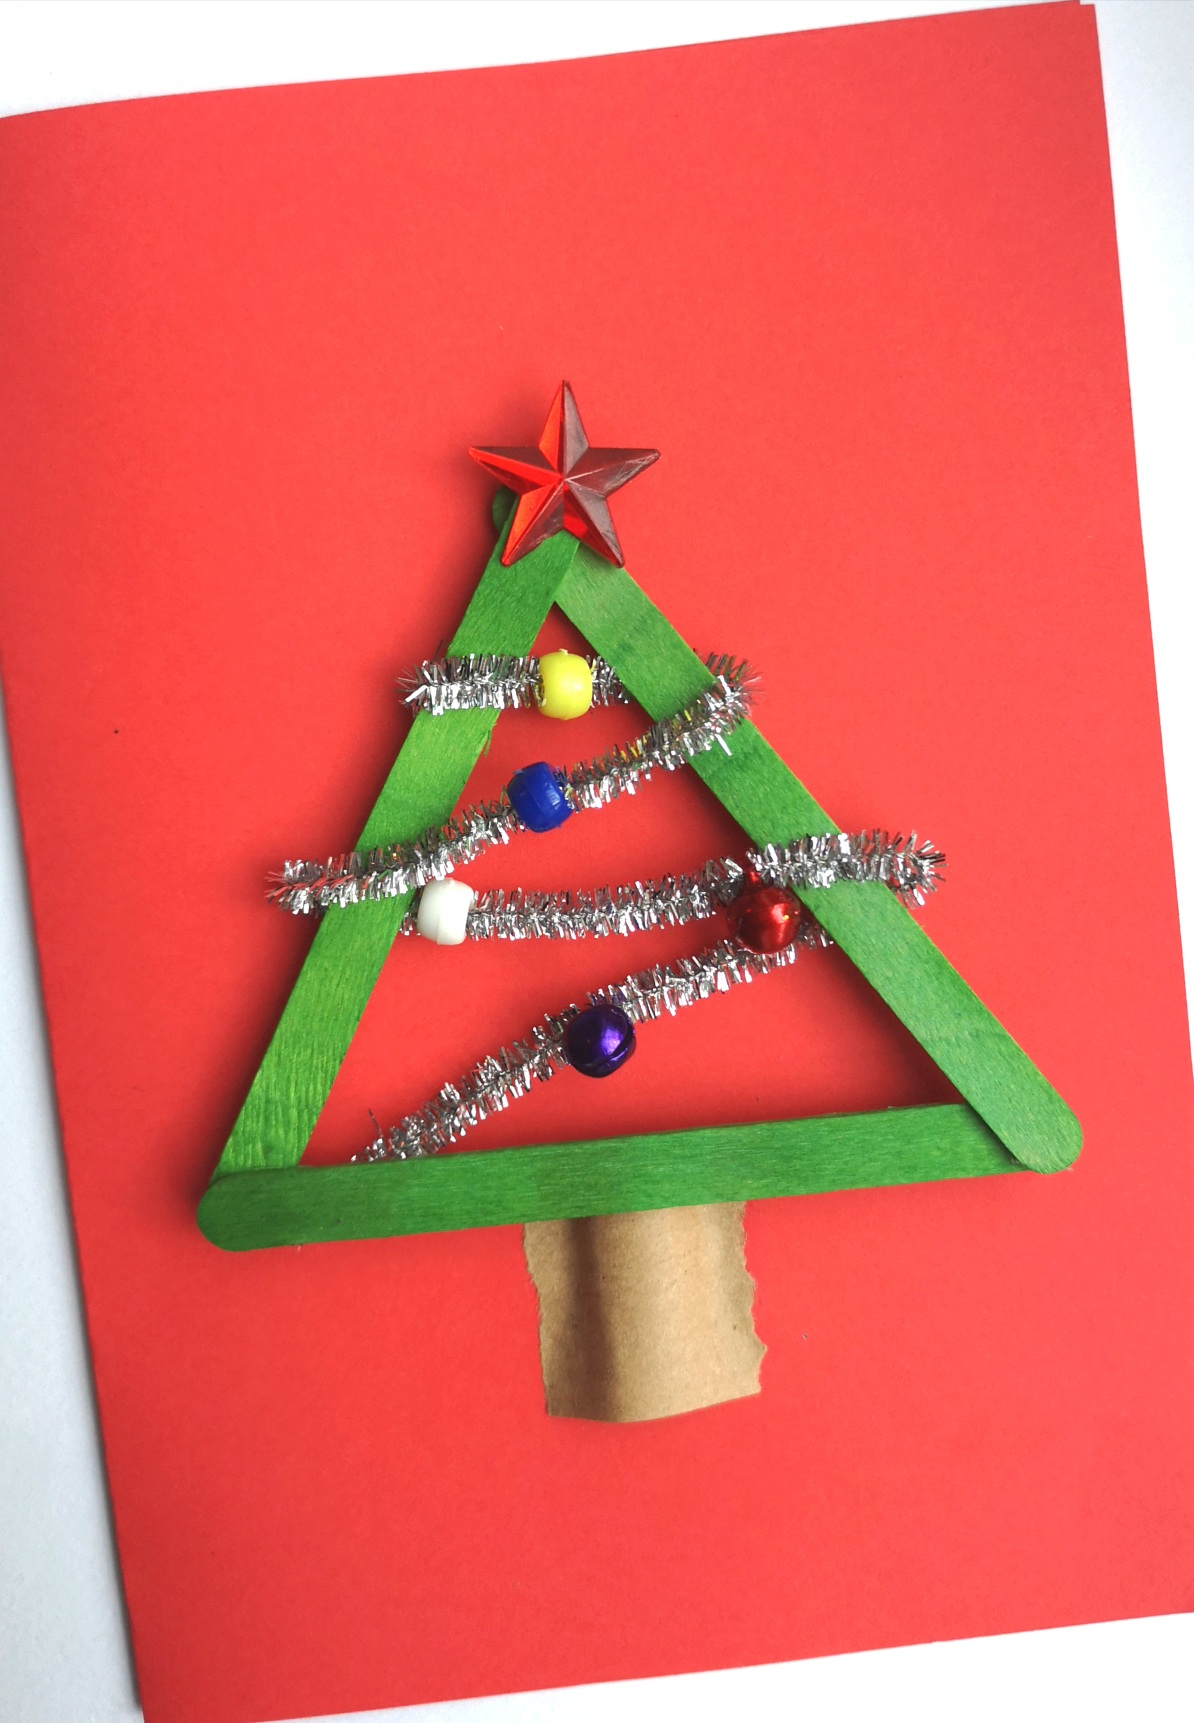
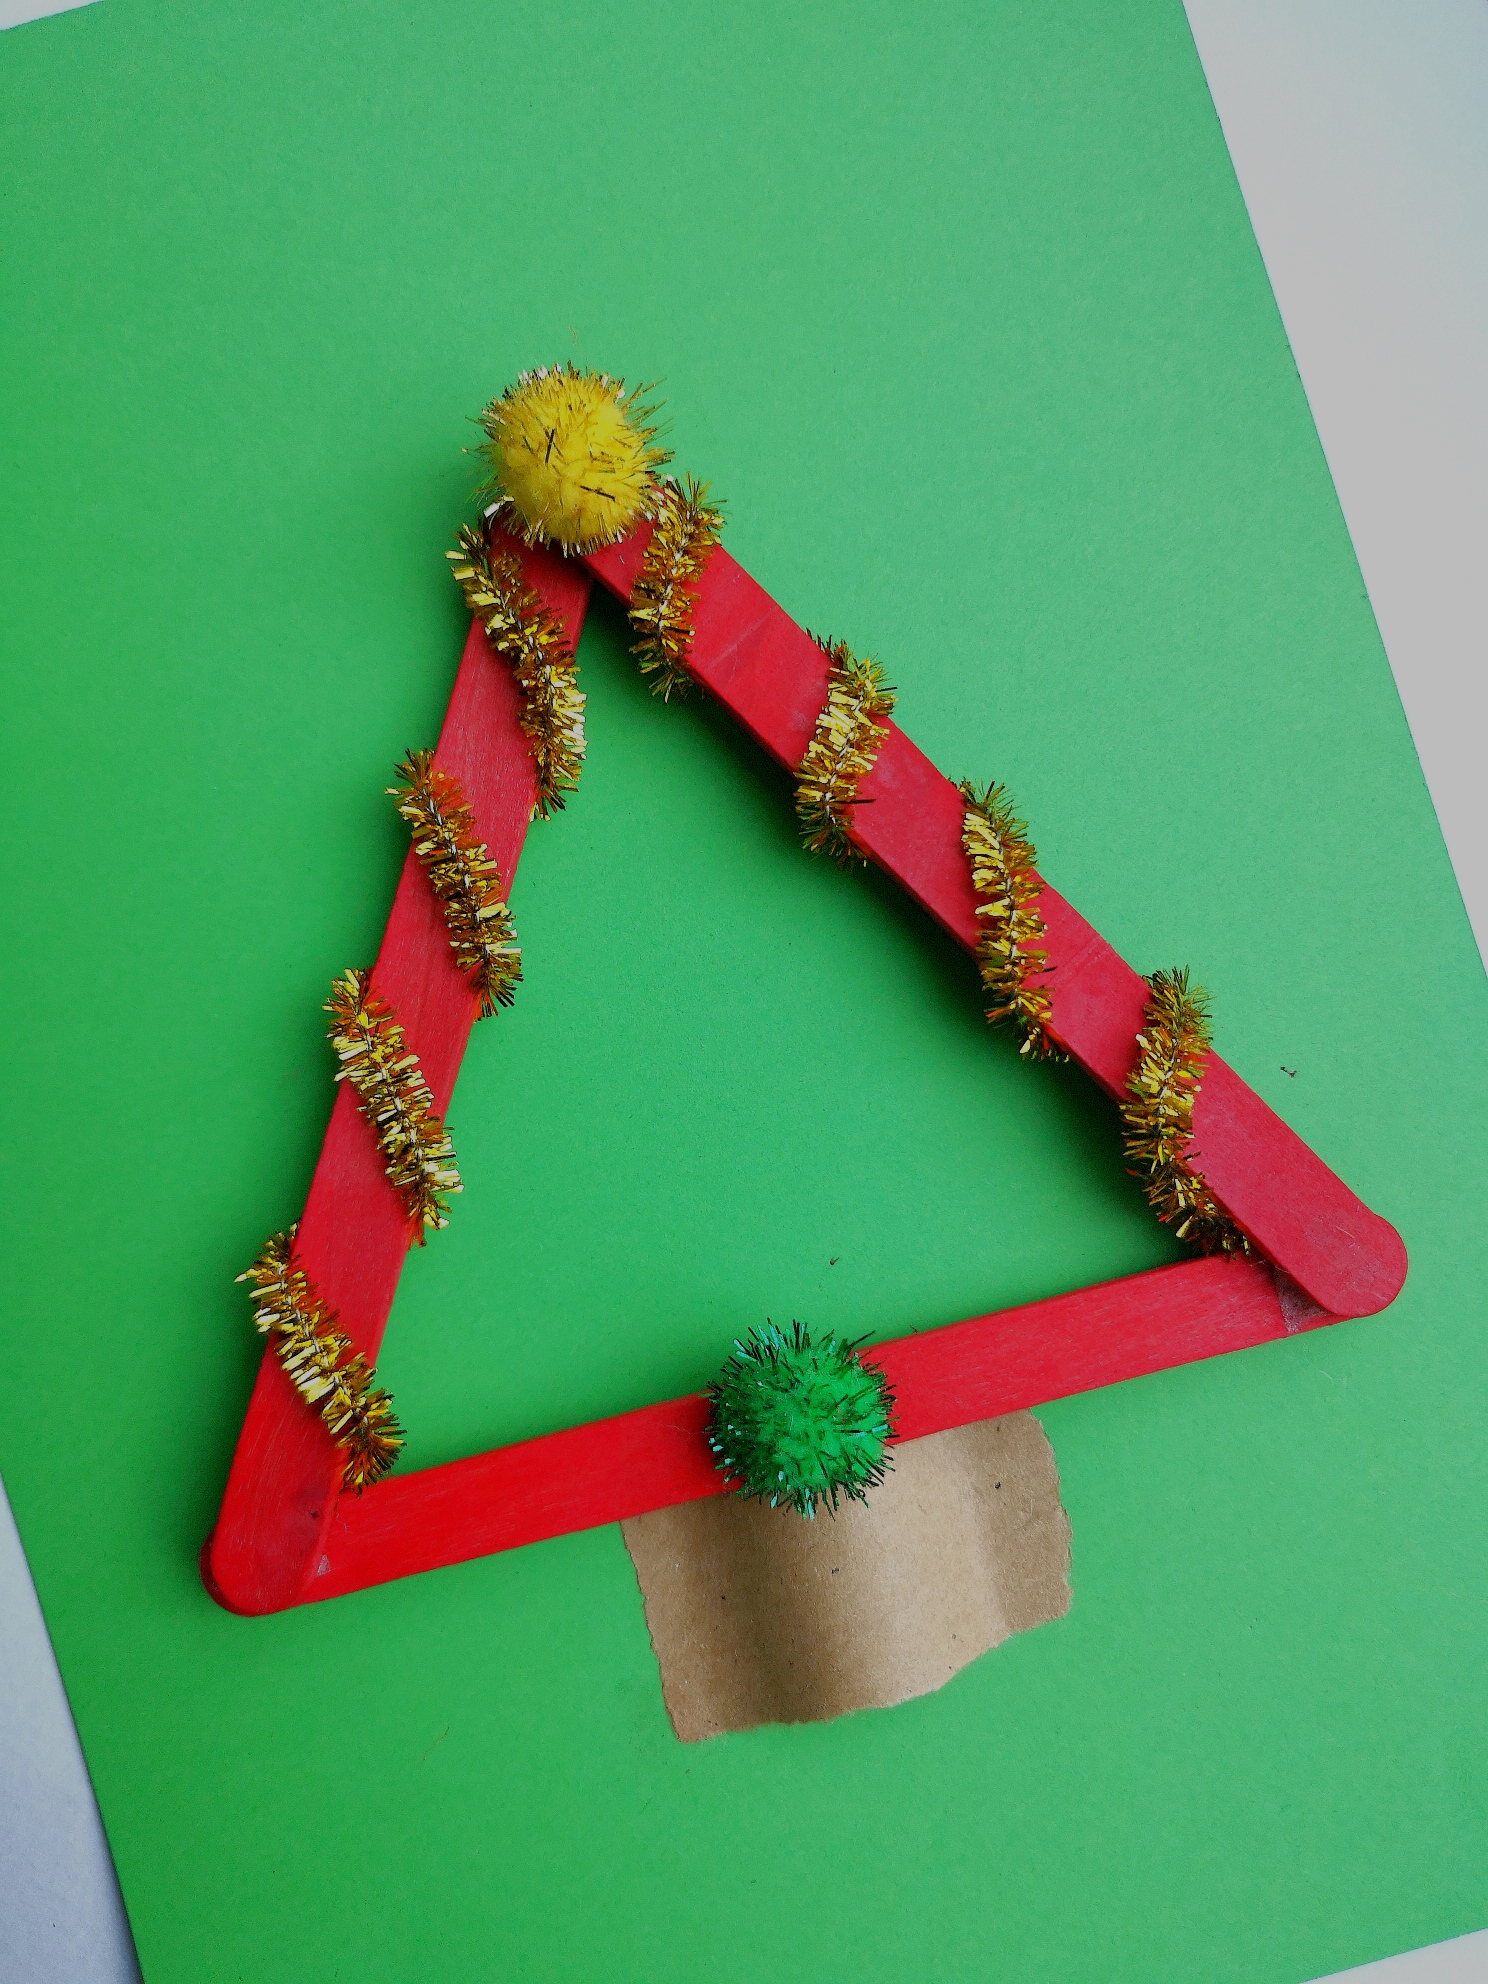
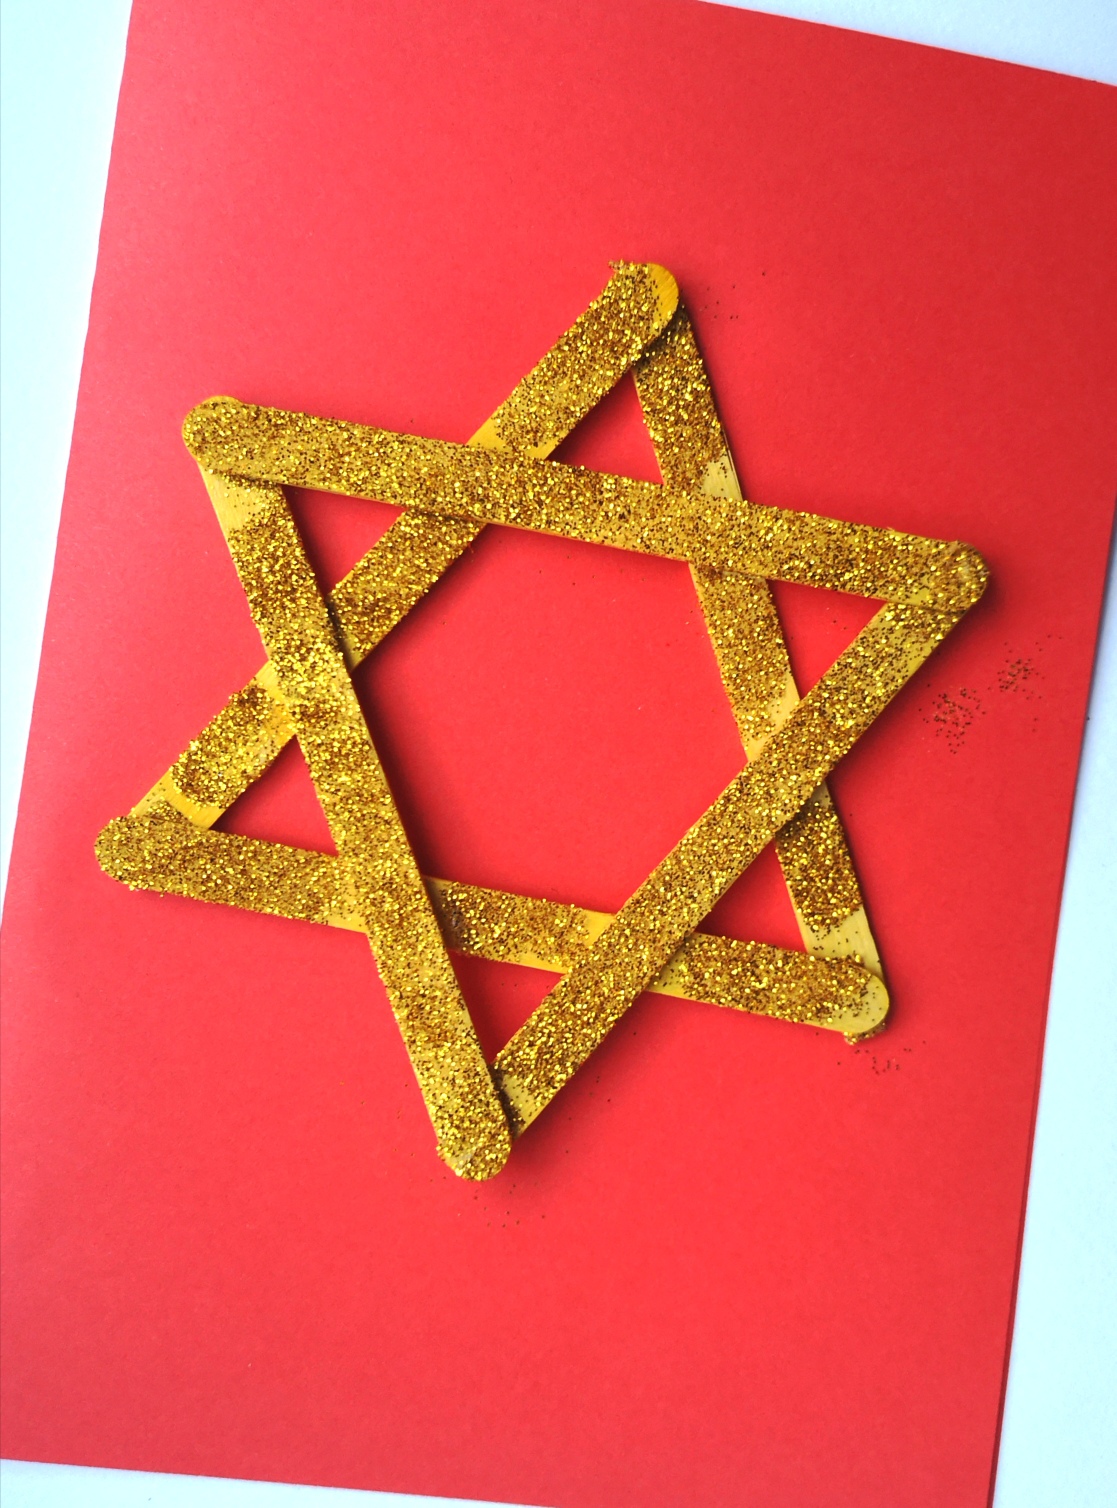
Use craft lolly sticks to create different Christmas themed shapes. They are perfect for trees, stars or snowflakes.
- Stick your craft lolly sticks together.
- Decorate them with pompoms, pipe cleaners, glitter, beads or gems.
- When dry, attach to the front of your Christmas cards.
They also make great decorations, so why not add a loop of yarn and make sure they can be detached. You have a card and decoration all in one!
Paper Baubles
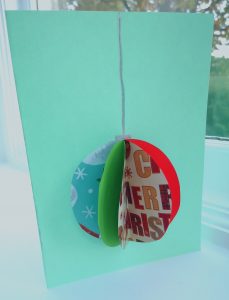
- Cut out same sized circles from a selection of Christmassy paper.
- Fold the circles in half.
- Stick the circles together side by side by sticking one half of one circle to the half of another circle. Leave the two outside halves unstuck.
- Stick these outside halves onto the front of your card.
- Add on a bauble string (you could use yarn if you wanted).
Snowman
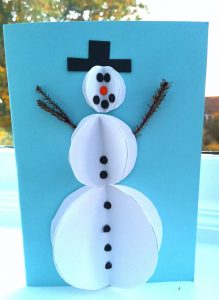
- Cut out a selection of 3 different sized circles from white paper. You will need to use either 3 or 5 circles for each section, depending on how many layers you want your snowman to have. (we used 3)
- Fold the circles in half.
- For the head use your smallest circles and stick them together side by side by sticking one half of one circle to one half of another circle. Leave the two outside halves unstuck.
- Repeat this process for the two other body circles.
- Stick all the sections to the paper and add buttons, eyes, a hat, a nose and arms to finish and decorate your snowman!
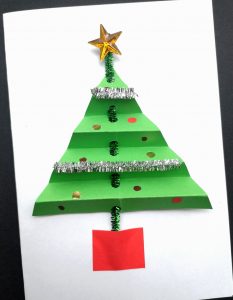
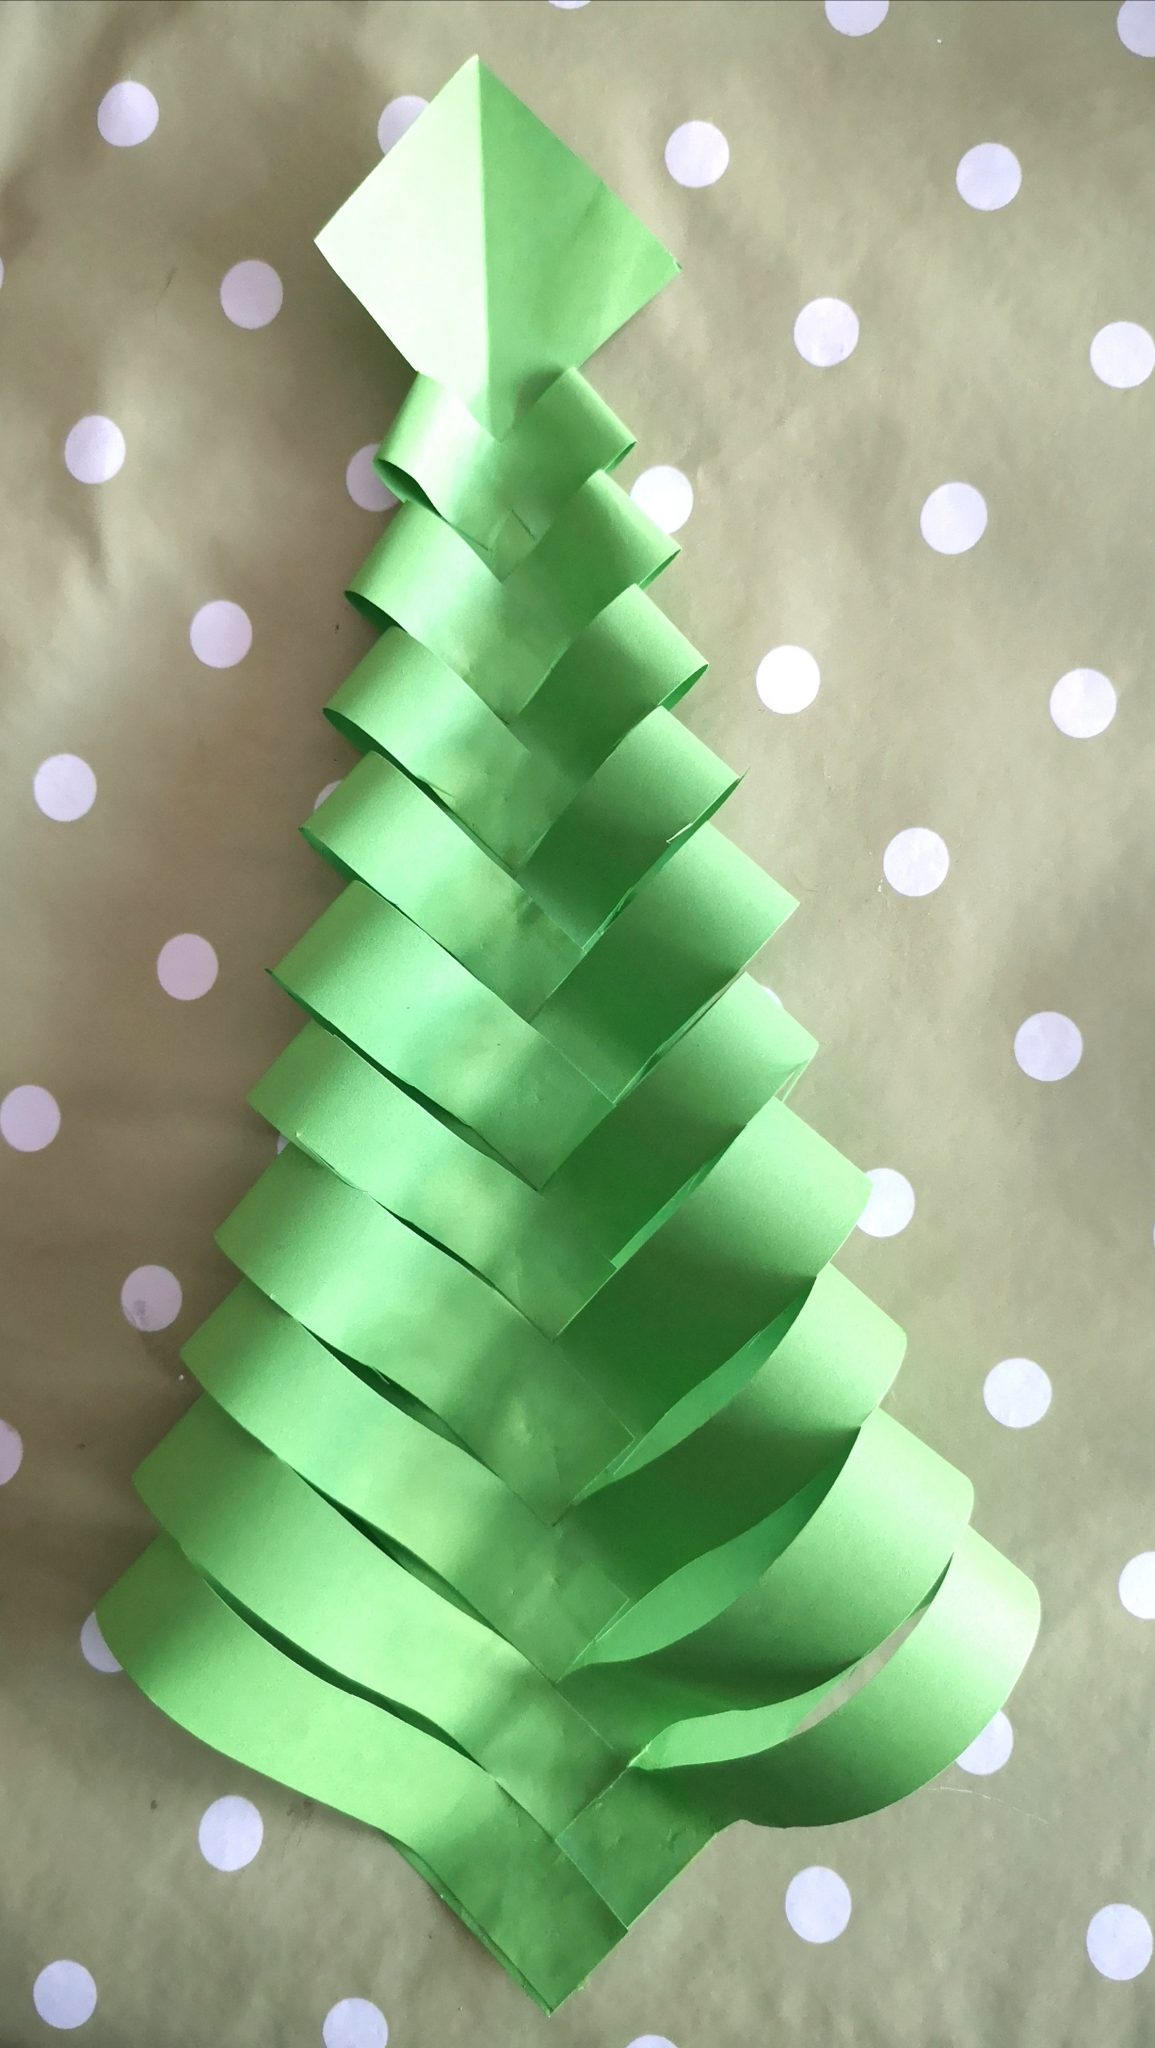
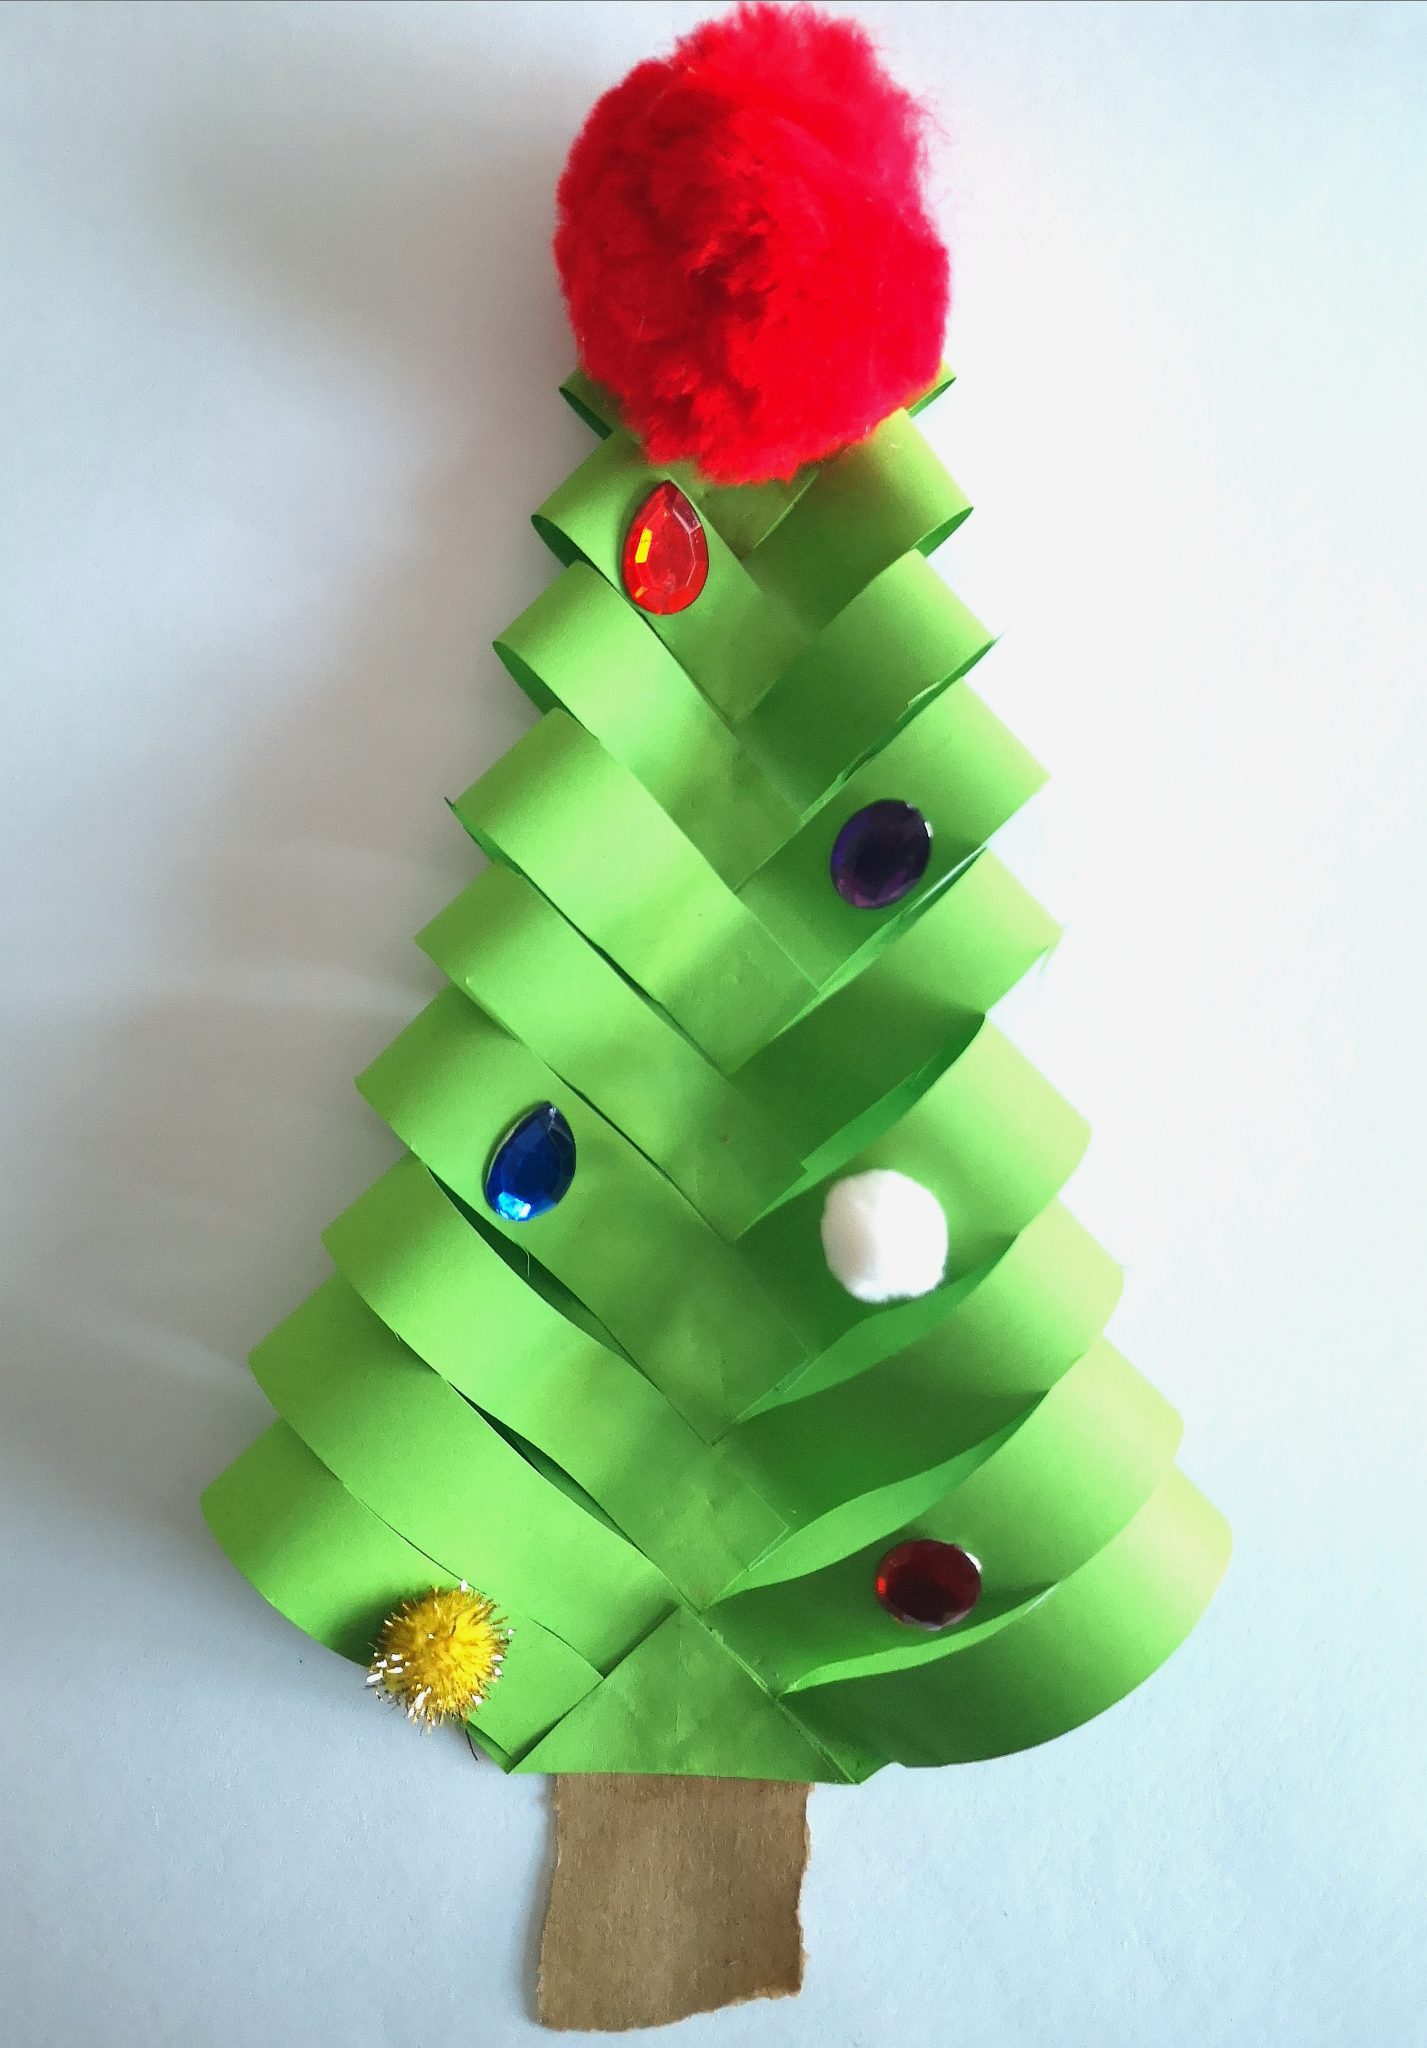
And … Another Christmas Tree


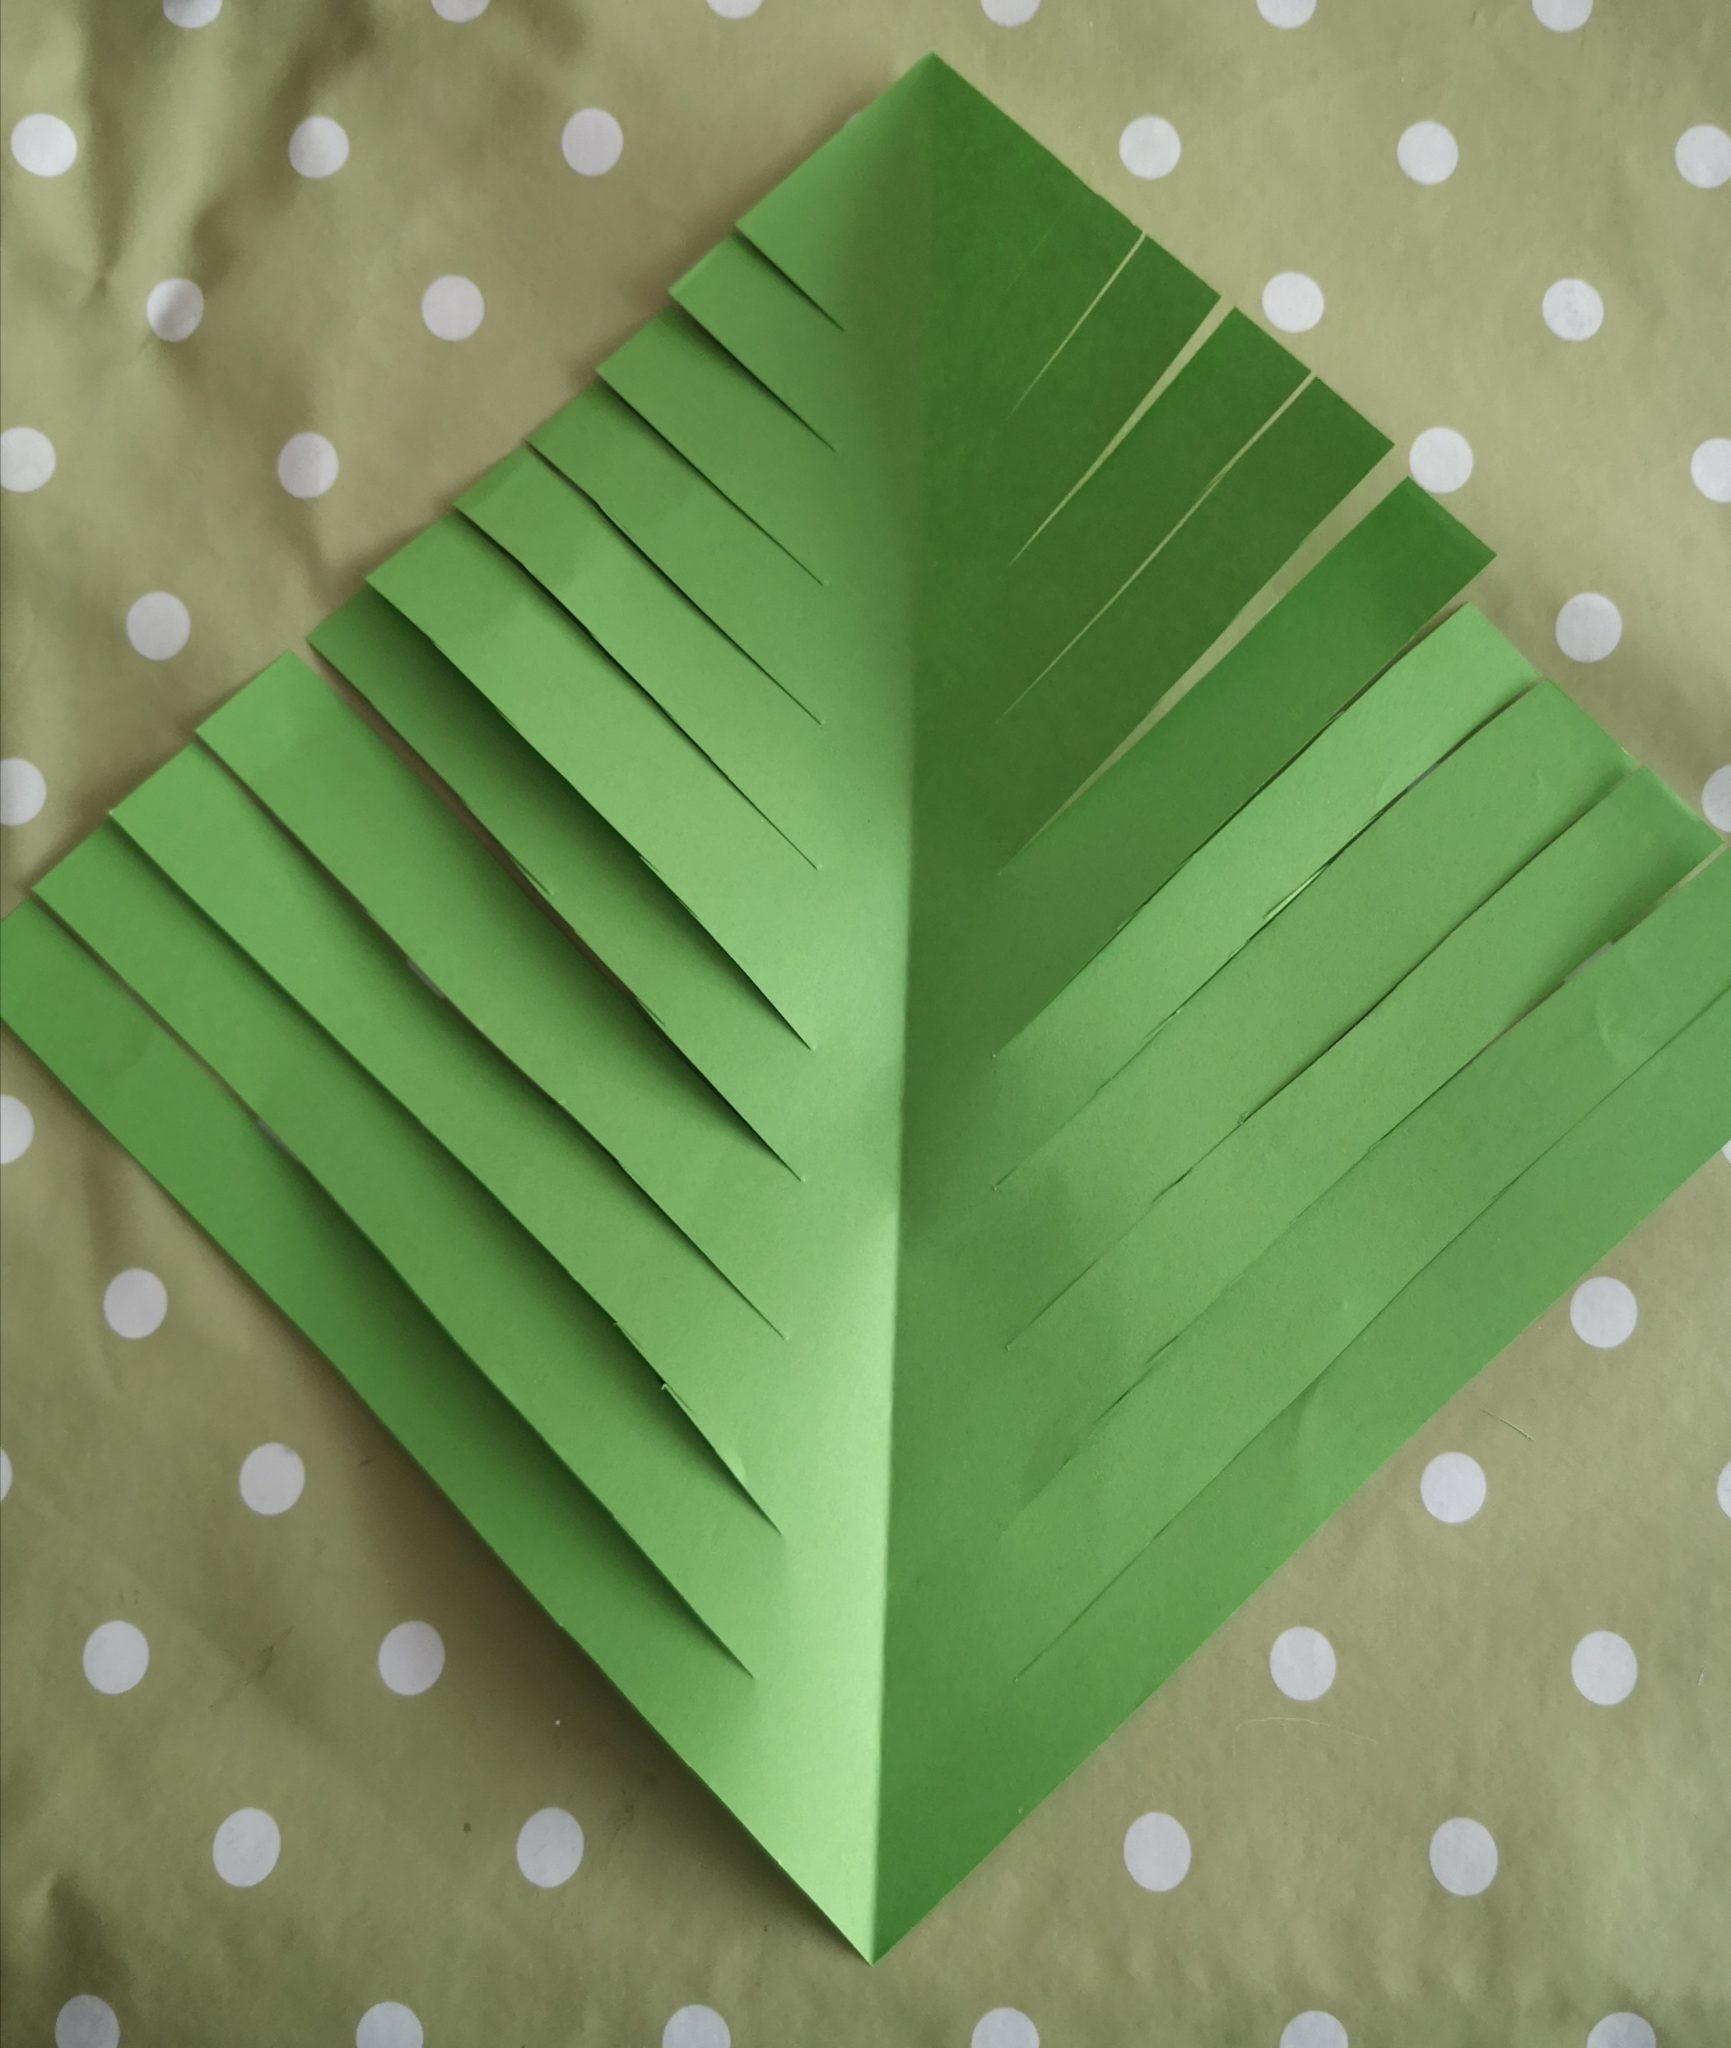
- Create a square from green paper (folding a piece of A4 paper and cutting off the excess works well).
- When folded, cut strips into the paper from the outside edge, but leave a couple of centimetres near to the fold. They do not have to be the same width, so don’t worry!
- Open up your paper and start by bringing the outside of the bottom strips into the middle and sticking them in place. It works well to overlap one strip on top of the other.
- Work your way up to the top of the paper, repeating with all the strips.
- Fold the bottom of the tree up, stick in place, attach a trunk and decorate as you like!
We hope you have fun making your Christmas cards this year and would love to see your creations!


