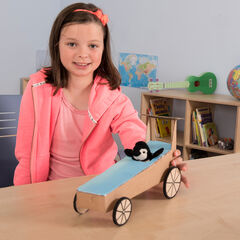
Follow this step by step guide on how to make your own carnival float. This relates to the Vehicles D&T Class Kit and is useful for KS1 & KS2 pupils exploring the use of wheels, axles and bearings.
What you’ll need
Parts:
- 2 cardboard boxes
- Wooden dowel 5mm diameter
- 2 jumbo paper drinking straws
- 4 wheels
- Coloured corrugated card
Tools and Consumables:
- Ruler
- Pencil
- Large scissors
- Junior hacksaw and vice or pair of secateurs (to be used only by adults)
- Sandpaper
- Low melt temperature glue gun (preferable) or double-sided foam tape (strong bond) and transparent sticky tape
- Decorations (e.g. pinecones, googly eyes, feathers, modelling clay, corks, lollipop sticks, pipe cleaners etc.)
Step 1
Mark and cut one of the boxes in half lengthways. Take one half, fold in the side flaps then stick down the end flaps firmly. The reason you stick the side flaps down first is so that the straws can be attached to the end flaps, which provides a flat surface. If the straws become bent the axles can’t rotate freely. You can trim the sides and back of the float down if you want. Save the other half of the box – it can be used to make a second carnival float.
Step 2
Mark and cut a second box in half widthways as shown below. Take one half, fold in the side flaps then stick down the end flaps firmly. Trim the open end to give the profile of the cabin. You can use the remaining cardboard to make the front of the cabin as shown (alternatively you could save it to make a second carnival float). Mark it out with the pencil and ruler, cut and fold it to shape then stick it on. You can hold it down with the ruler when you fold it to give a straight fold line.
Step 3
Stick the cabin onto the front of the float. Cover the float in corrugated card to make it bright and colourful. You can place the float on the corrugated card, draw round it and cut out the shape, then stick it onto the side of the float. If you don’t have a glue gun then you can use double-sided tape, but it takes longer and is less robust.
Step 4
Cut the two straws to 15cm length. The cut end will become flattened – round it out using a pencil. Stick the straws onto the flaps underneath the back and the front of the carnival float as shown, trying to keep them parallel. If you are using a glue gun, run a line of glue along the flap then hold the straw by its end to stick it on. This should help prevent you burning your fingers.
Step 5

Cut two 17cm lengths of wooden dowel for axles. You can use either the junior hacksaw and vice or a pair of secateurs (the secateurs are easier). Sand down the ends of the axles to help the wheels go on. Push a wheel onto the end of one of the axles, slide the axle through the middle of the straw (bearing) then push on the second wheel. If they are difficult to get on, you can rotate one wheel relative to the other. Repeat for the second axle. Adjust the wheel positions until there is approximately a 1mm gap between the wheels and the ends of the straw. Hold the carnival float and spin the wheels to check the wheel/axle assemblies rotate freely.
Step 6
Populate and decorate your carnival float.

For a free downloadable copy of the above instructions for making a carnival float, click here.
About our guest author
Caroline Alliston, is a professional engineer and technical author with a degree from Cambridge and twenty four years experience in industry. Whilst on a career break to spend more time with her two boys, she started a club at their school to enthuse children about science and engineering. Before long there were more children on the waiting list than in the actual club!
Caroline now spends her time running hugely popular workshops for teachers, pupils, home educated children, holiday clubs, Scout groups etc. Unable to be in three places at once, she has written the Technology for Fun series of books incorporating her favourite and most successful projects, to give even more children the opportunity to have fun making things that really work.


