
Everybody loves a glowing pumpkin! They have become synonymous with autumn and all things ghostly and ghoulish. This may be because pumpkins are ready for picking in September and October, just in time for Halloween, when they are carved into jack-o-lanterns.
Where does the idea of a pumpkin lantern come from?
There are a range of stories and legends about jack-o-lanterns – they generally relate to a lost soul, not good enough to enter heaven, but who has bargained with the devil not to go to hell. He is given a light with which to wander the earth forever.
The custom to make jack-o-lanterns first started in Britain with turnips and swedes, but when pumpkins were discovered in America, they were found to make much better lanterns, not least because they are so much easier to carve (as anyone who has tried to carve a swede will know!)
So, why clay for a pumpkin lantern?
However, these clay lanterns are even easier and offer a creative and longer lasting alternative; children can make them individually and safely – no need for sharp knives!

Clay pumpkins can be made easily and safely by small hands.
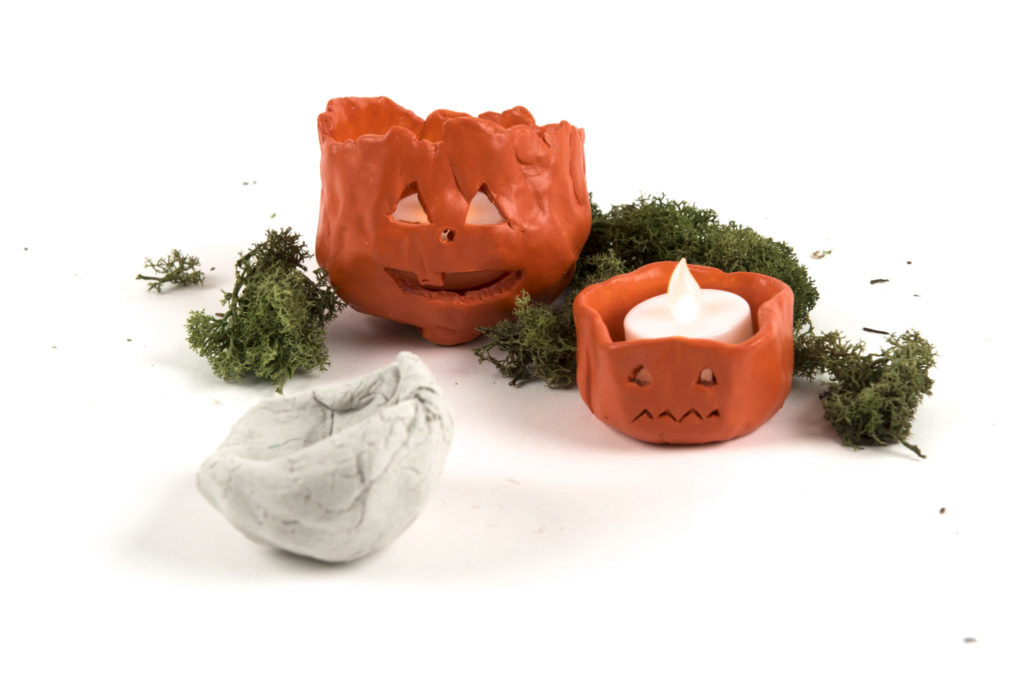
From a simple lump of clay, can come a spooky and amusing pumpkin lantern.
Why not have a go? Just follow these simple instructions…
You will need:
Step 1
Start by cutting a piece of clay, the more clay you cut the bigger you will be able to make the lantern.
Step 2
Roll the clay into a ball.
Holding the ball in one hand, use your thumb to stretch the clay starting from the middle and pinching out. Keep rotating the clay in your hand to give the pot a circular shape.
Step 3
Once you’re happy with the height of the pot, it’s time to cut out the face of your pumpkin. Dip your tool into water and shake the excess, this will allow the cuts to be smooth and easy.
Start with the mouth. Once you’ve cut your desired shape, dip your finger into water and smooth out the cuts, this will give your pumpkin a lovely finish. Do the same with the other details.
Step 4
Let the lantern air dry overnight.
Once dried, paint it with orange paint (acrylic will give a more durable finish).
Let it dry.
Step 5
Draw some details, such as imperfections or lines on the pumpkin. You might even make a lid!
Put a tea light inside your pumpkin and enjoy.
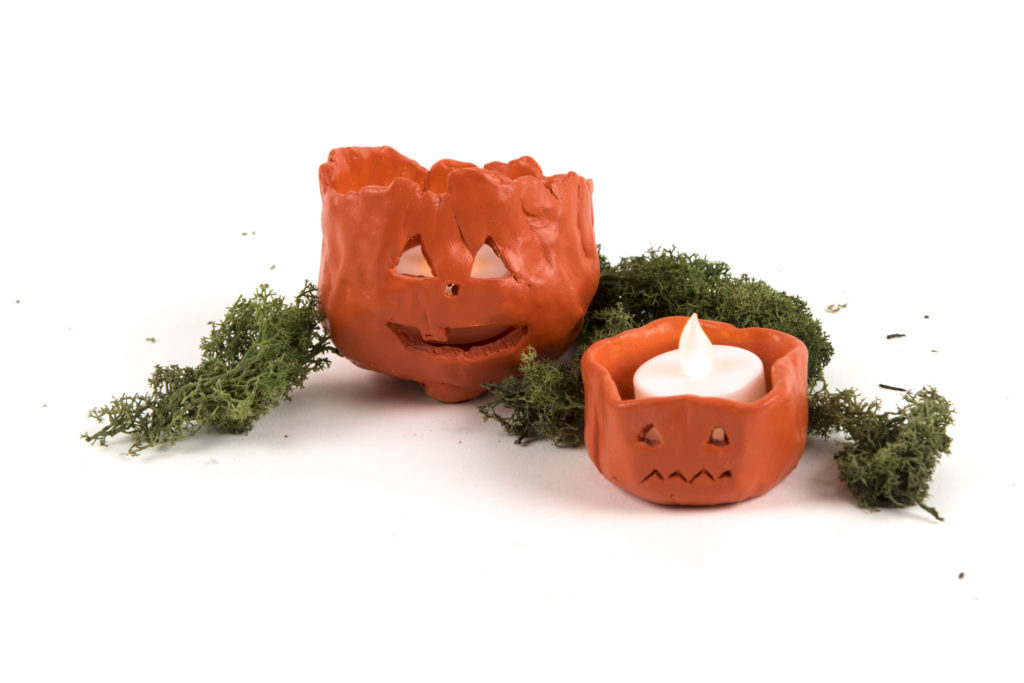
Cute and spooky clay pumpkin lanterns
This ‘How To’ was created by our Marketing Executive Mayra Espinoza and written by Beverley Smalley. Beverley is a mum, an education specialist, writer and former primary school teacher.