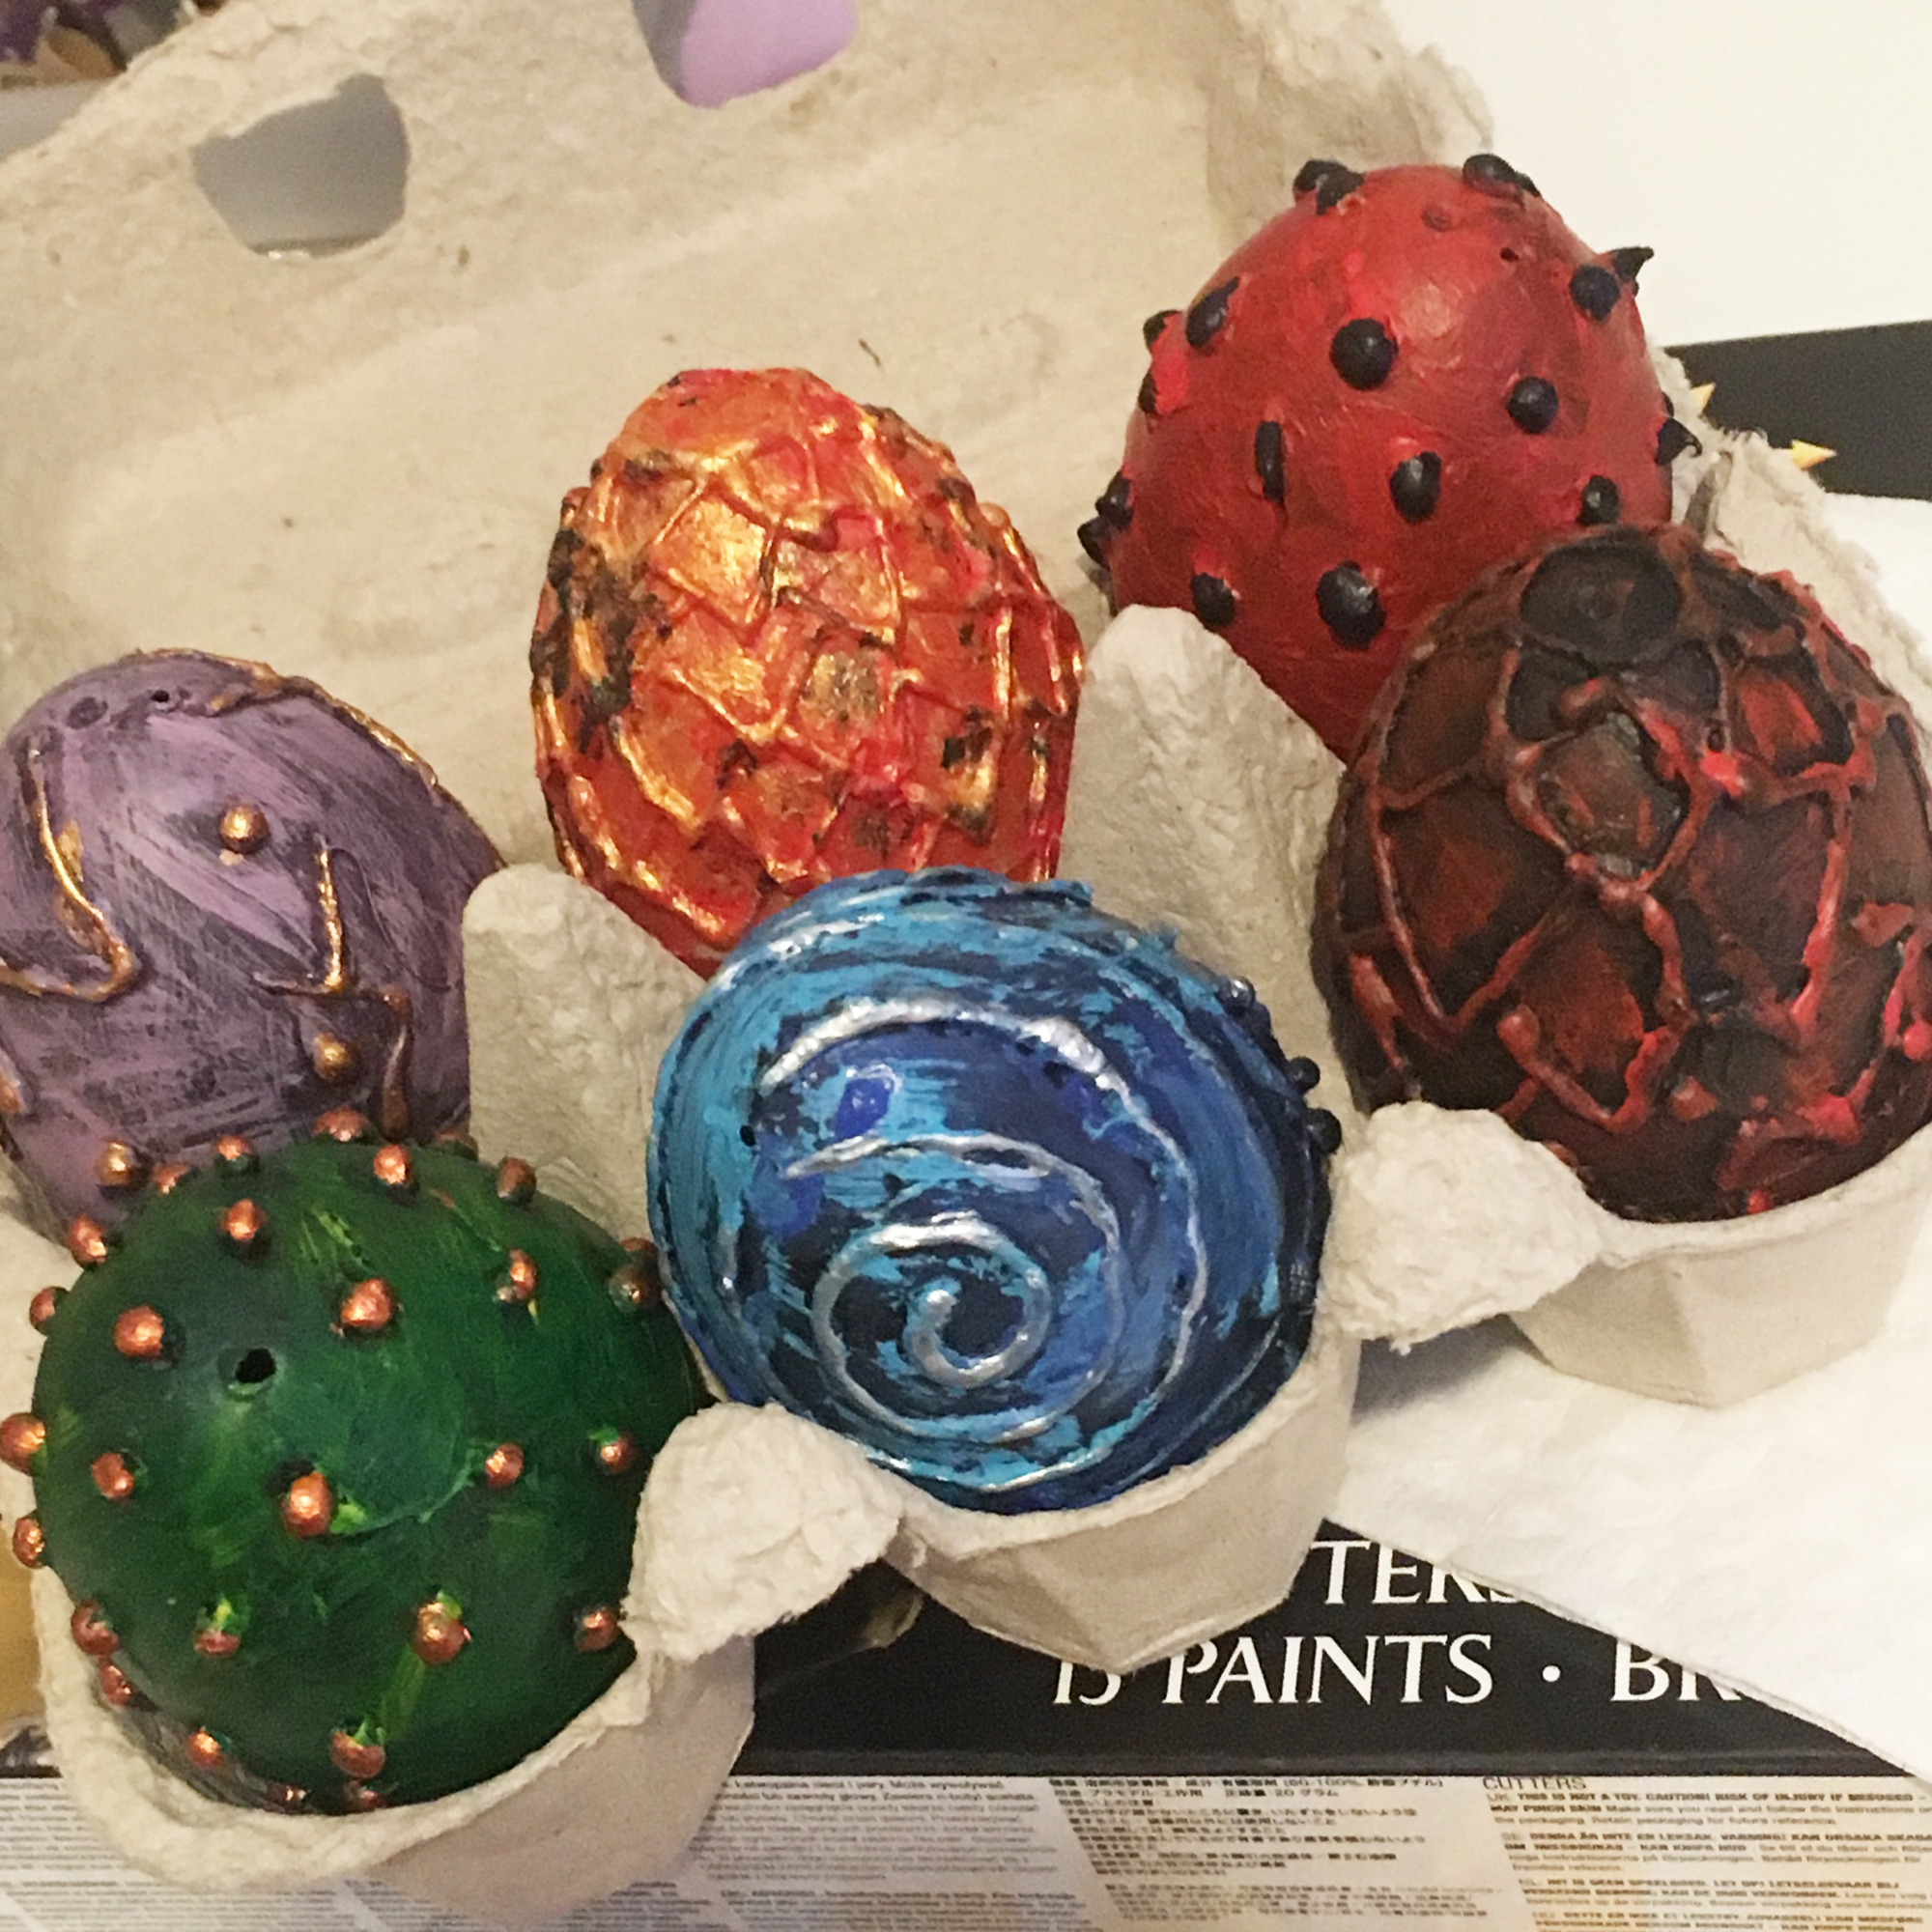
You will need:
- Plastic eggs (opening eggs not essential unless adding a dragon!)
- Low melt glue gun
- Acrylic paint including a metallic range
- Mod Podge
- Fimo (if you’re are feeling creative enough to make a dragon!)
How to make the eggs:
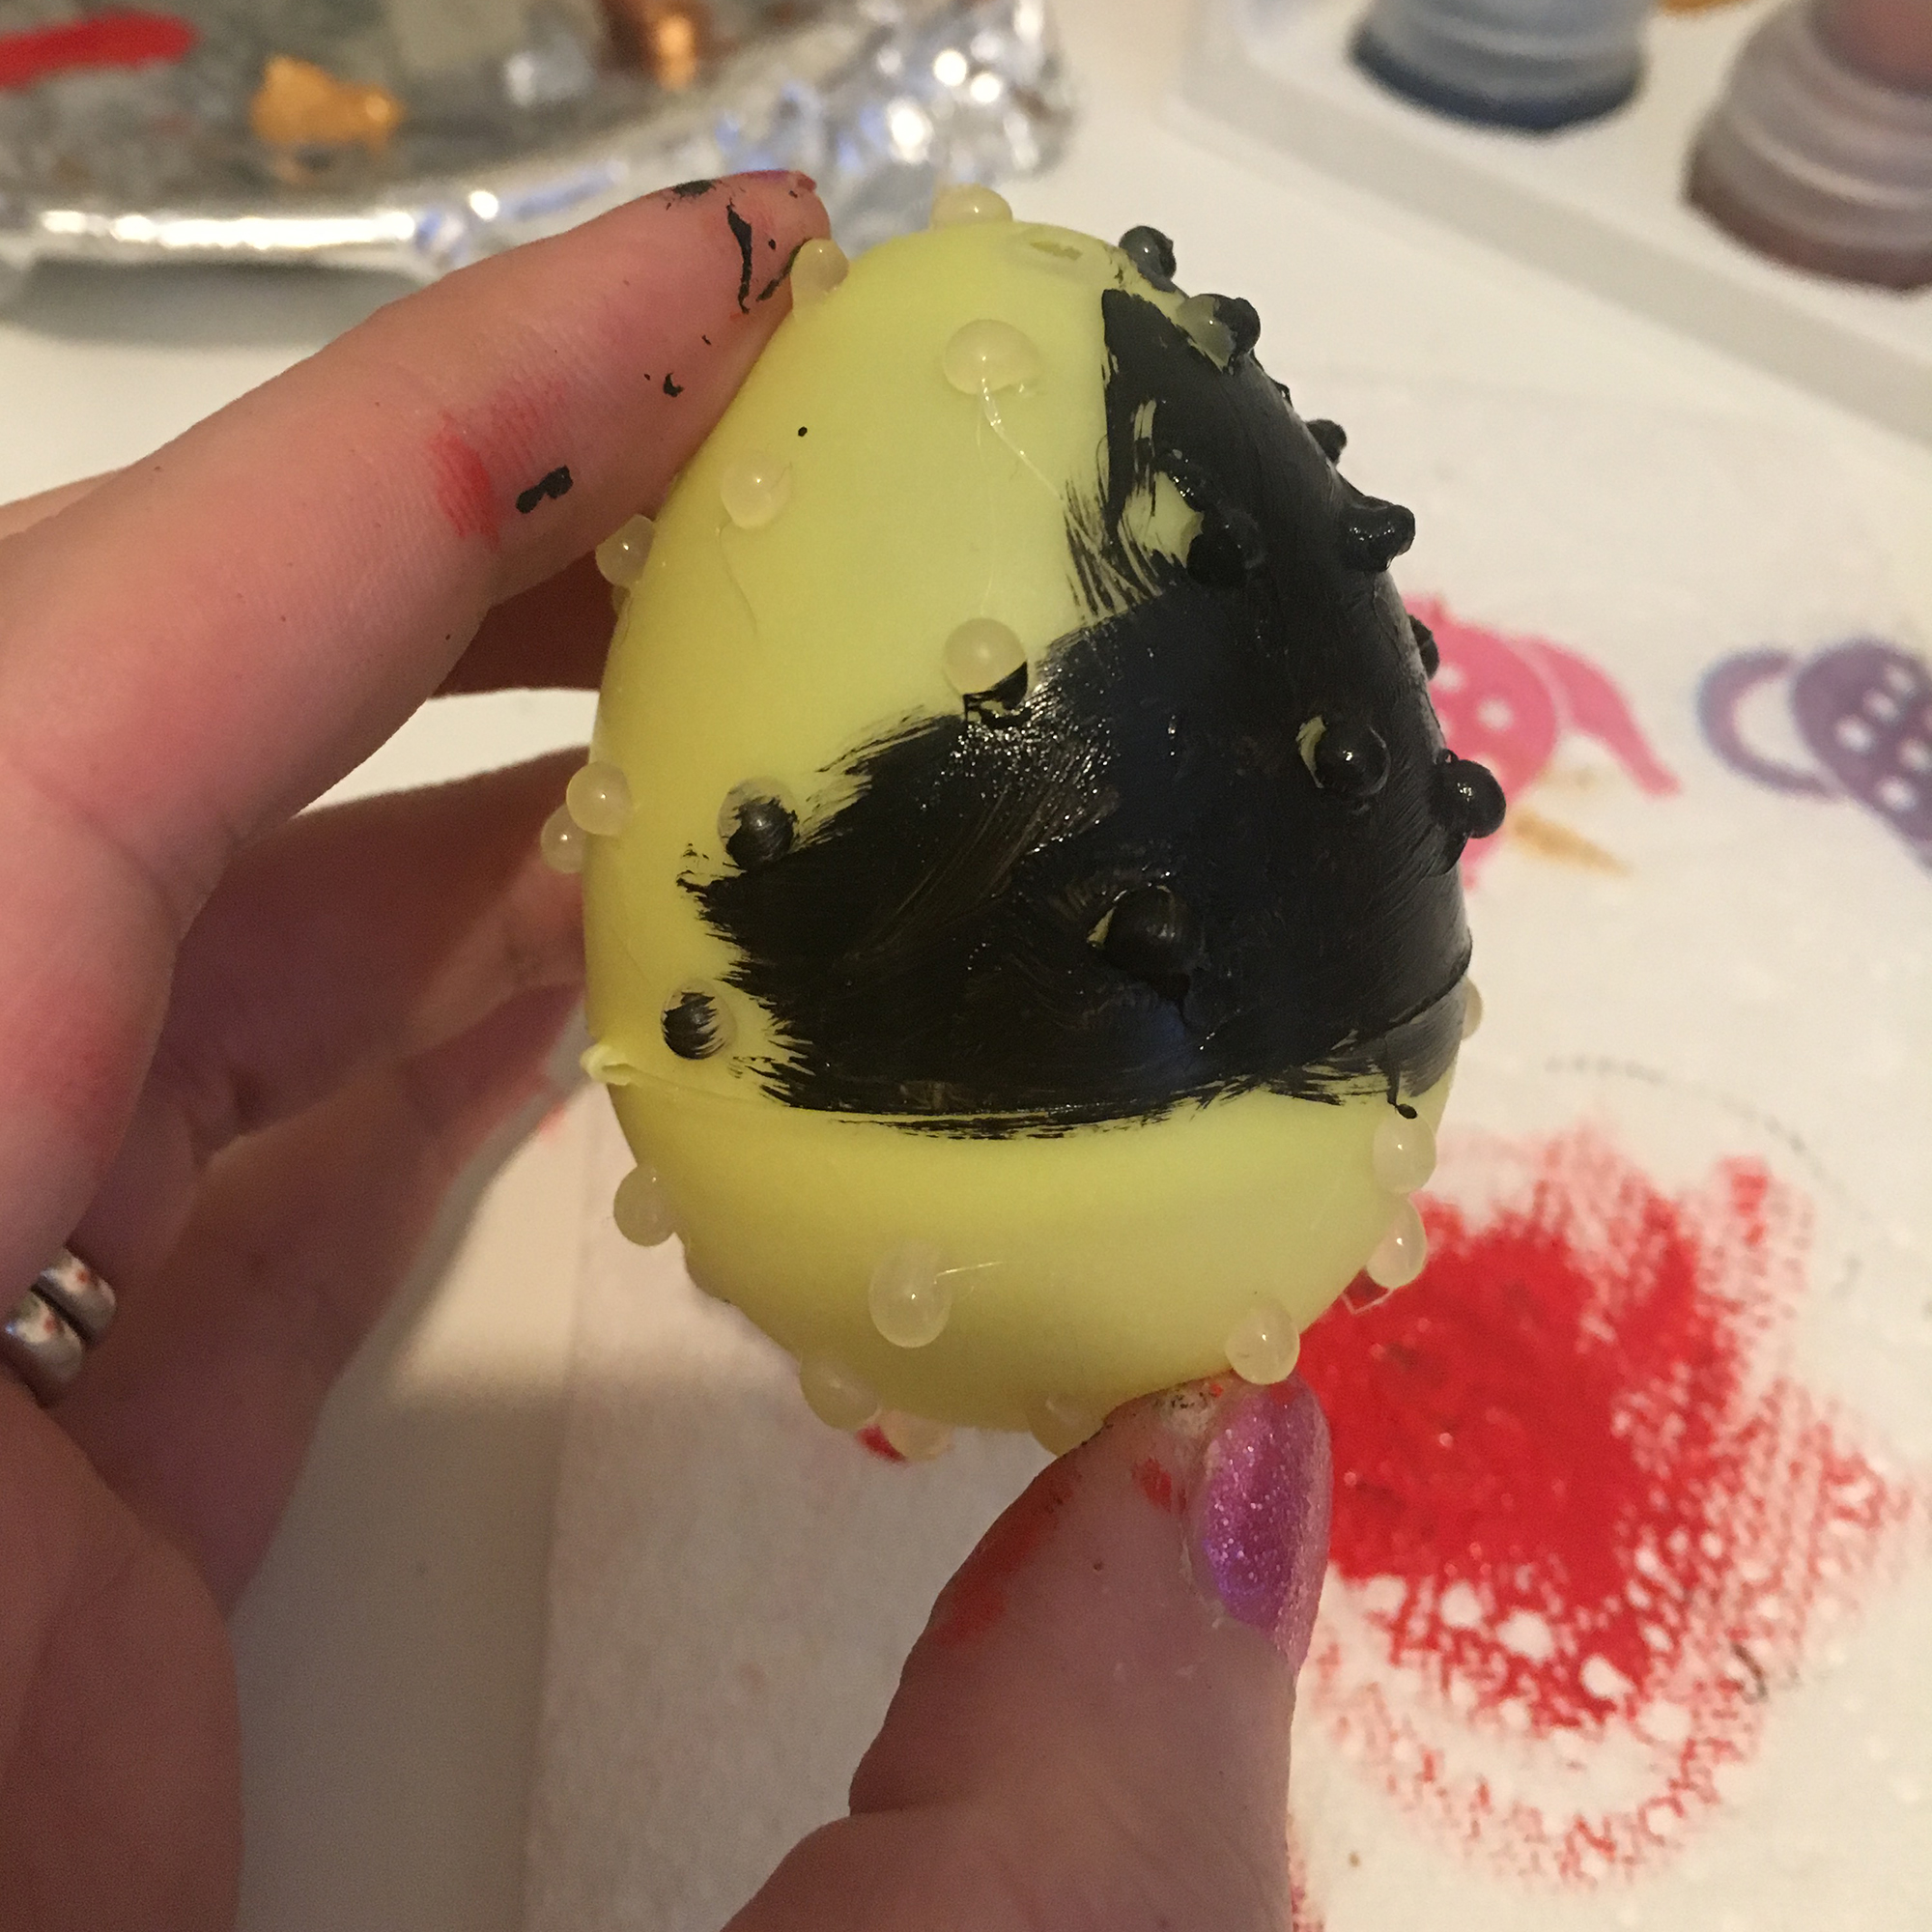
Step 1
Once the glue gun is heated, carefully draw on your pattern. We did some practise beforehand so we knew what patterns we wanted.

Step 2
When the glue is dry, paint over the eggs with a base colour – we chose black for this.

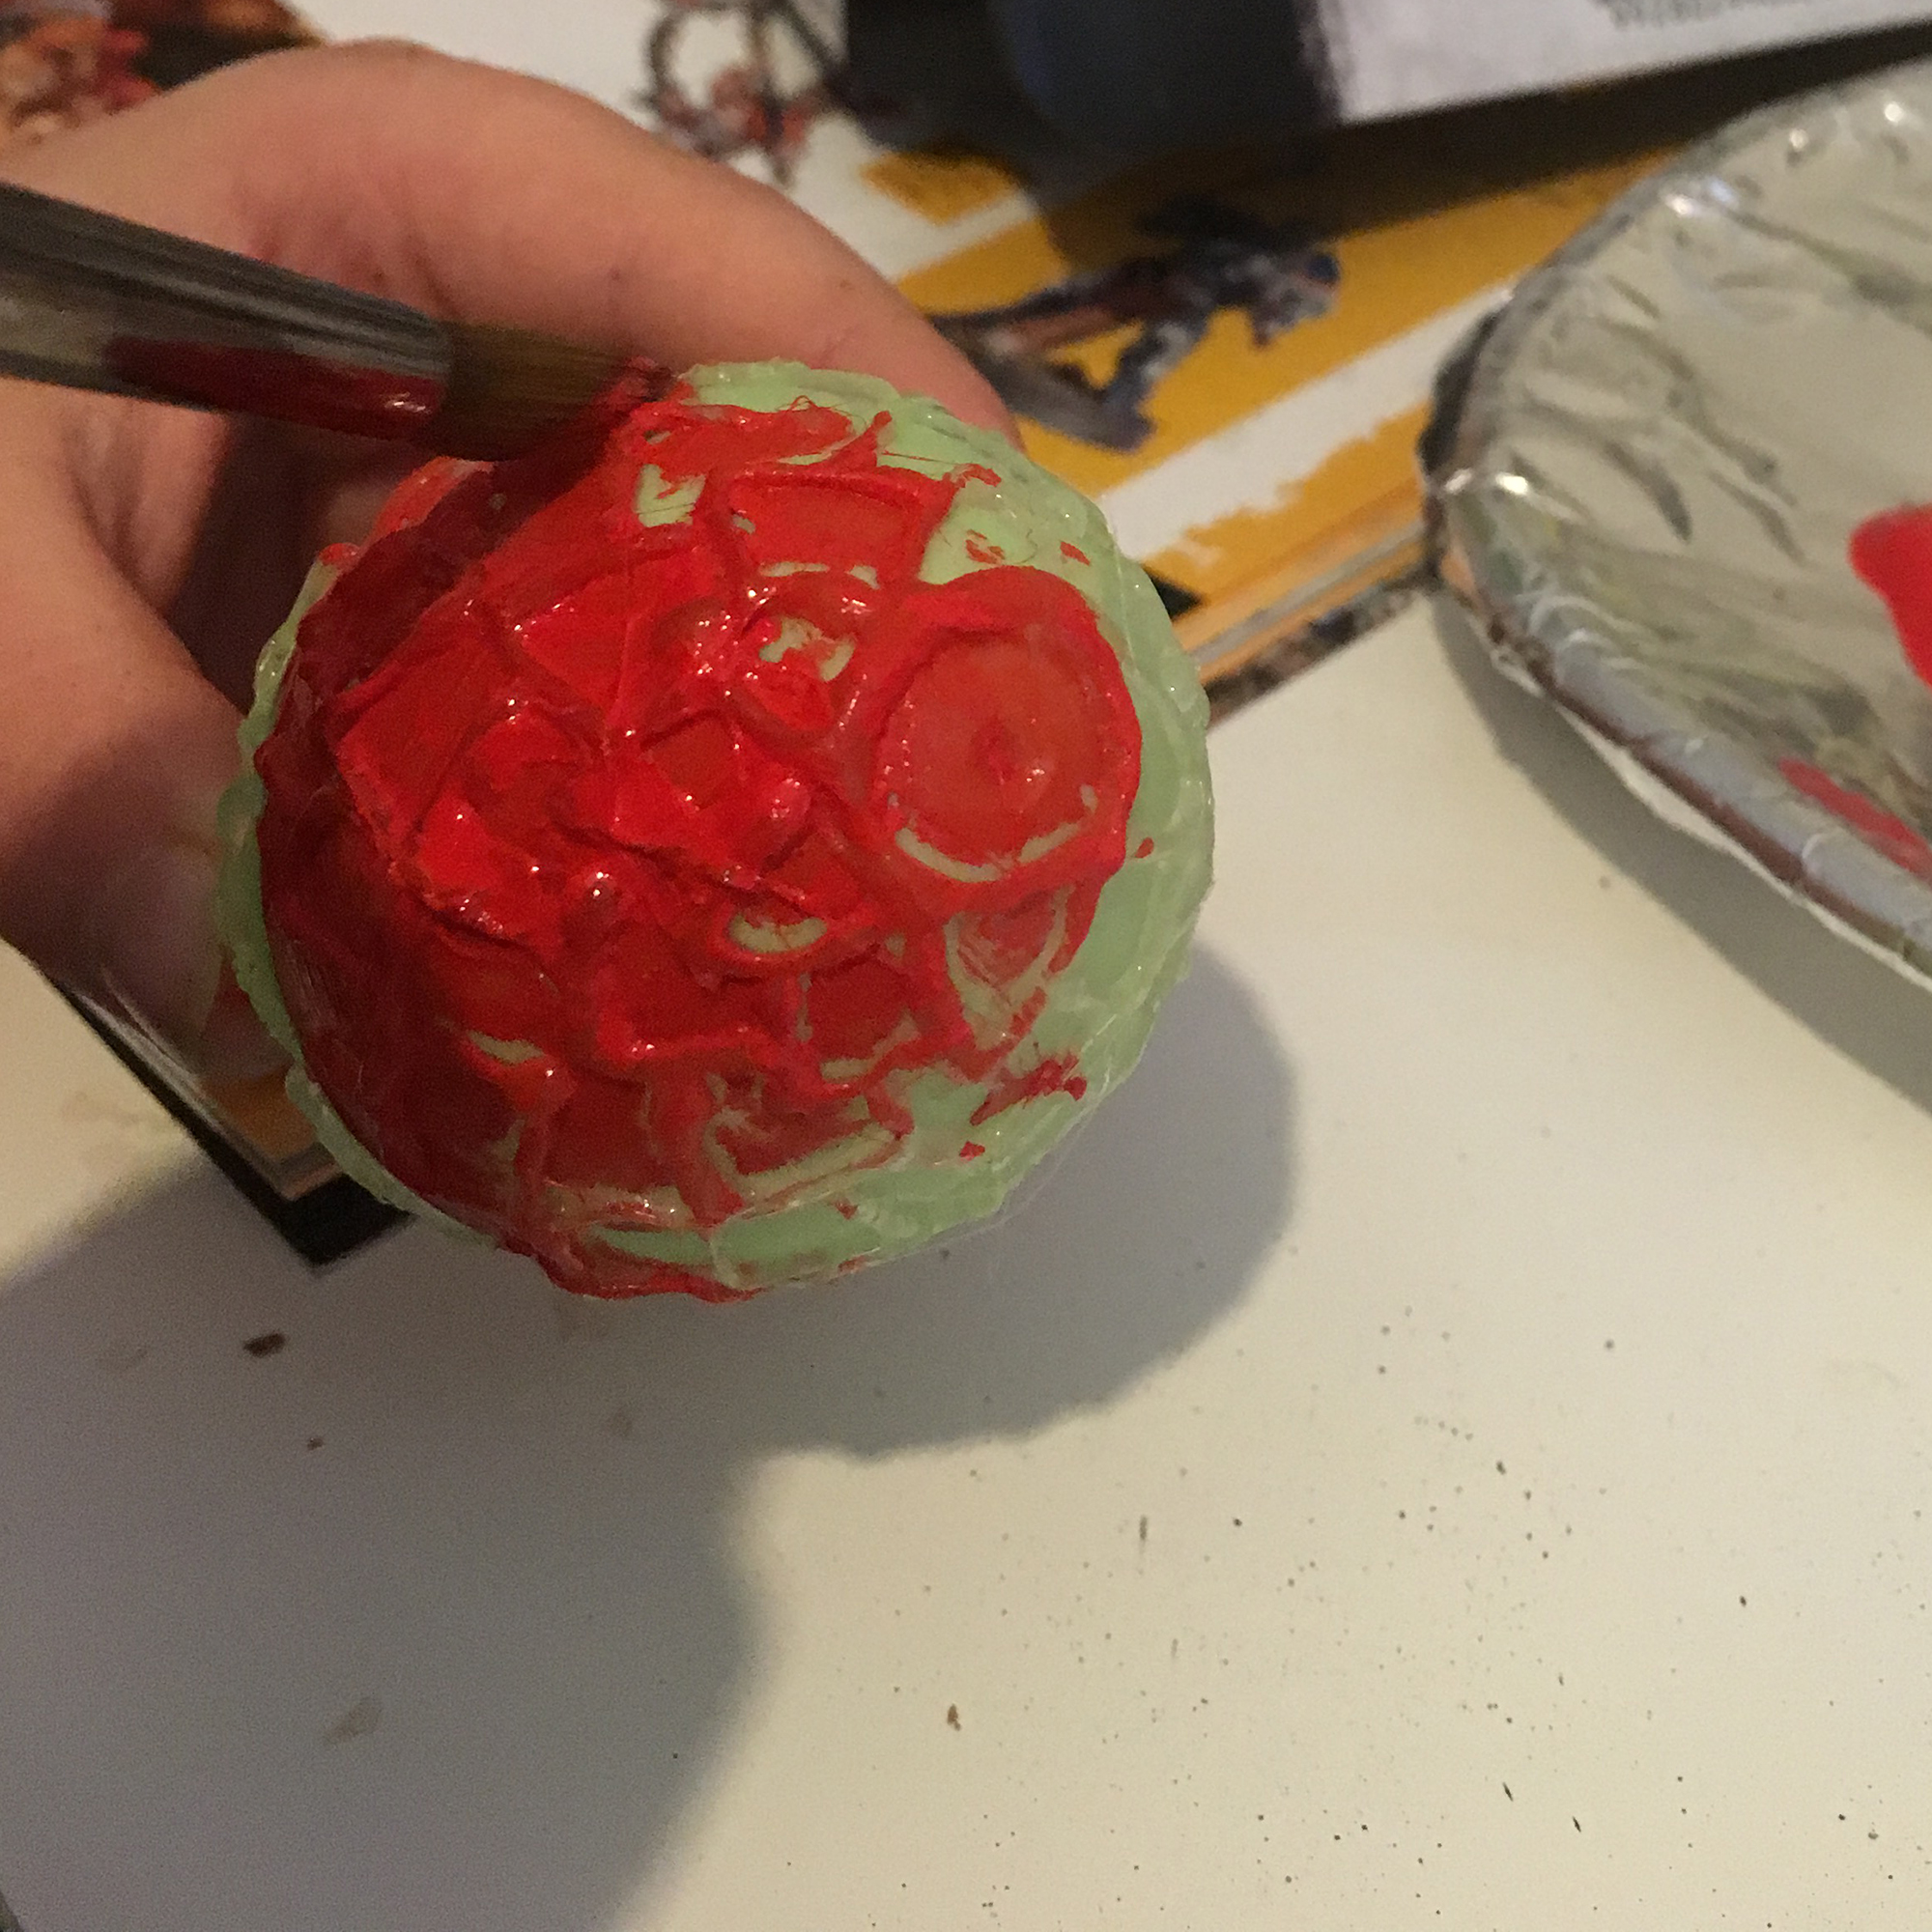
Step 3
Once the black paint is dry, paint on other colours – a dry brush effect works really well for this. We added highlights using metallic colours too.
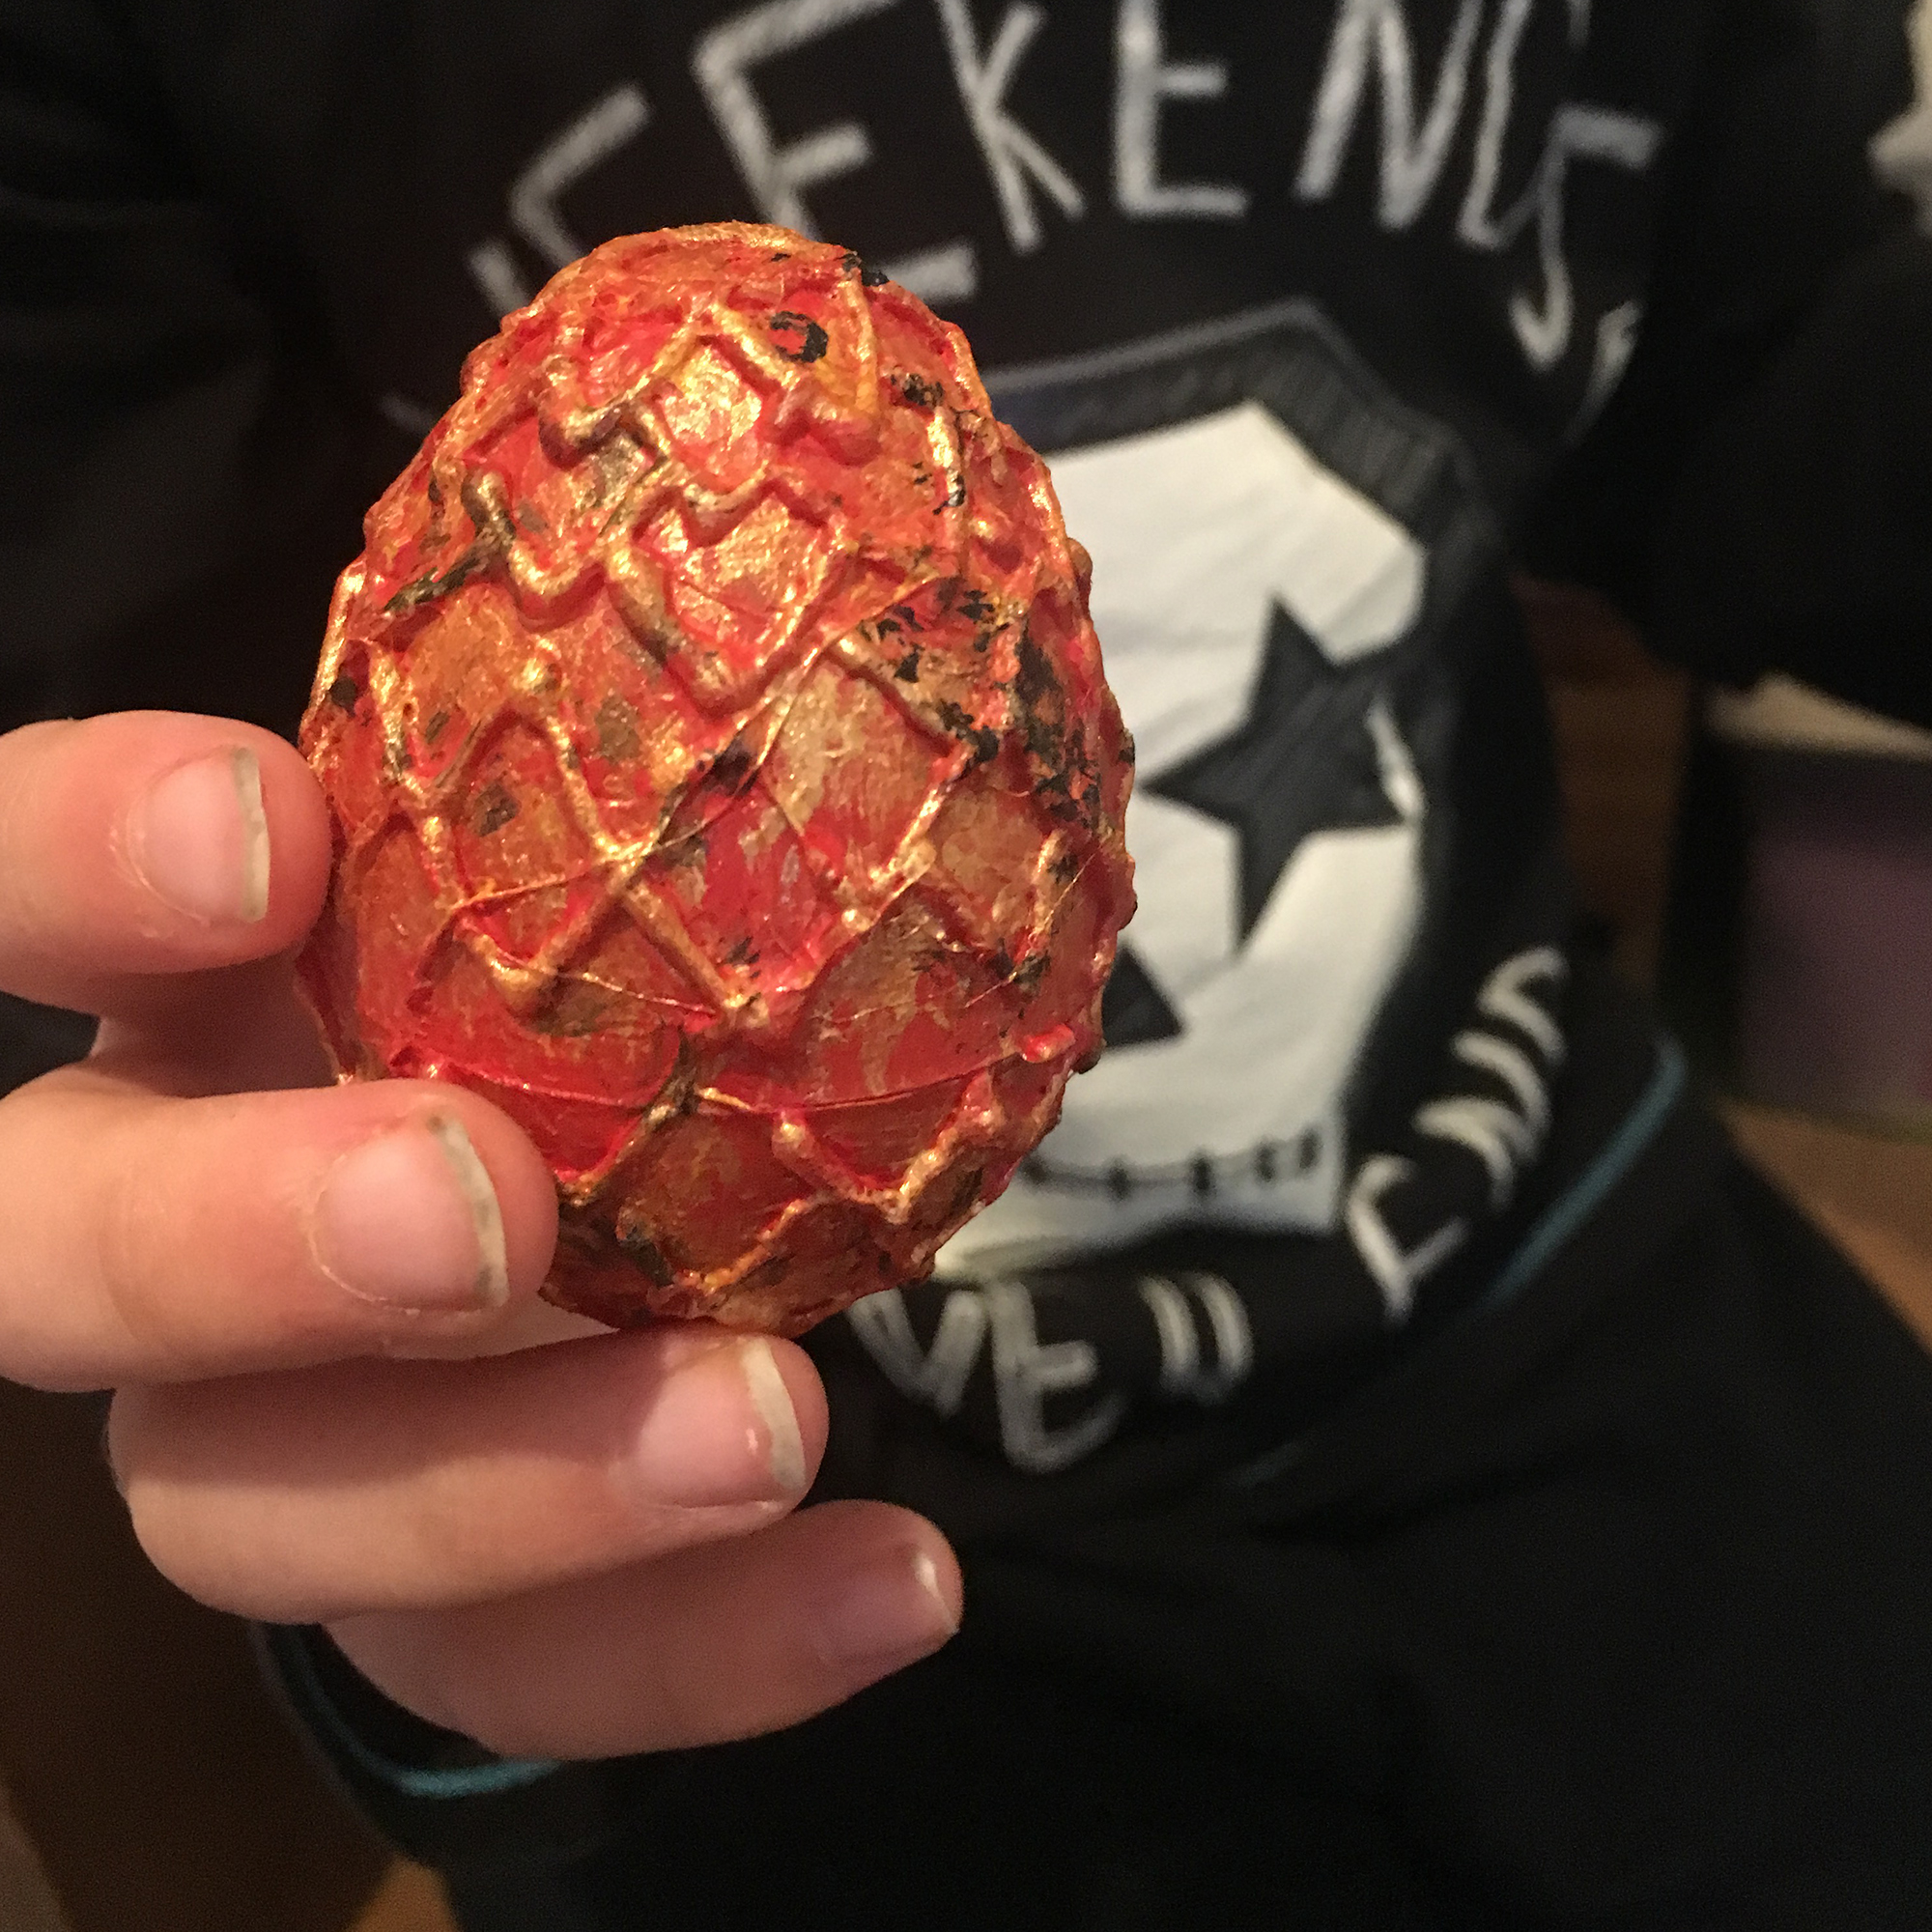

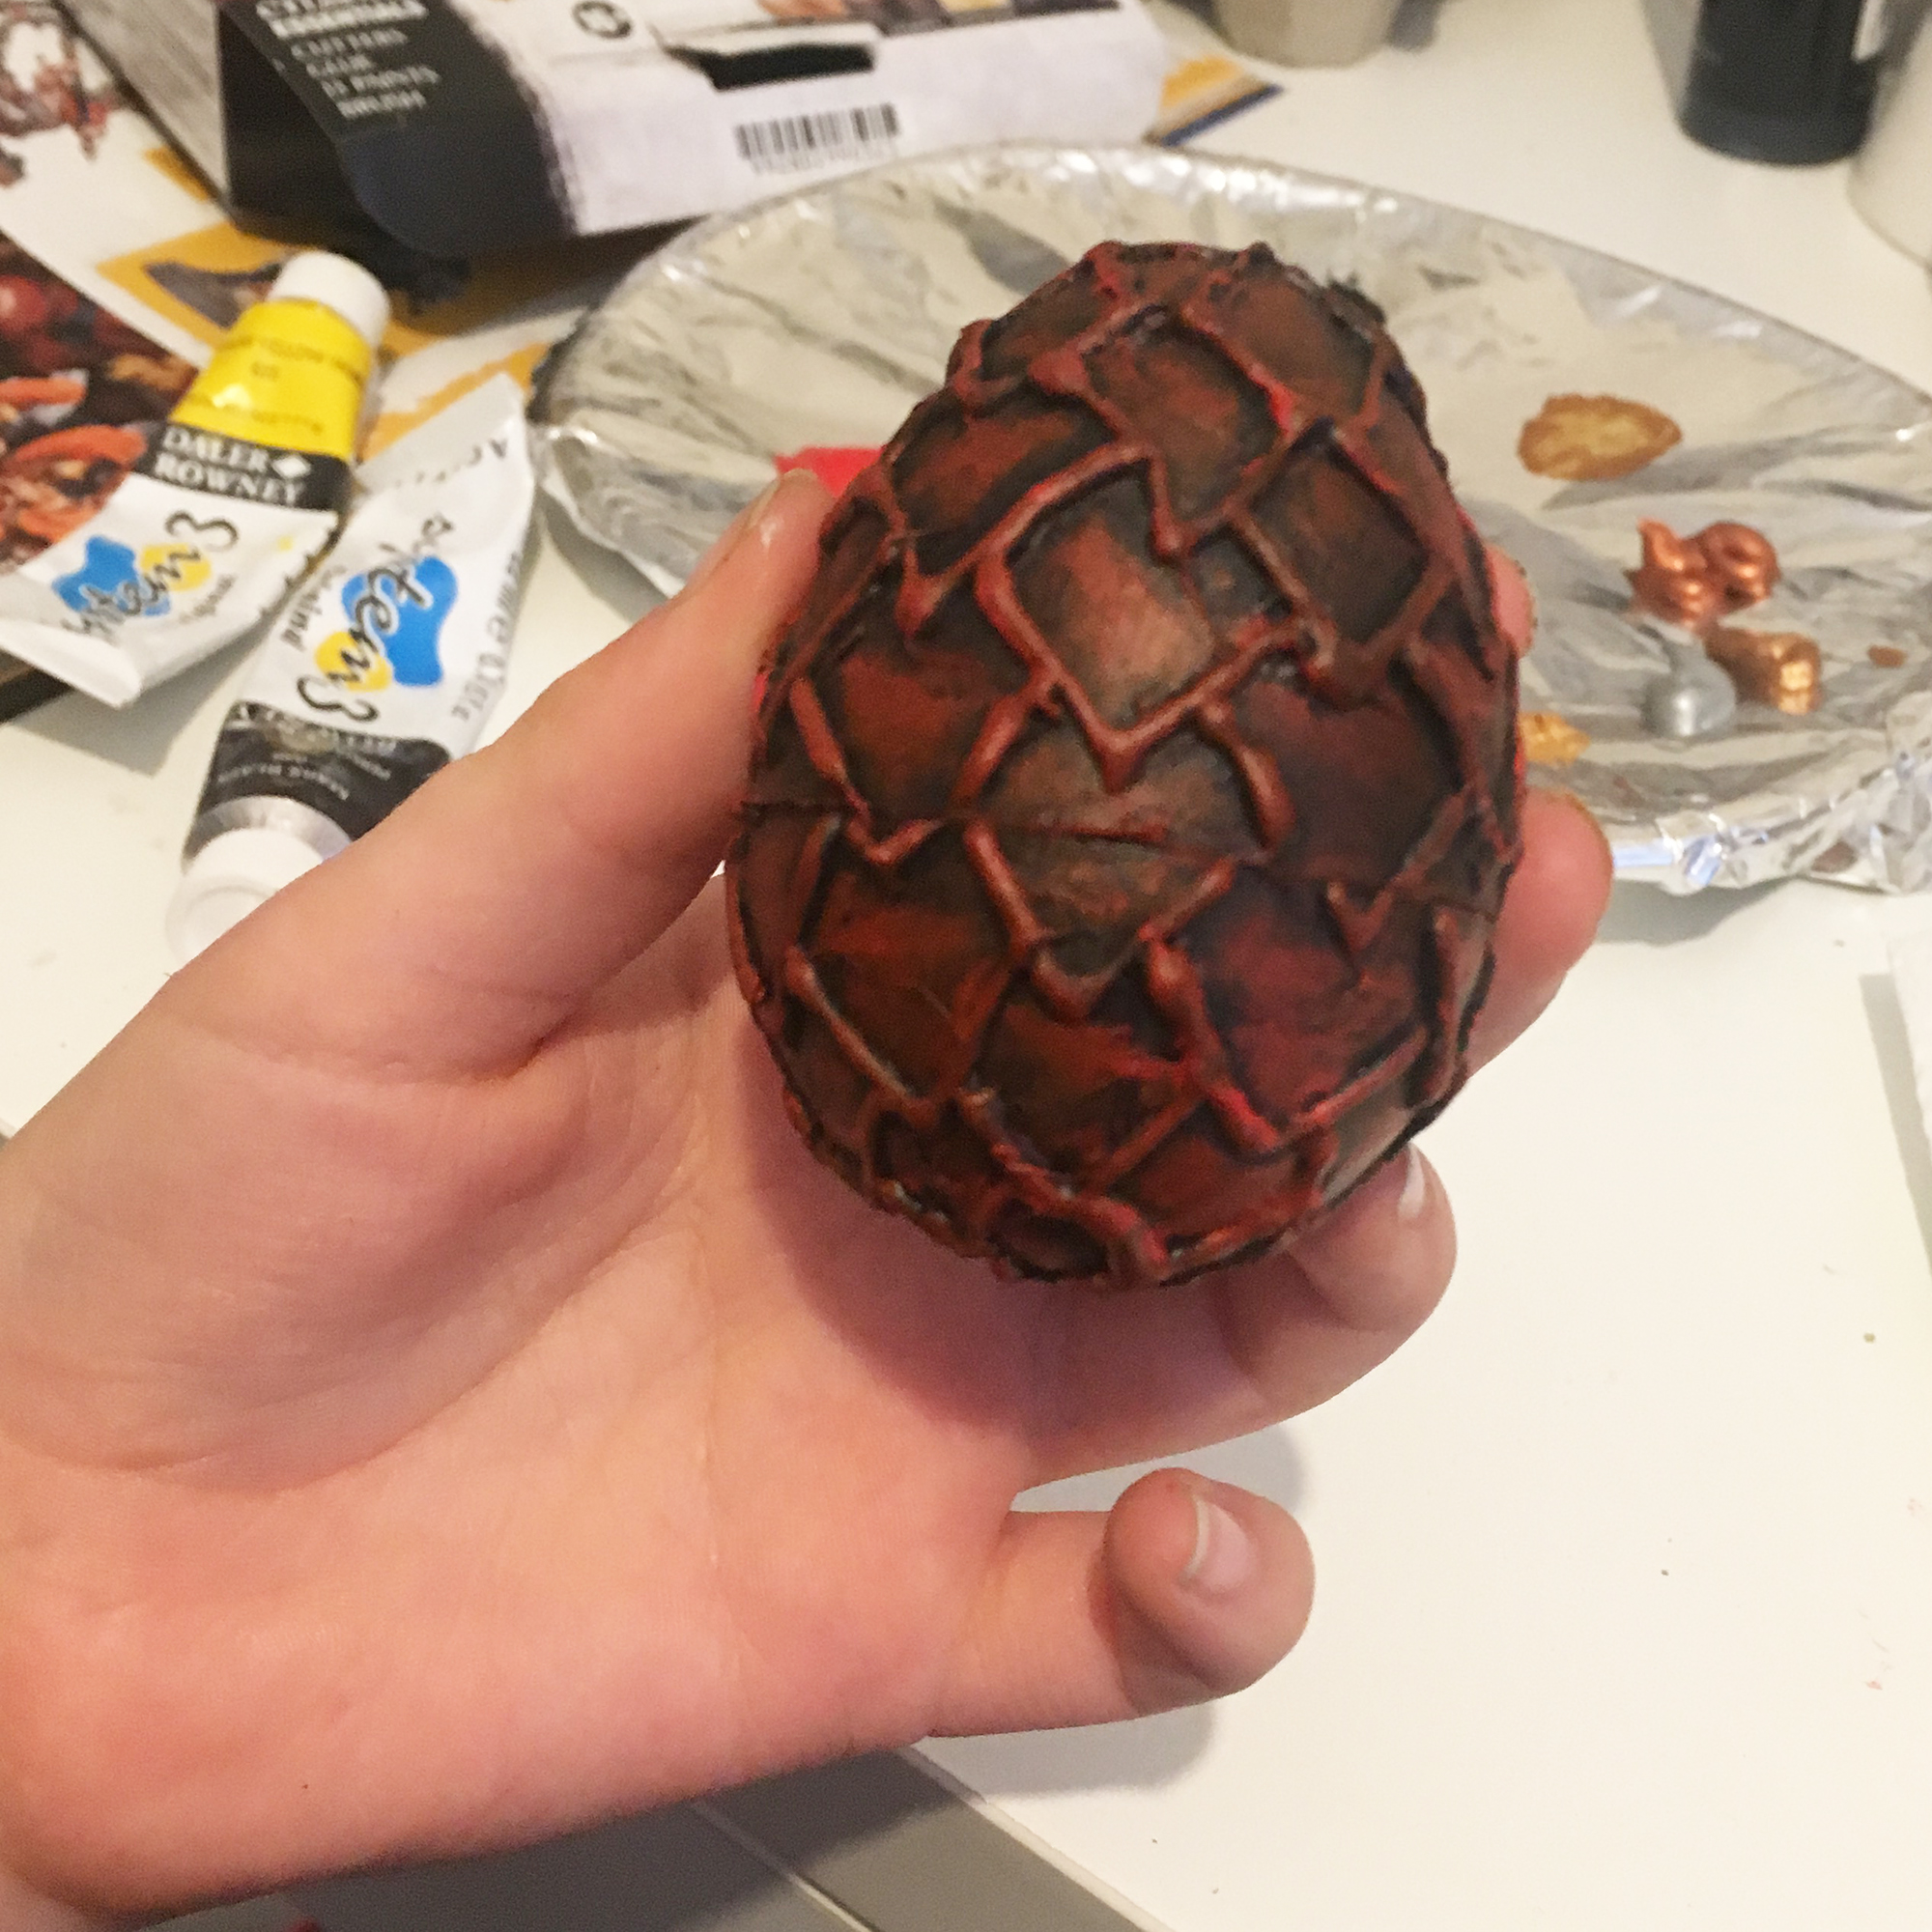
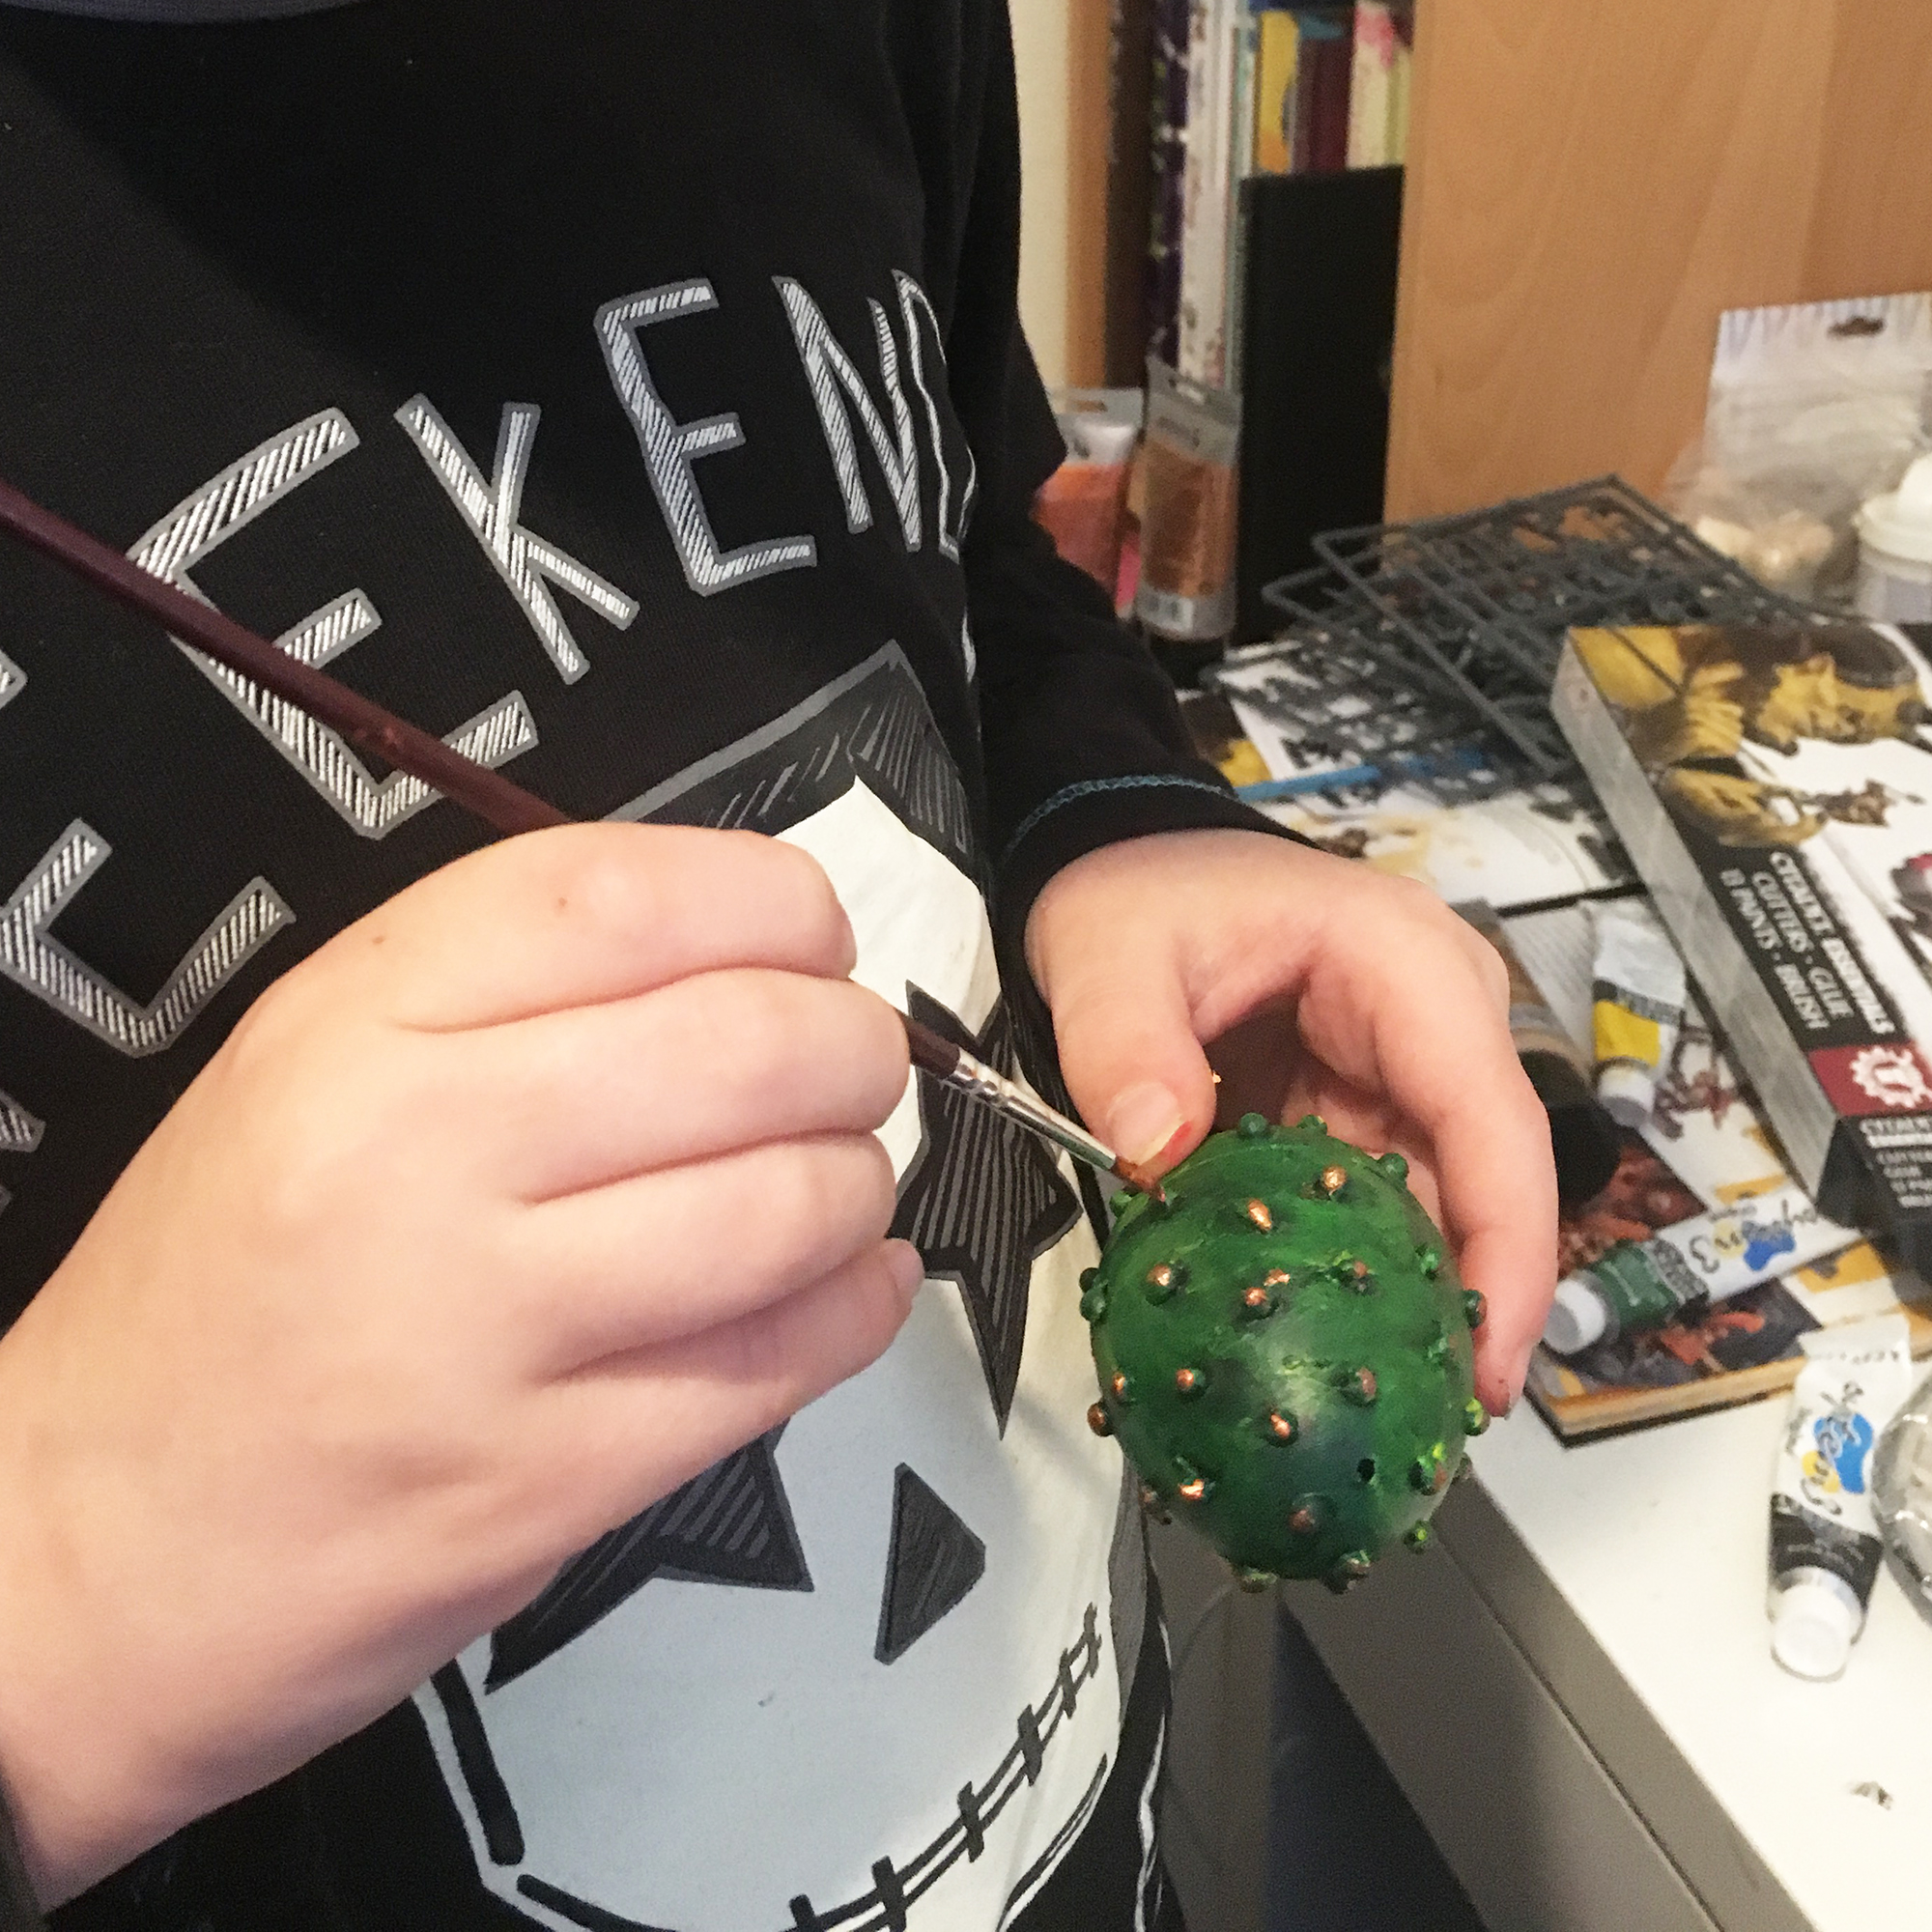
Step 4
Apply a coat of Mod Podge to seal the paint, then leave to dry.

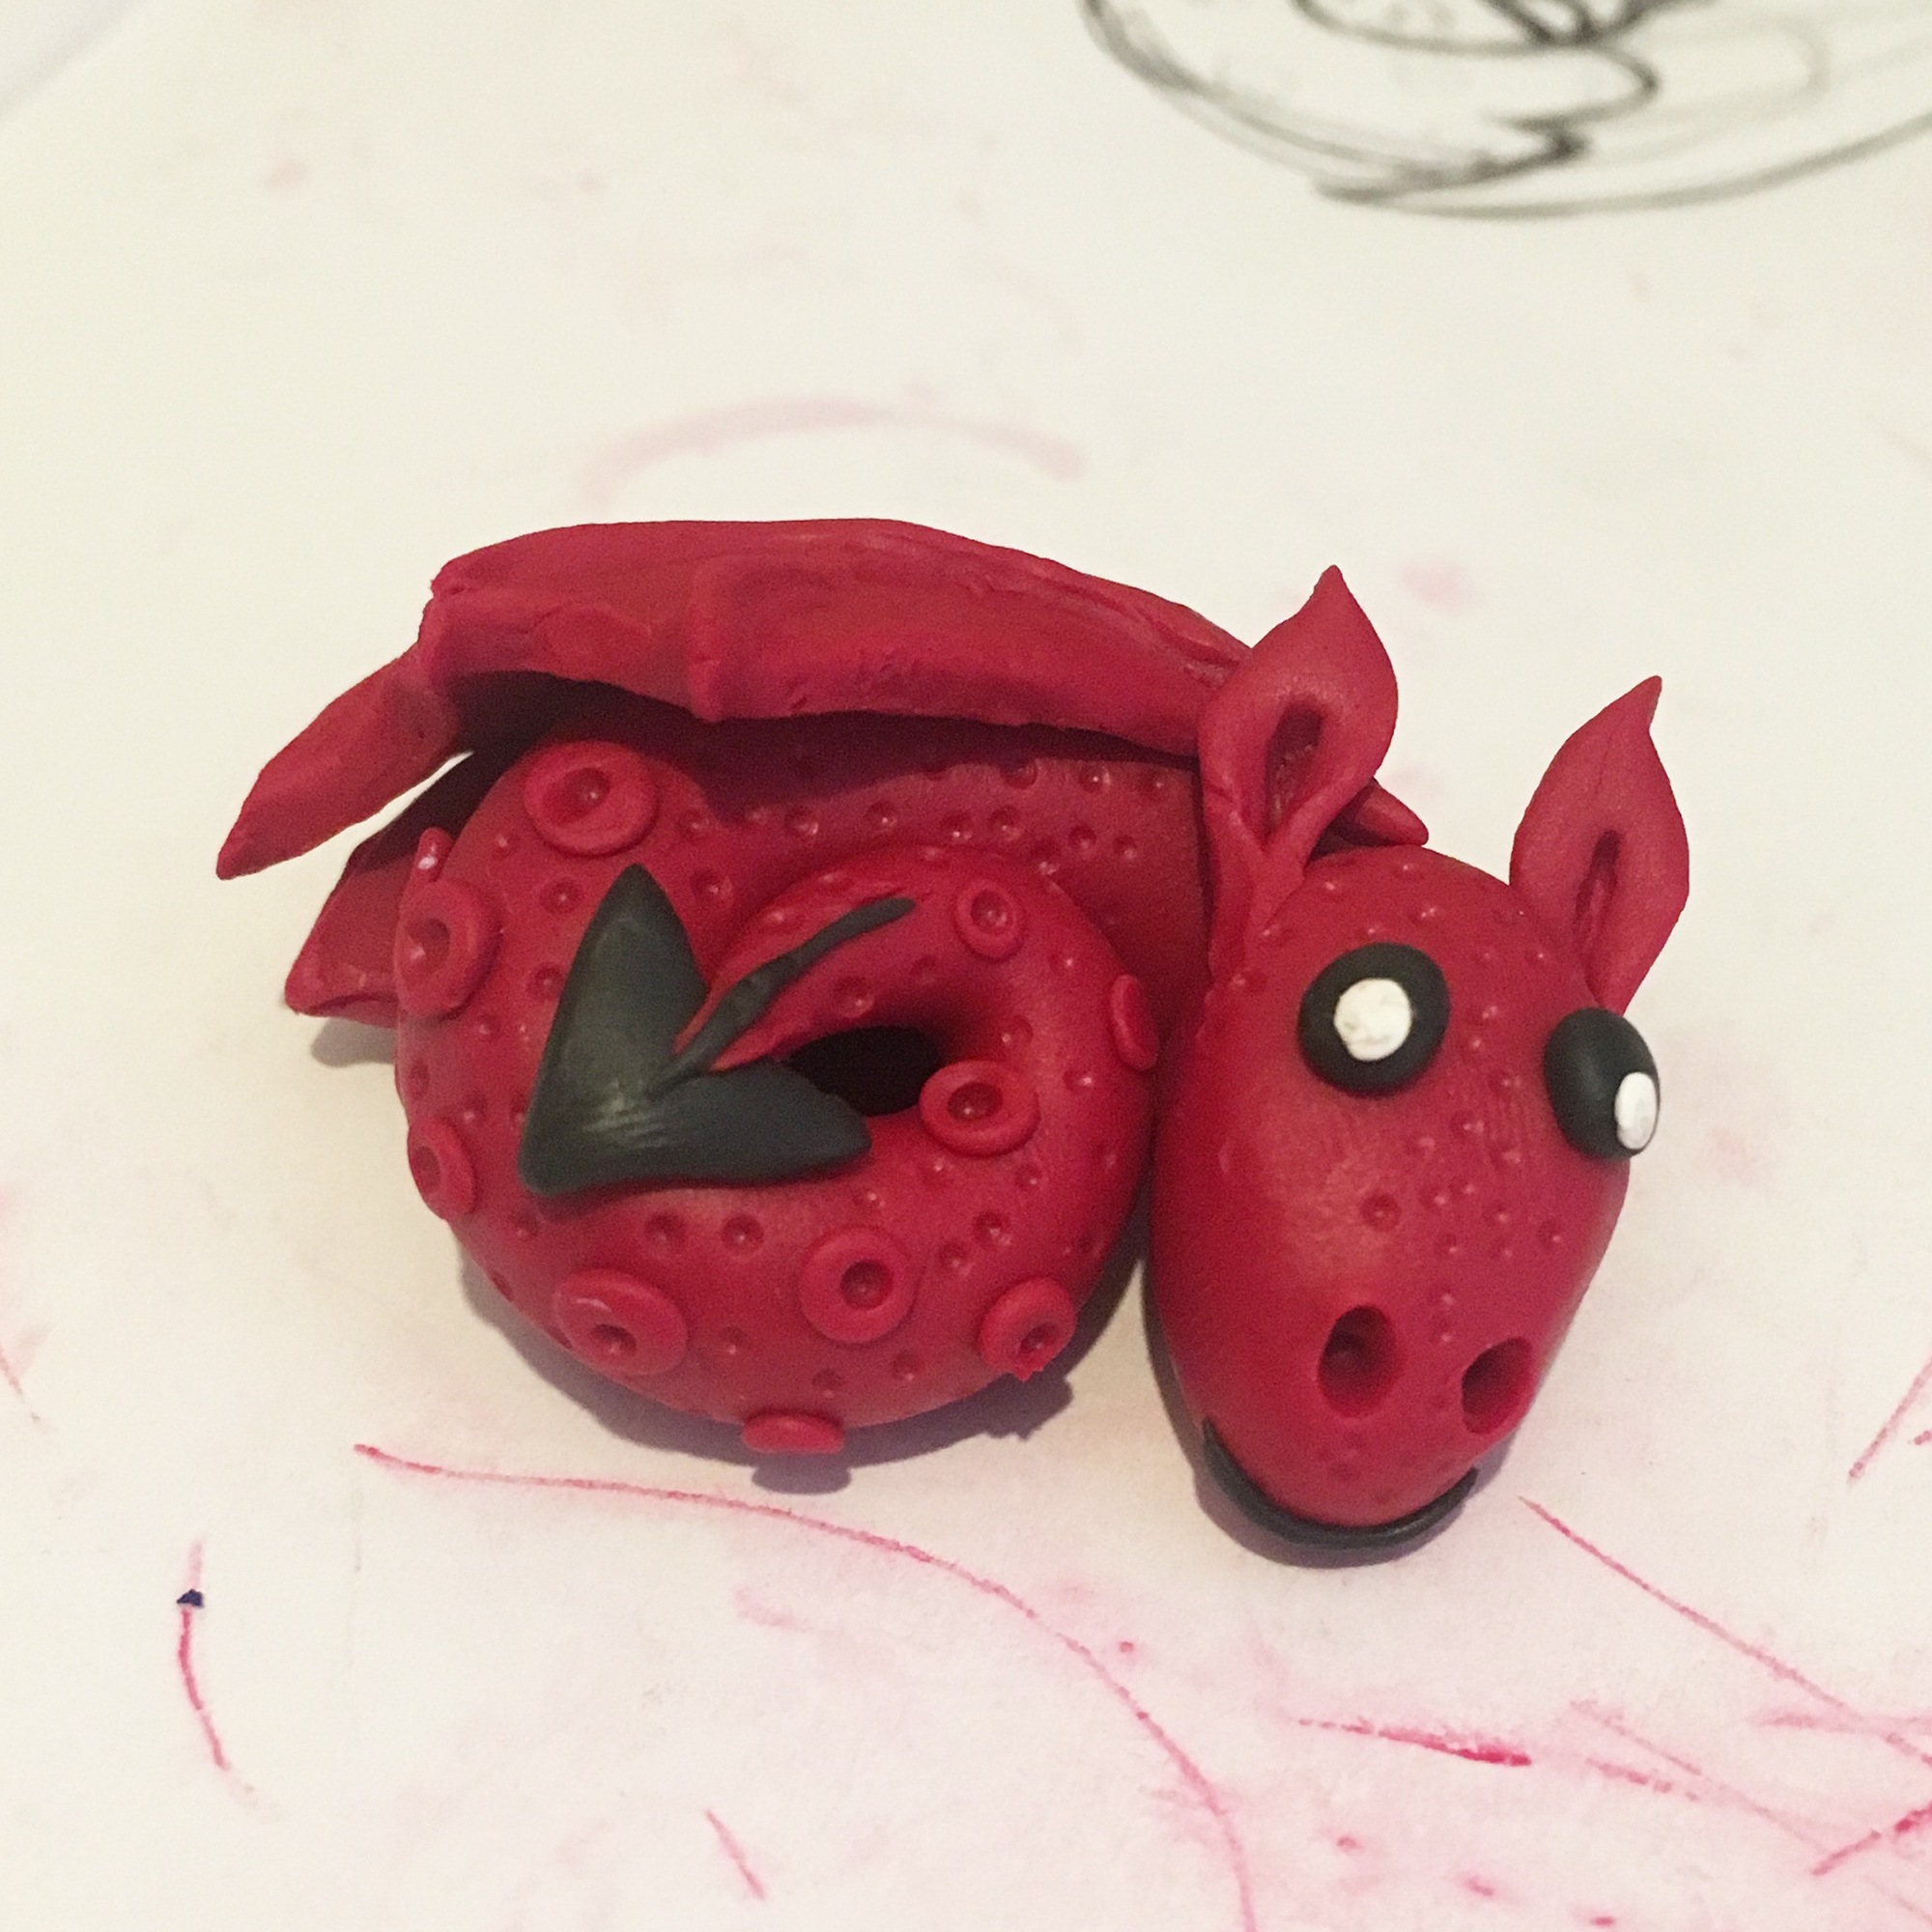
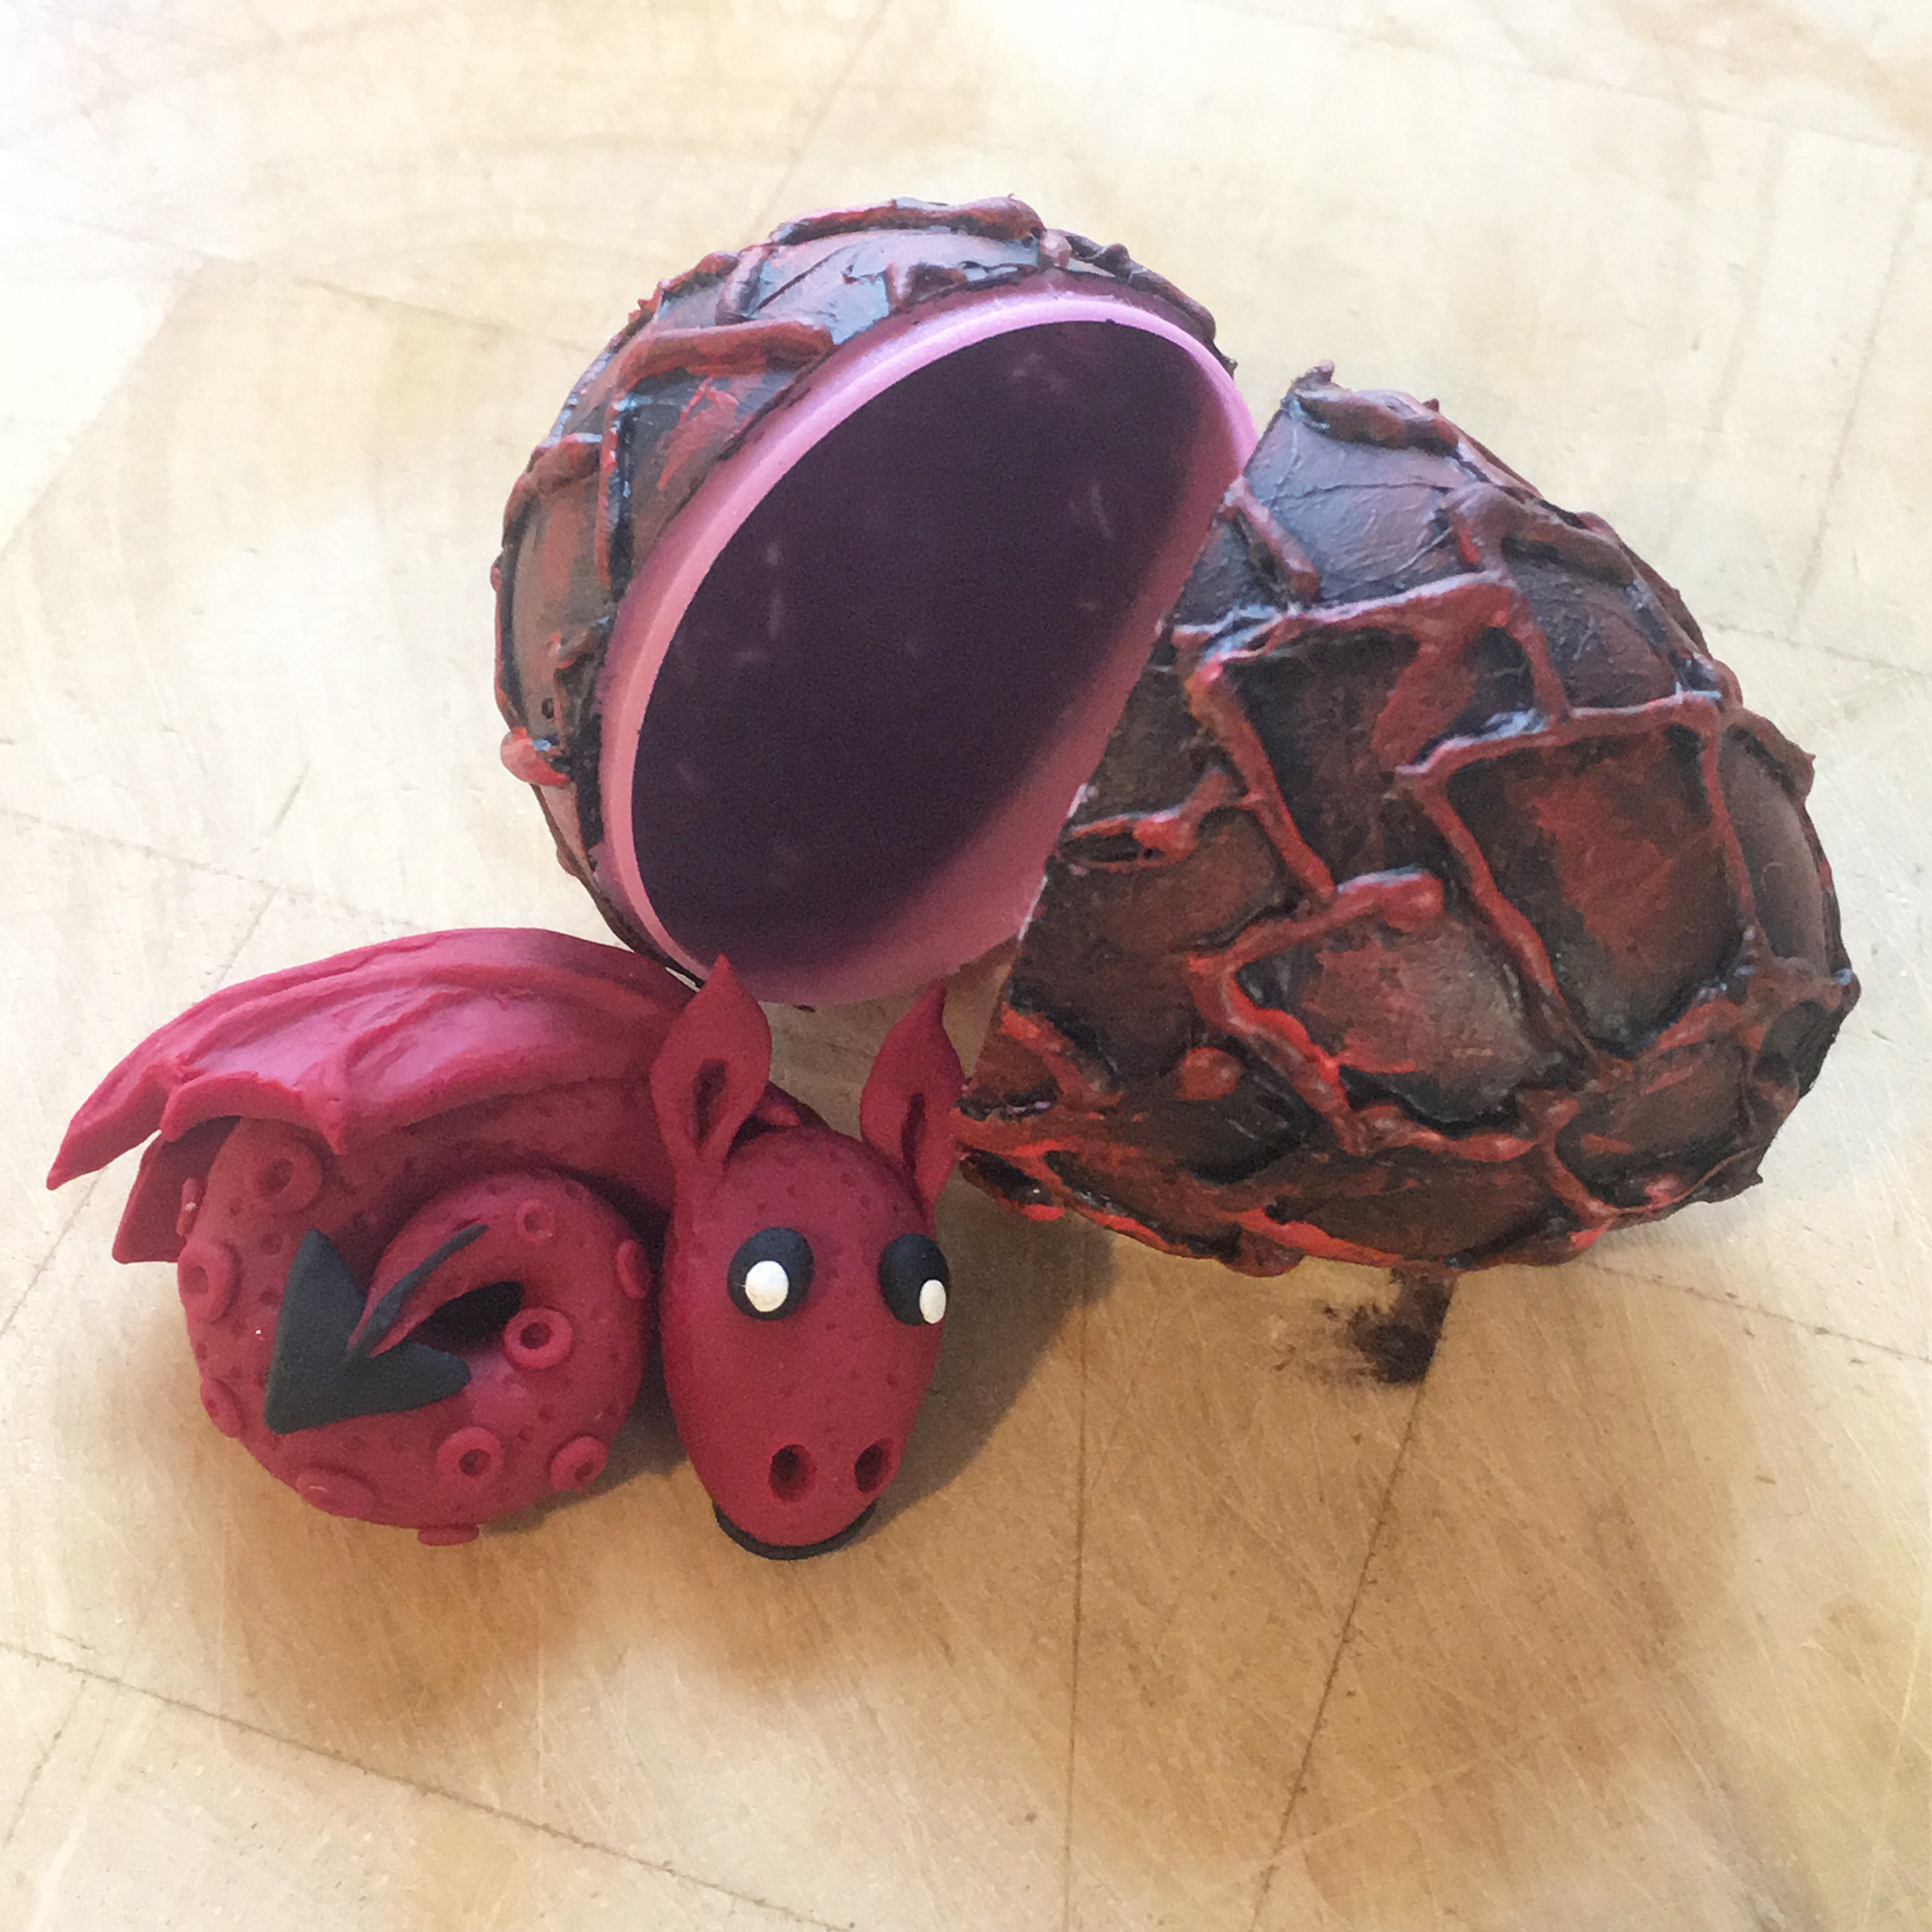
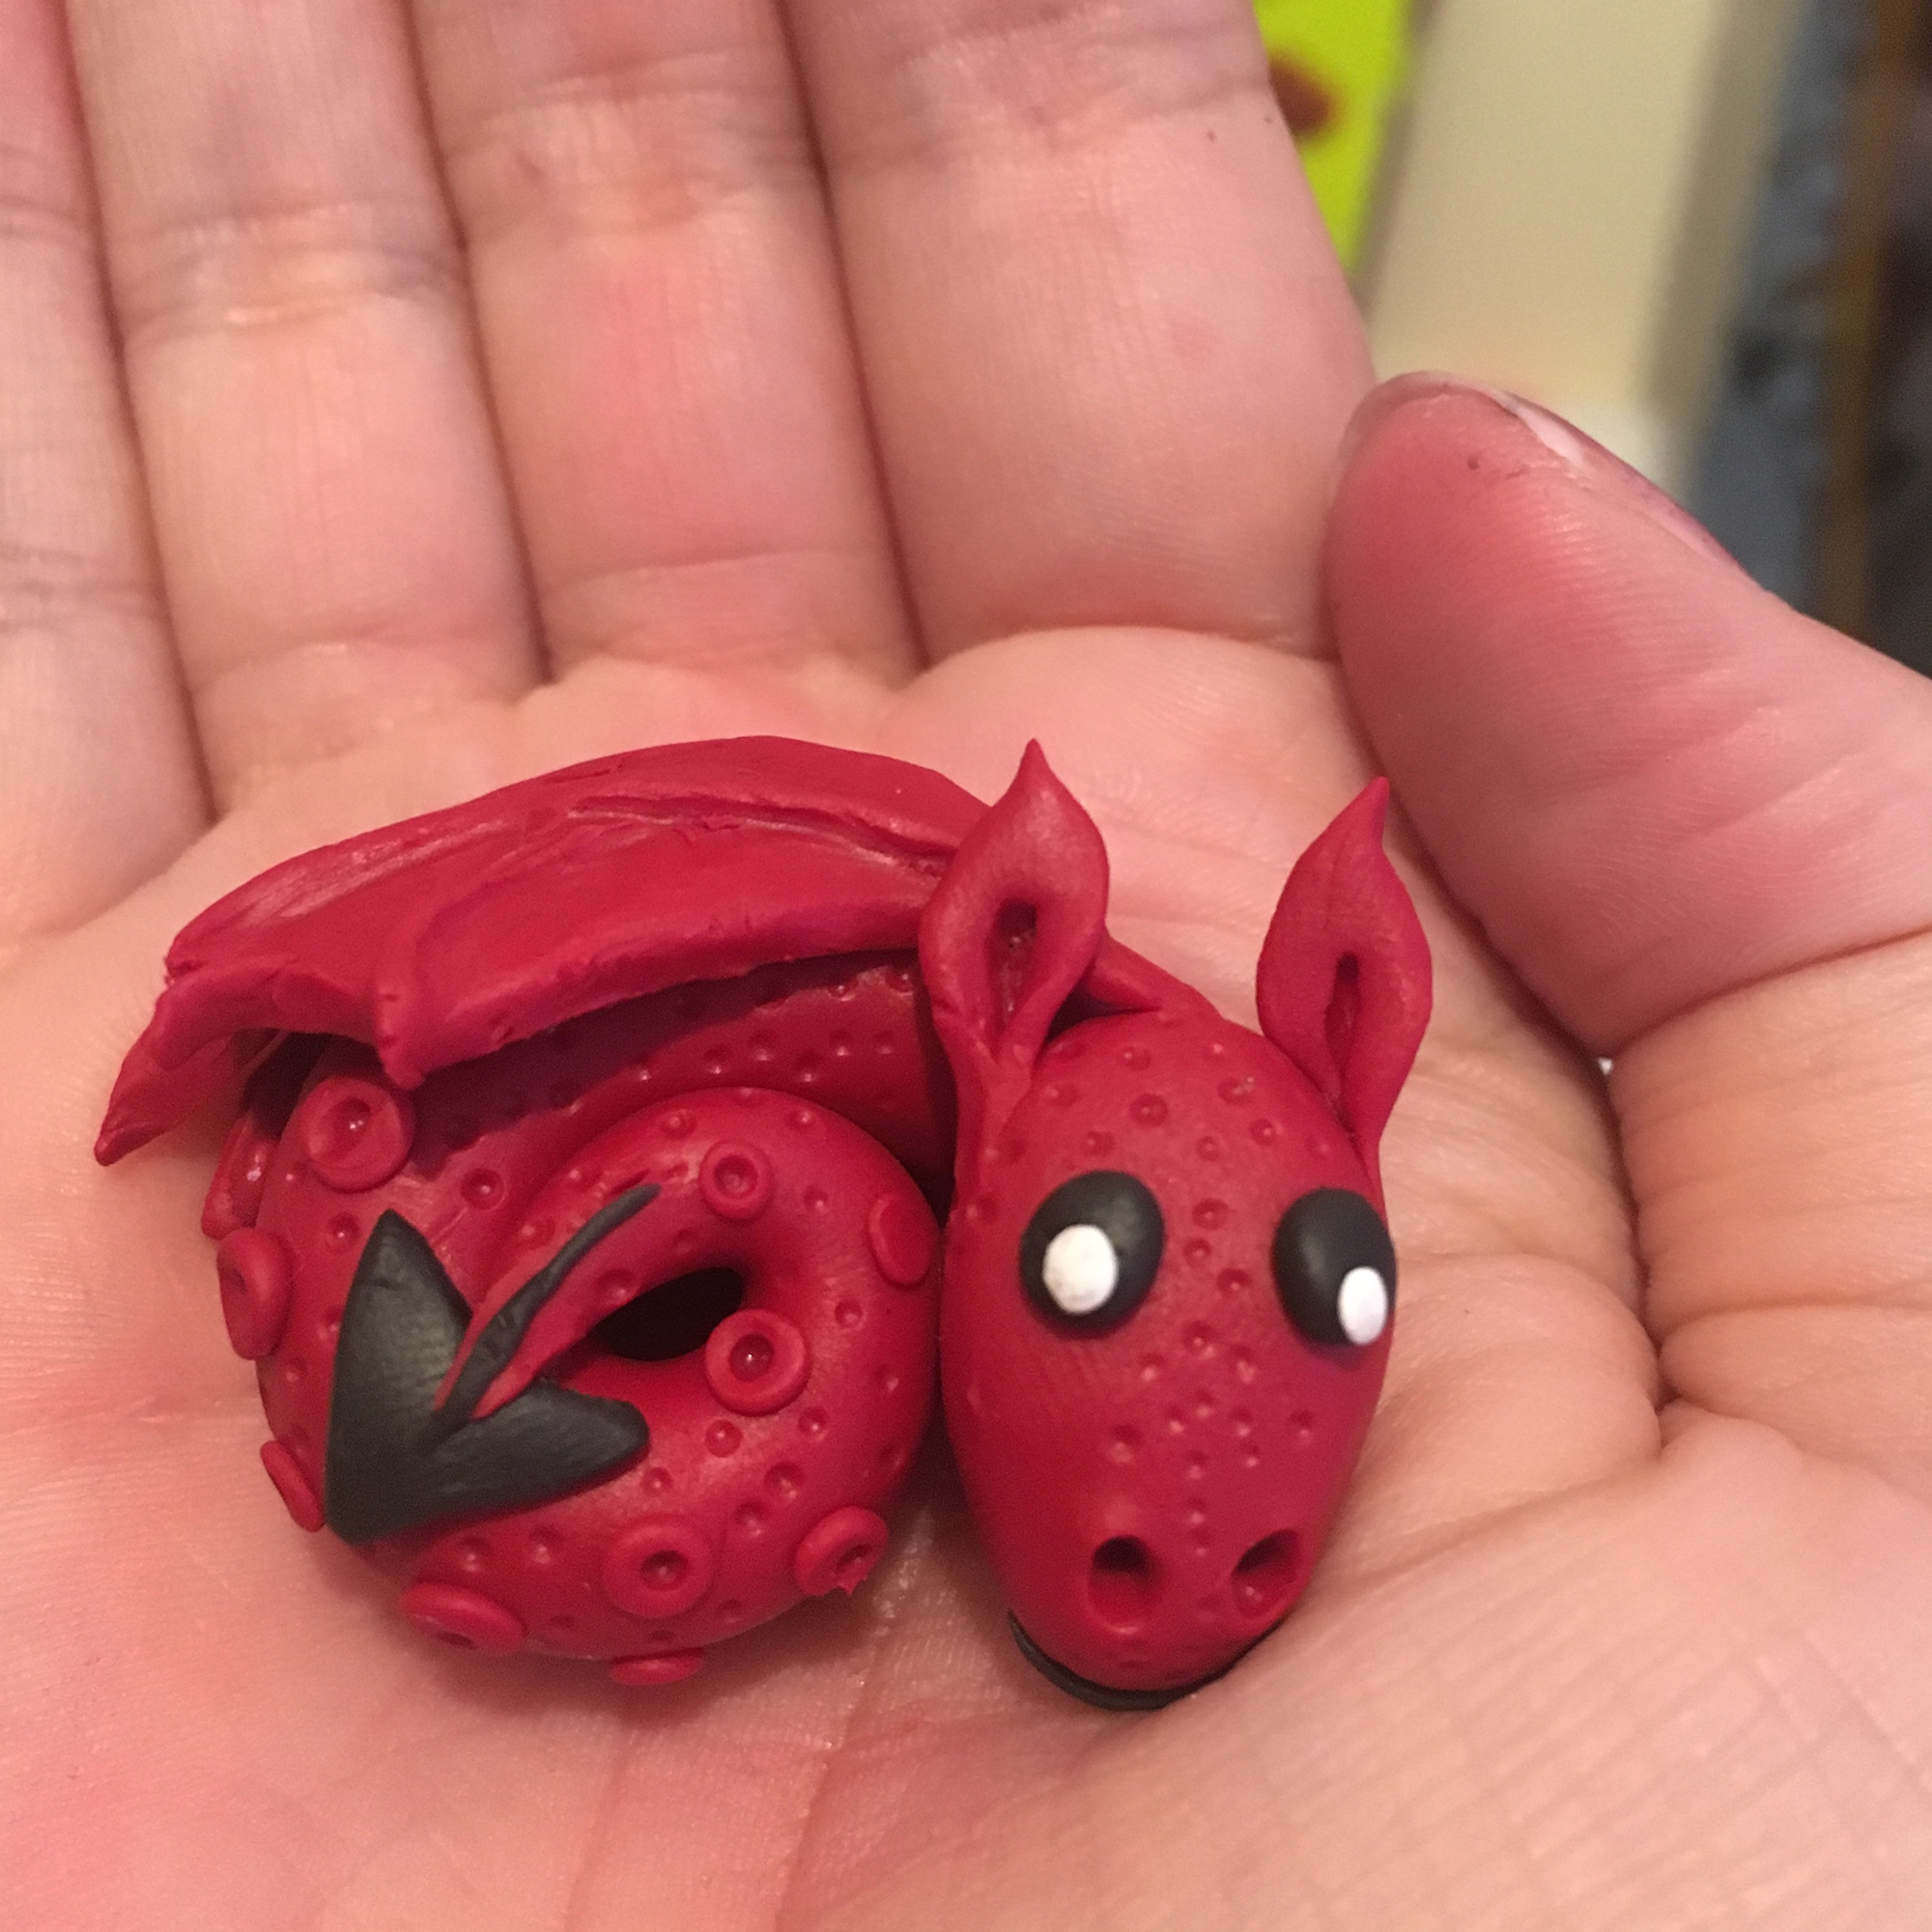
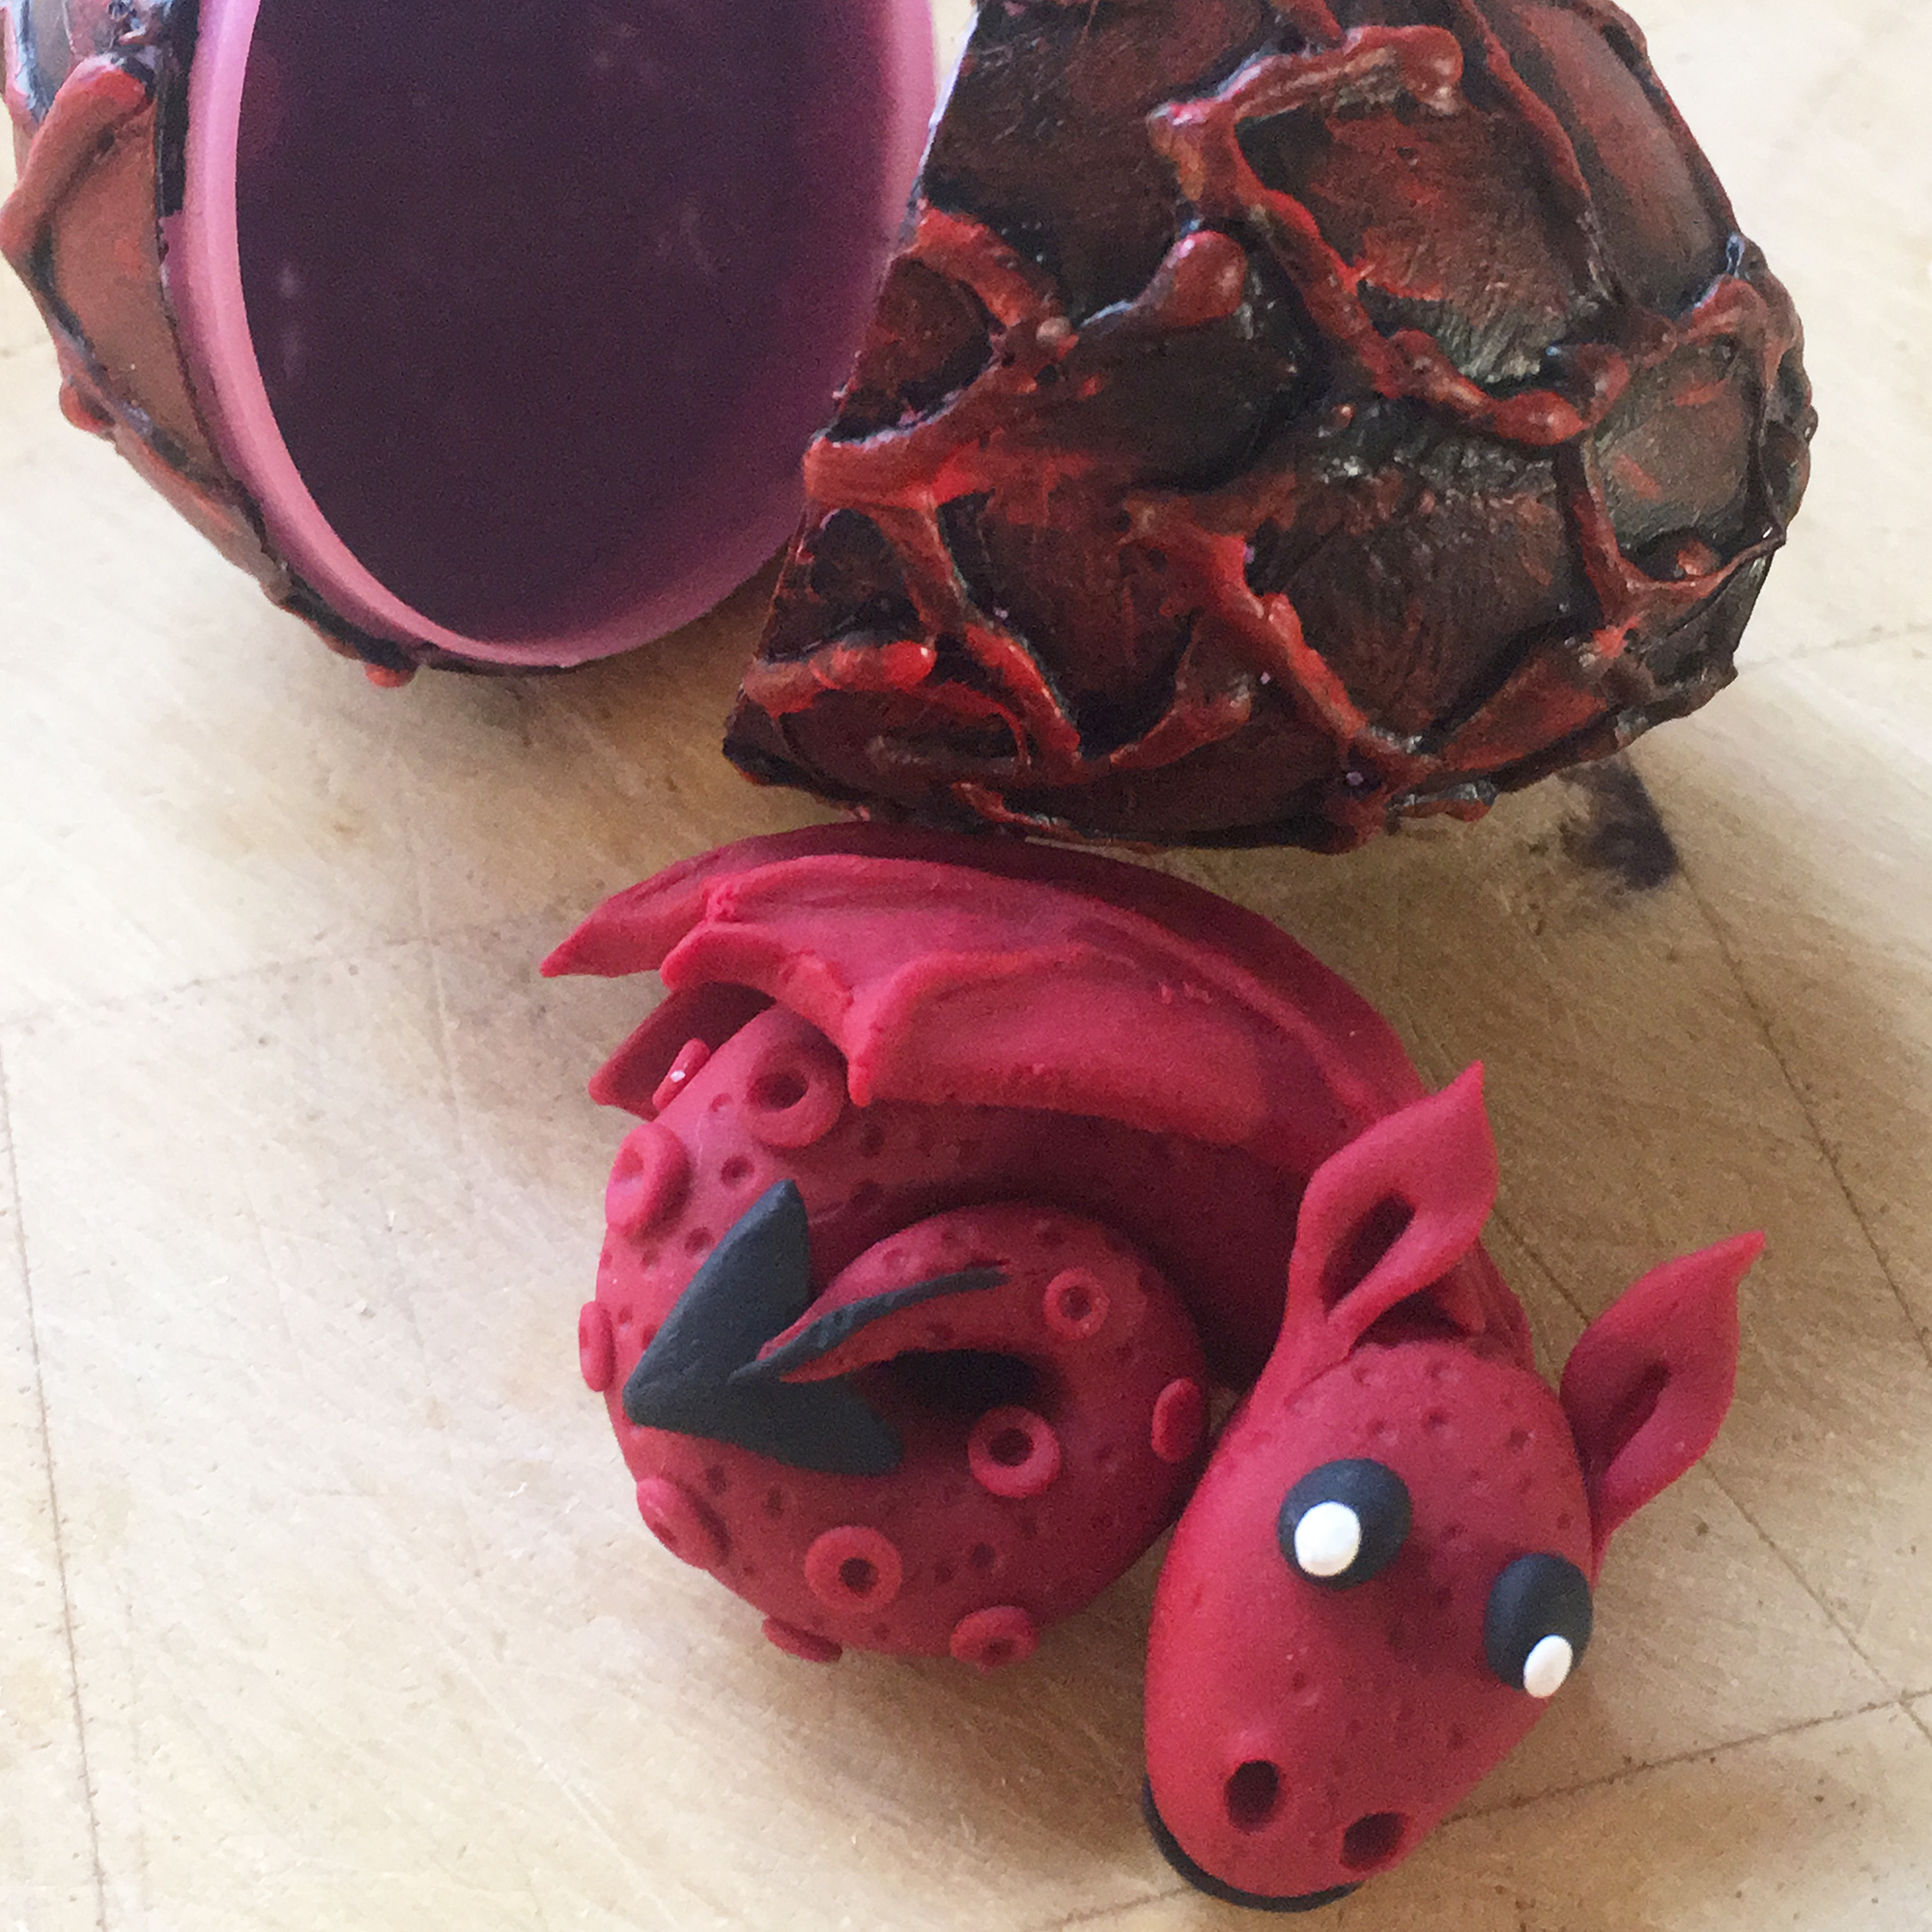
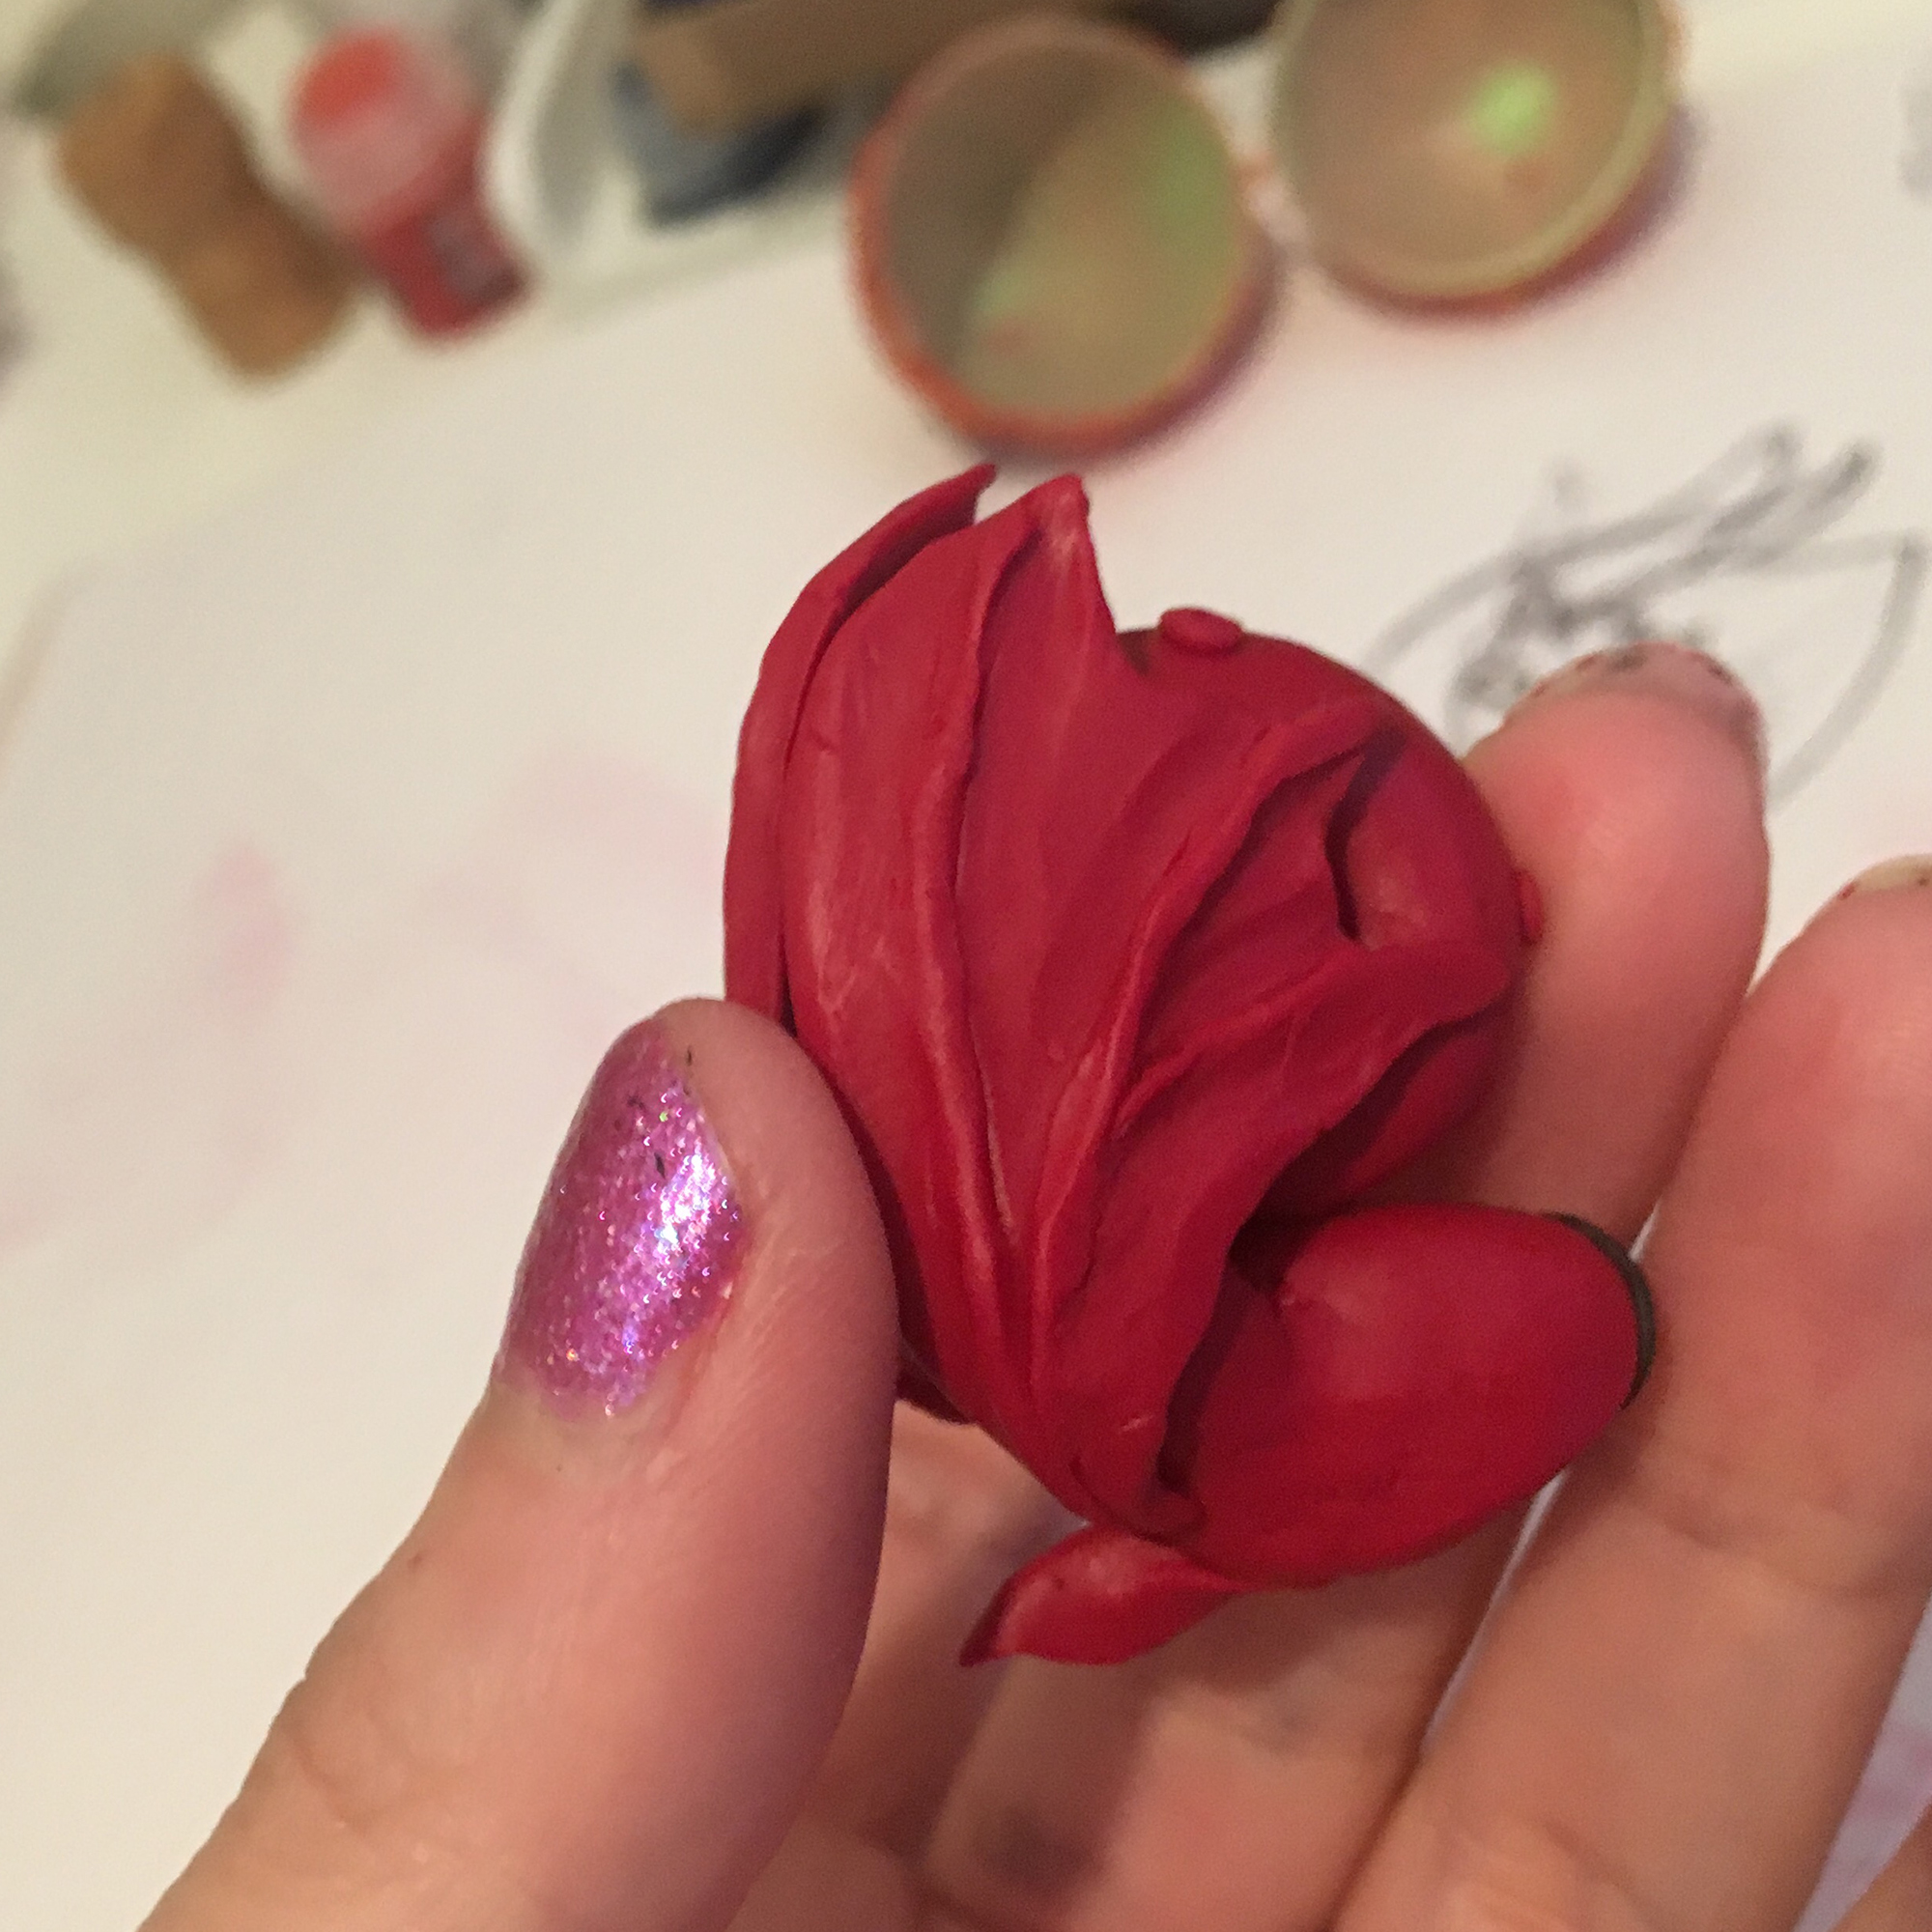
Making the tiny Dragon:

Step 1
Ensure you create a dragon small enough fit inside your egg (if that is what you want to achieve). It could be slightly bigger as if it has just hatched! First, make the head and body using sculpting tools.

Step 2
Sculpt the wings. These can be quite difficult so we did some research on the internet first. It helps to draw a wing on paper to use as a template. Once we had a wing we liked, we used the template, flipped it and used it to make the second wing. You may be able to get away with just the one wing. Attach these to the body.
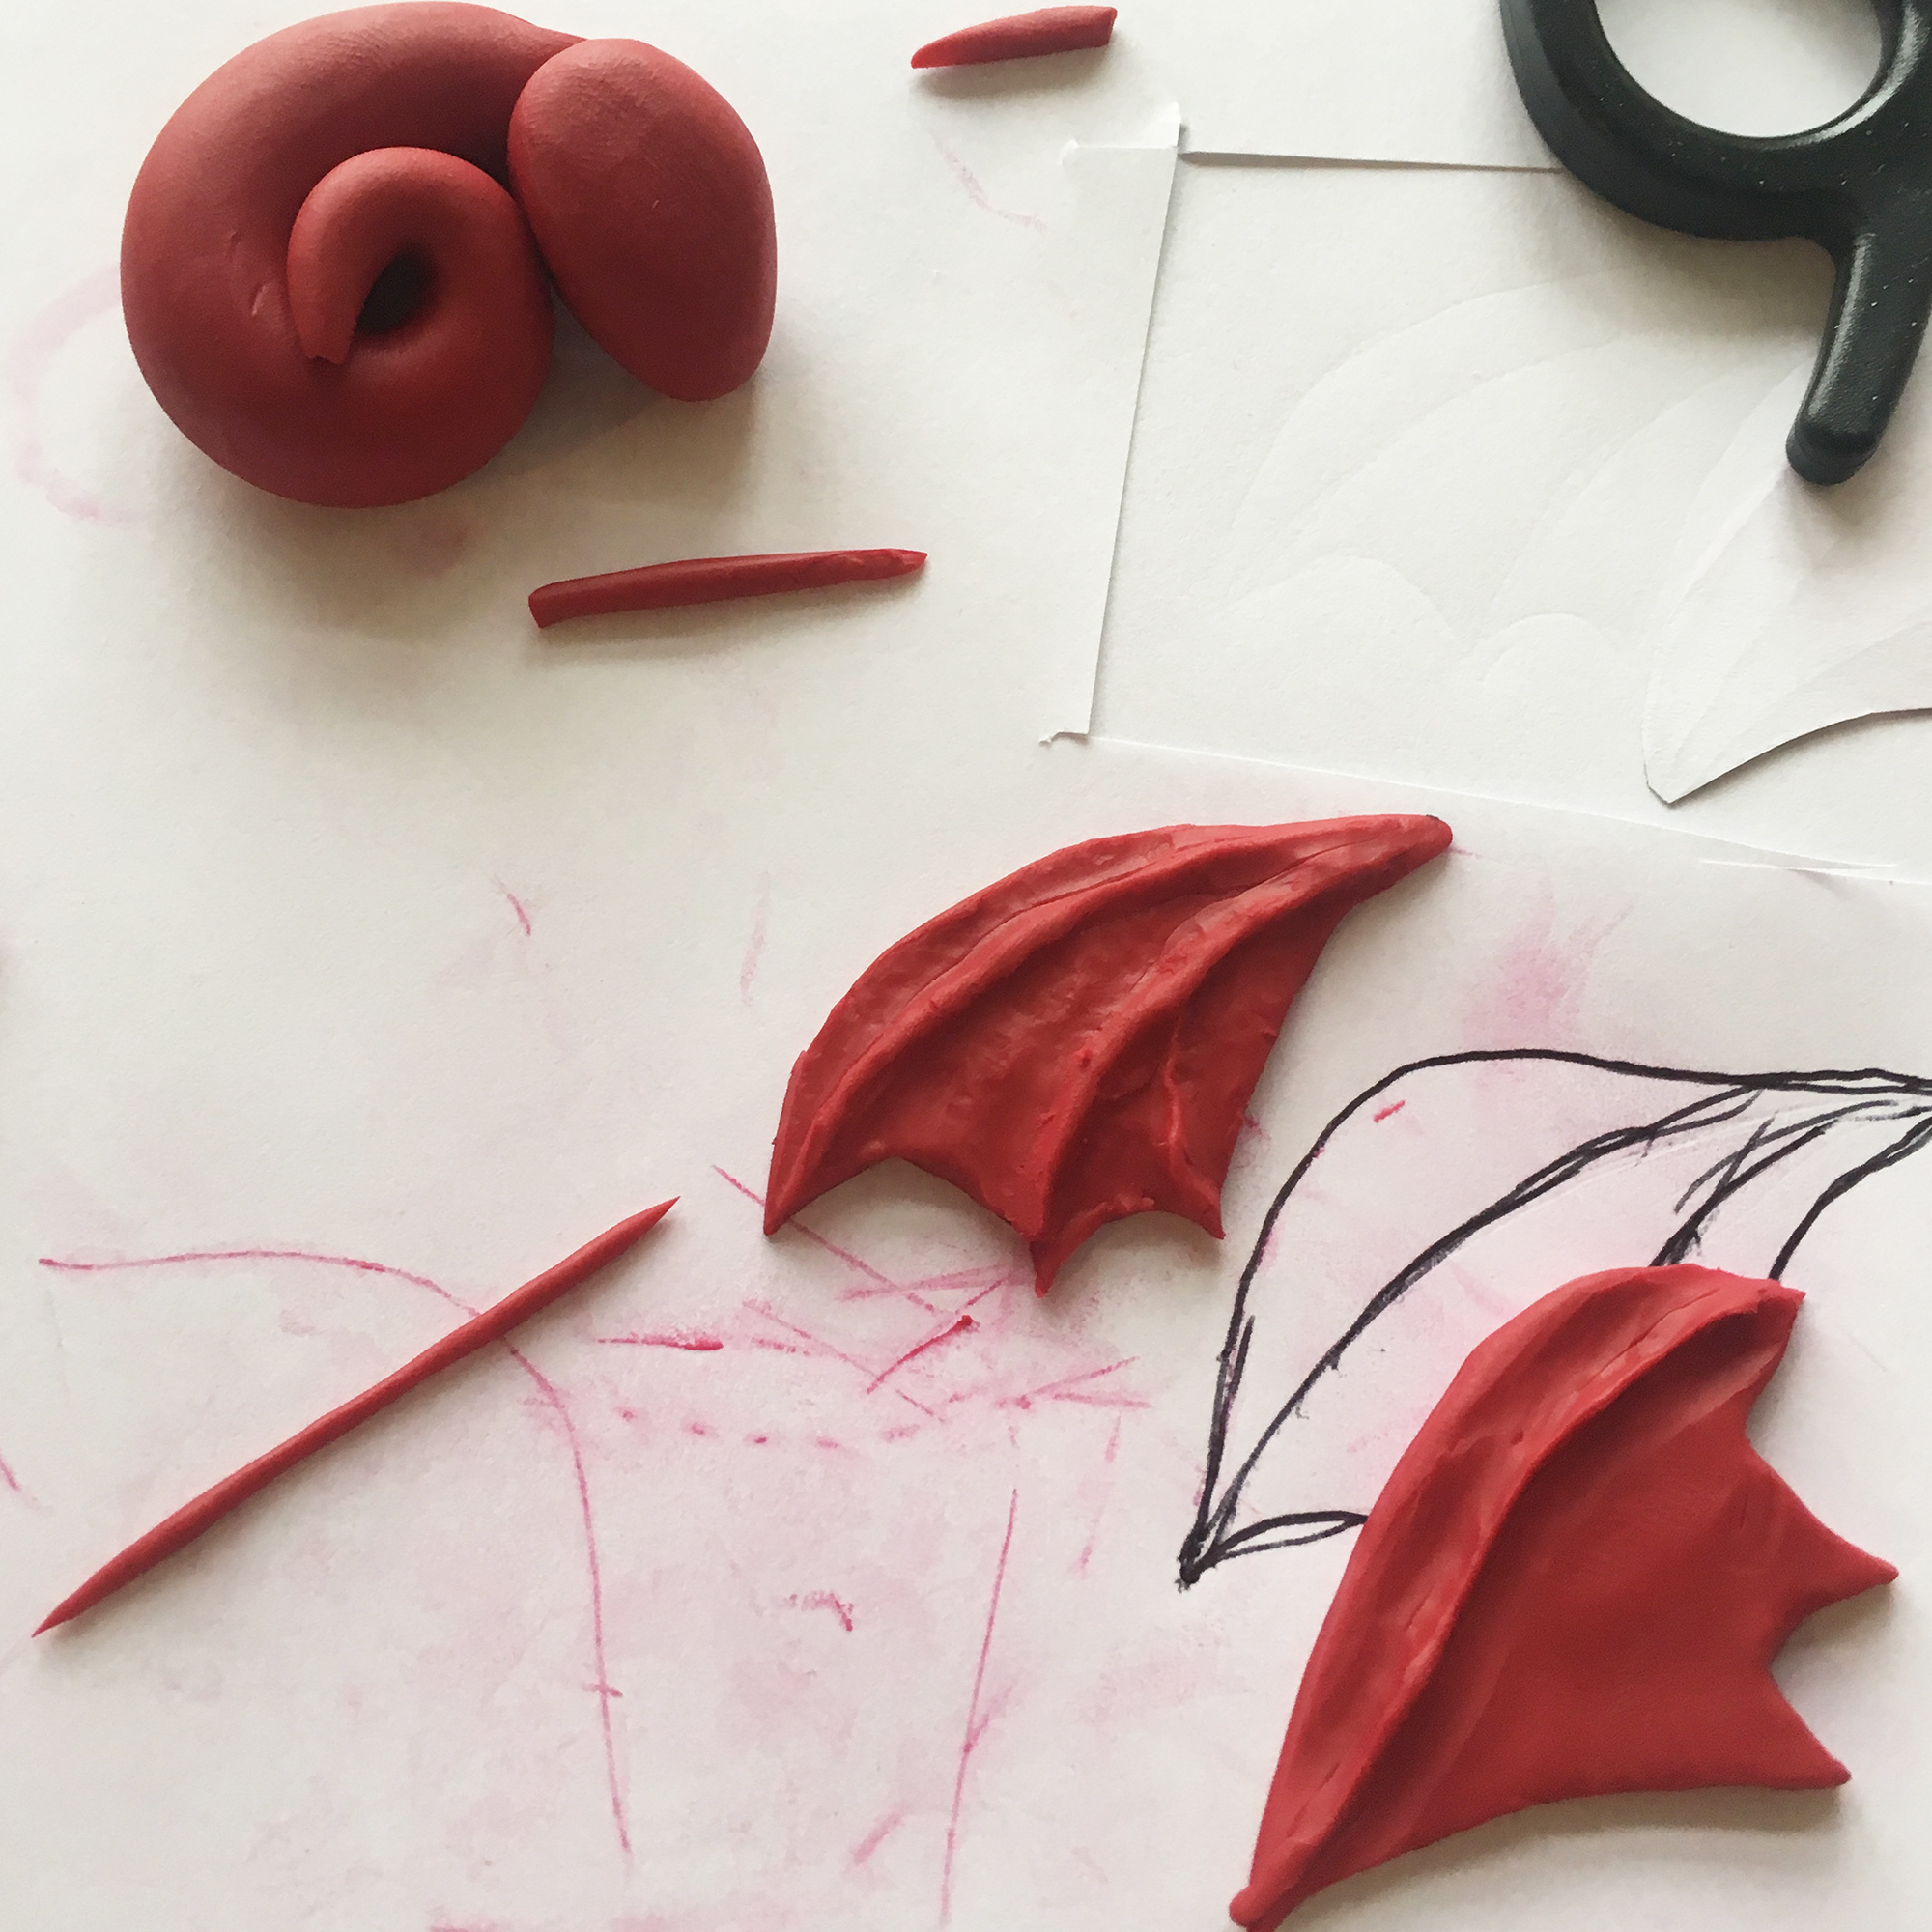
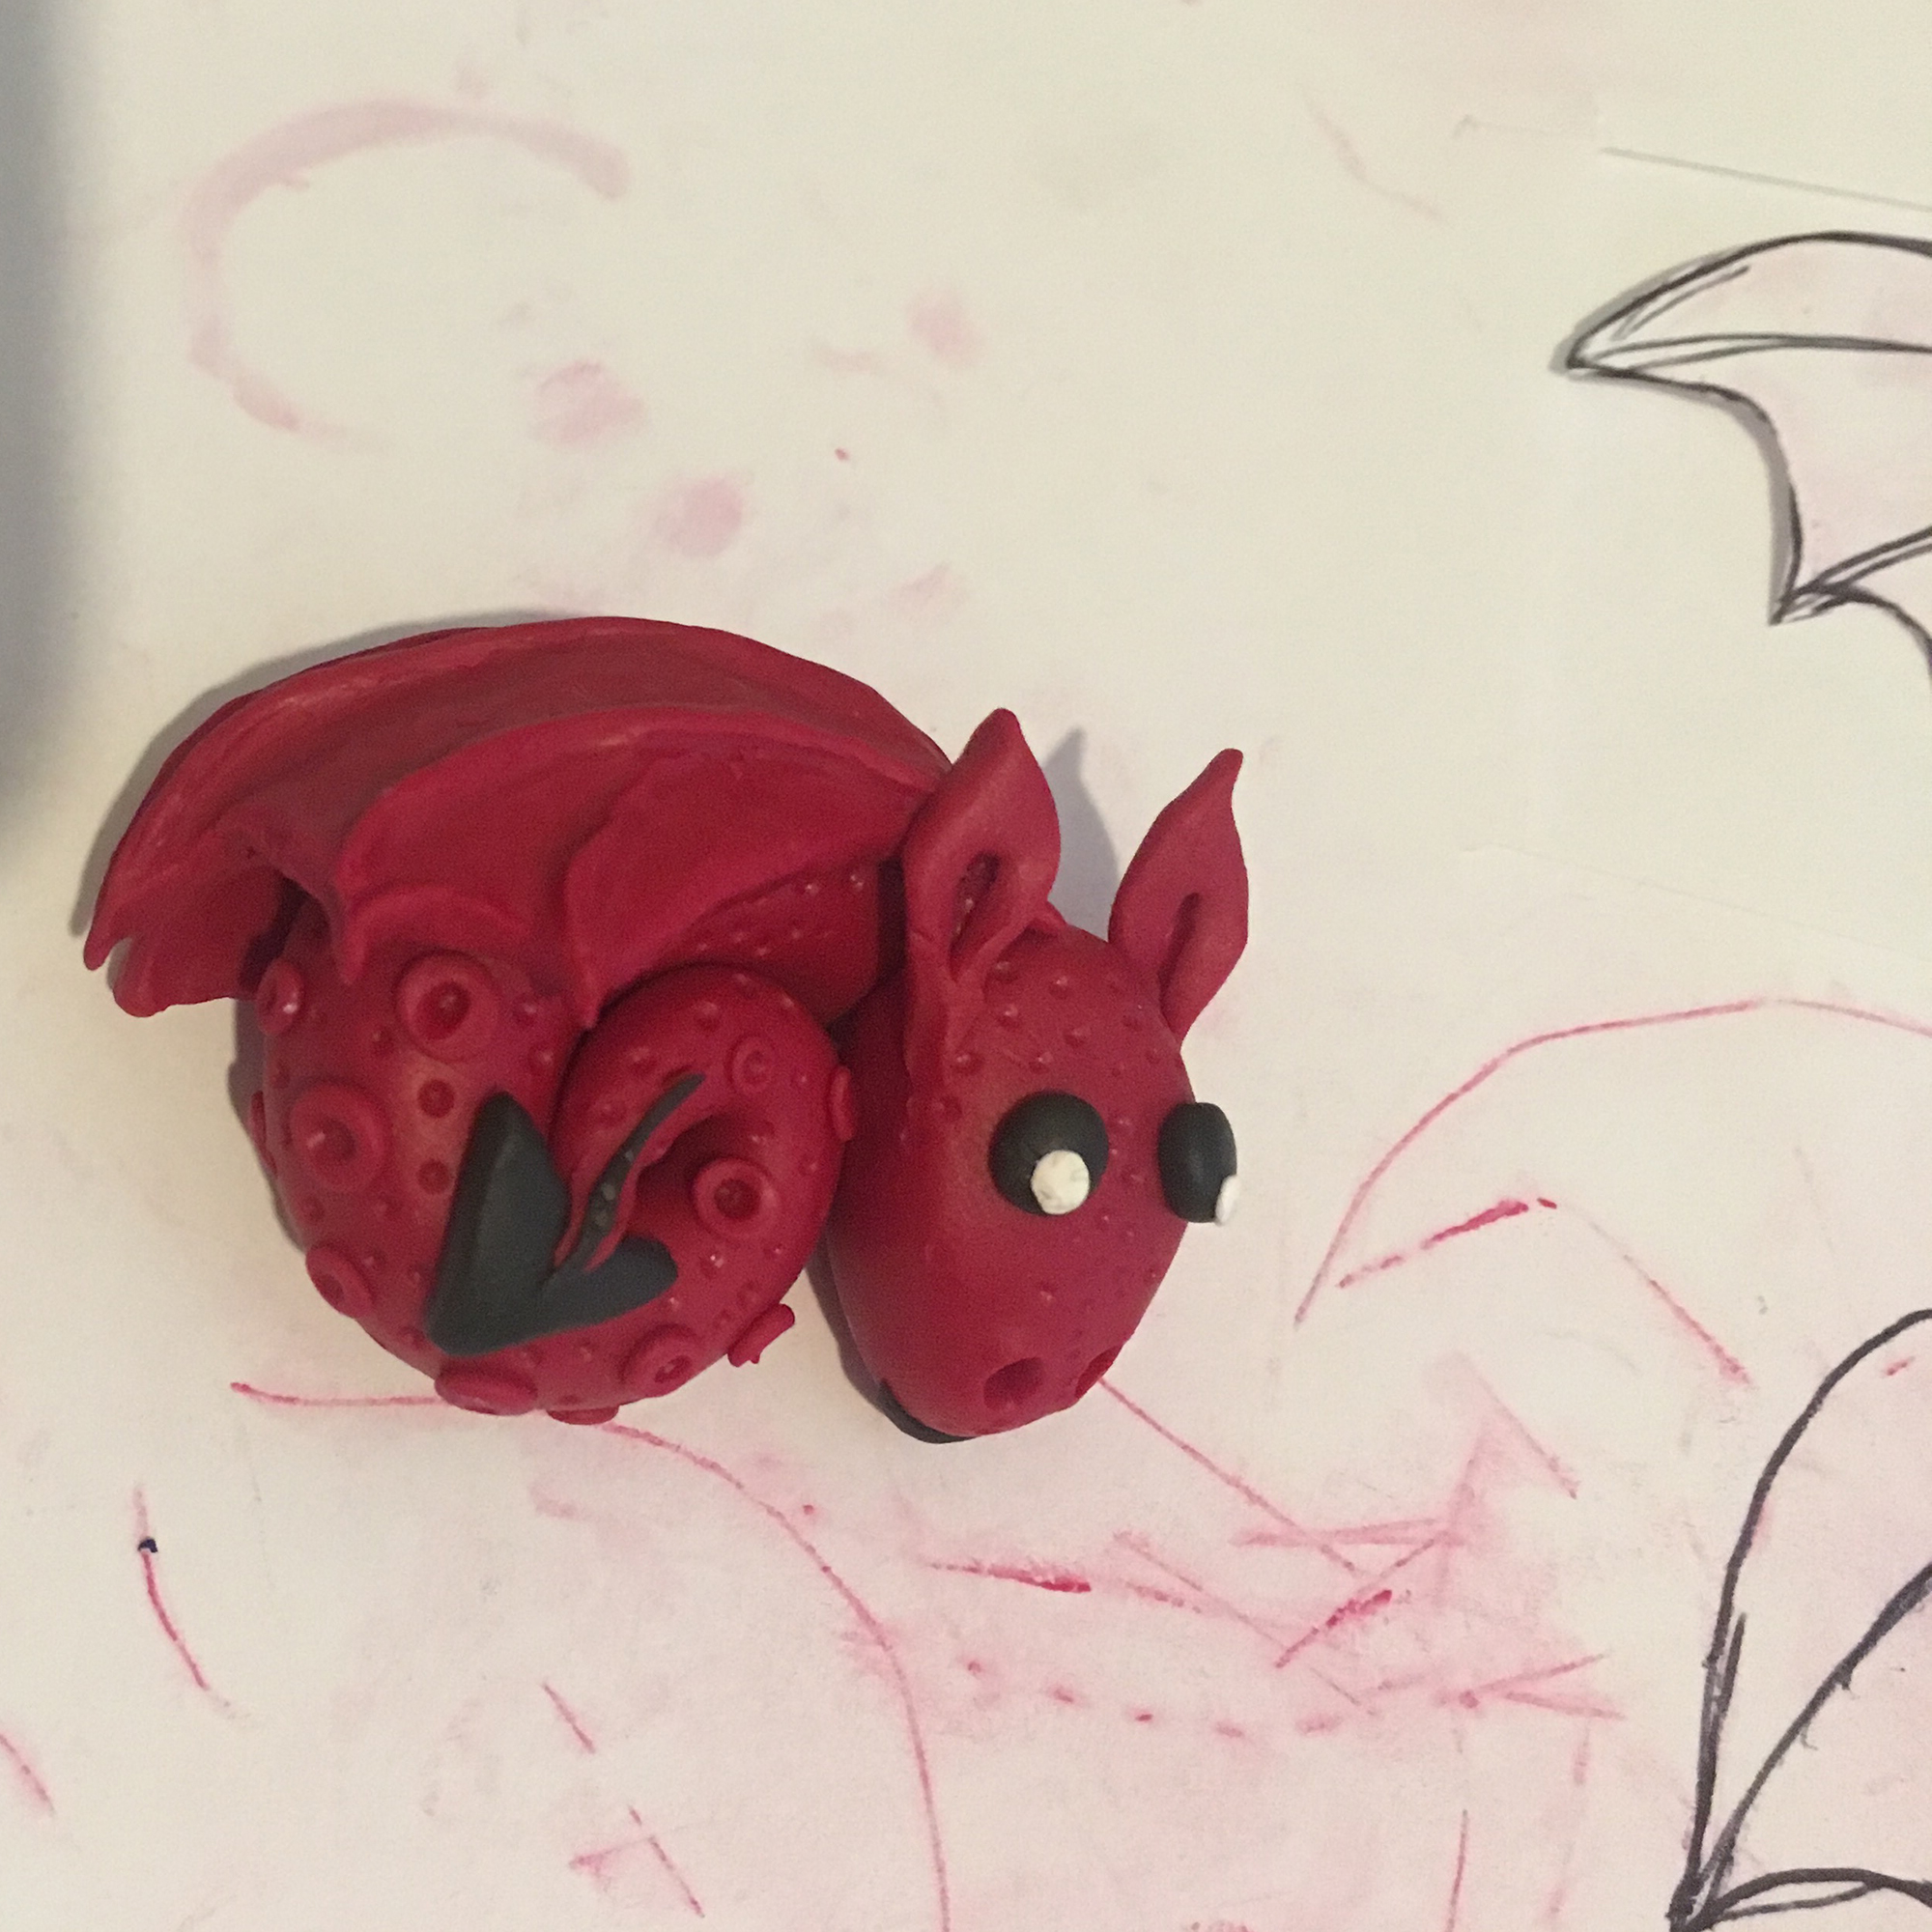

Step 3
Make some ears, a tail and the eyes.
Step 4
Add details. We used a pen and made tiny holes to add texture to the skin of the dragon. We also added details to the wings using sculpting tools.