

Here’s how to get creative and make these simple wands by Lottie Makes. (A low melt glue gun is needed, and may be worth a purchase if you don’t have one and love crafting, as they are relatively inexpensive.) Small children may need help with the glue gun but will be able to project manage how they would like the glue placing! They can then do the decorating.
You will need:
- Sticks – go out for a walk and hunt out sticks that will make ideal wands!
- Glue gun – low melt is ideal (adult help and/or supervision required here)
- Acrylic Paints – including metallic colours
- Brushes
- Beads and fascinators – skeleton heads, stones etc.
- Glitter/ sequins
- Mod Podge or PVA for a protective coat
Step 1
Choose your sticks. Ensure they are smooth and have a clean surface.
Step 2

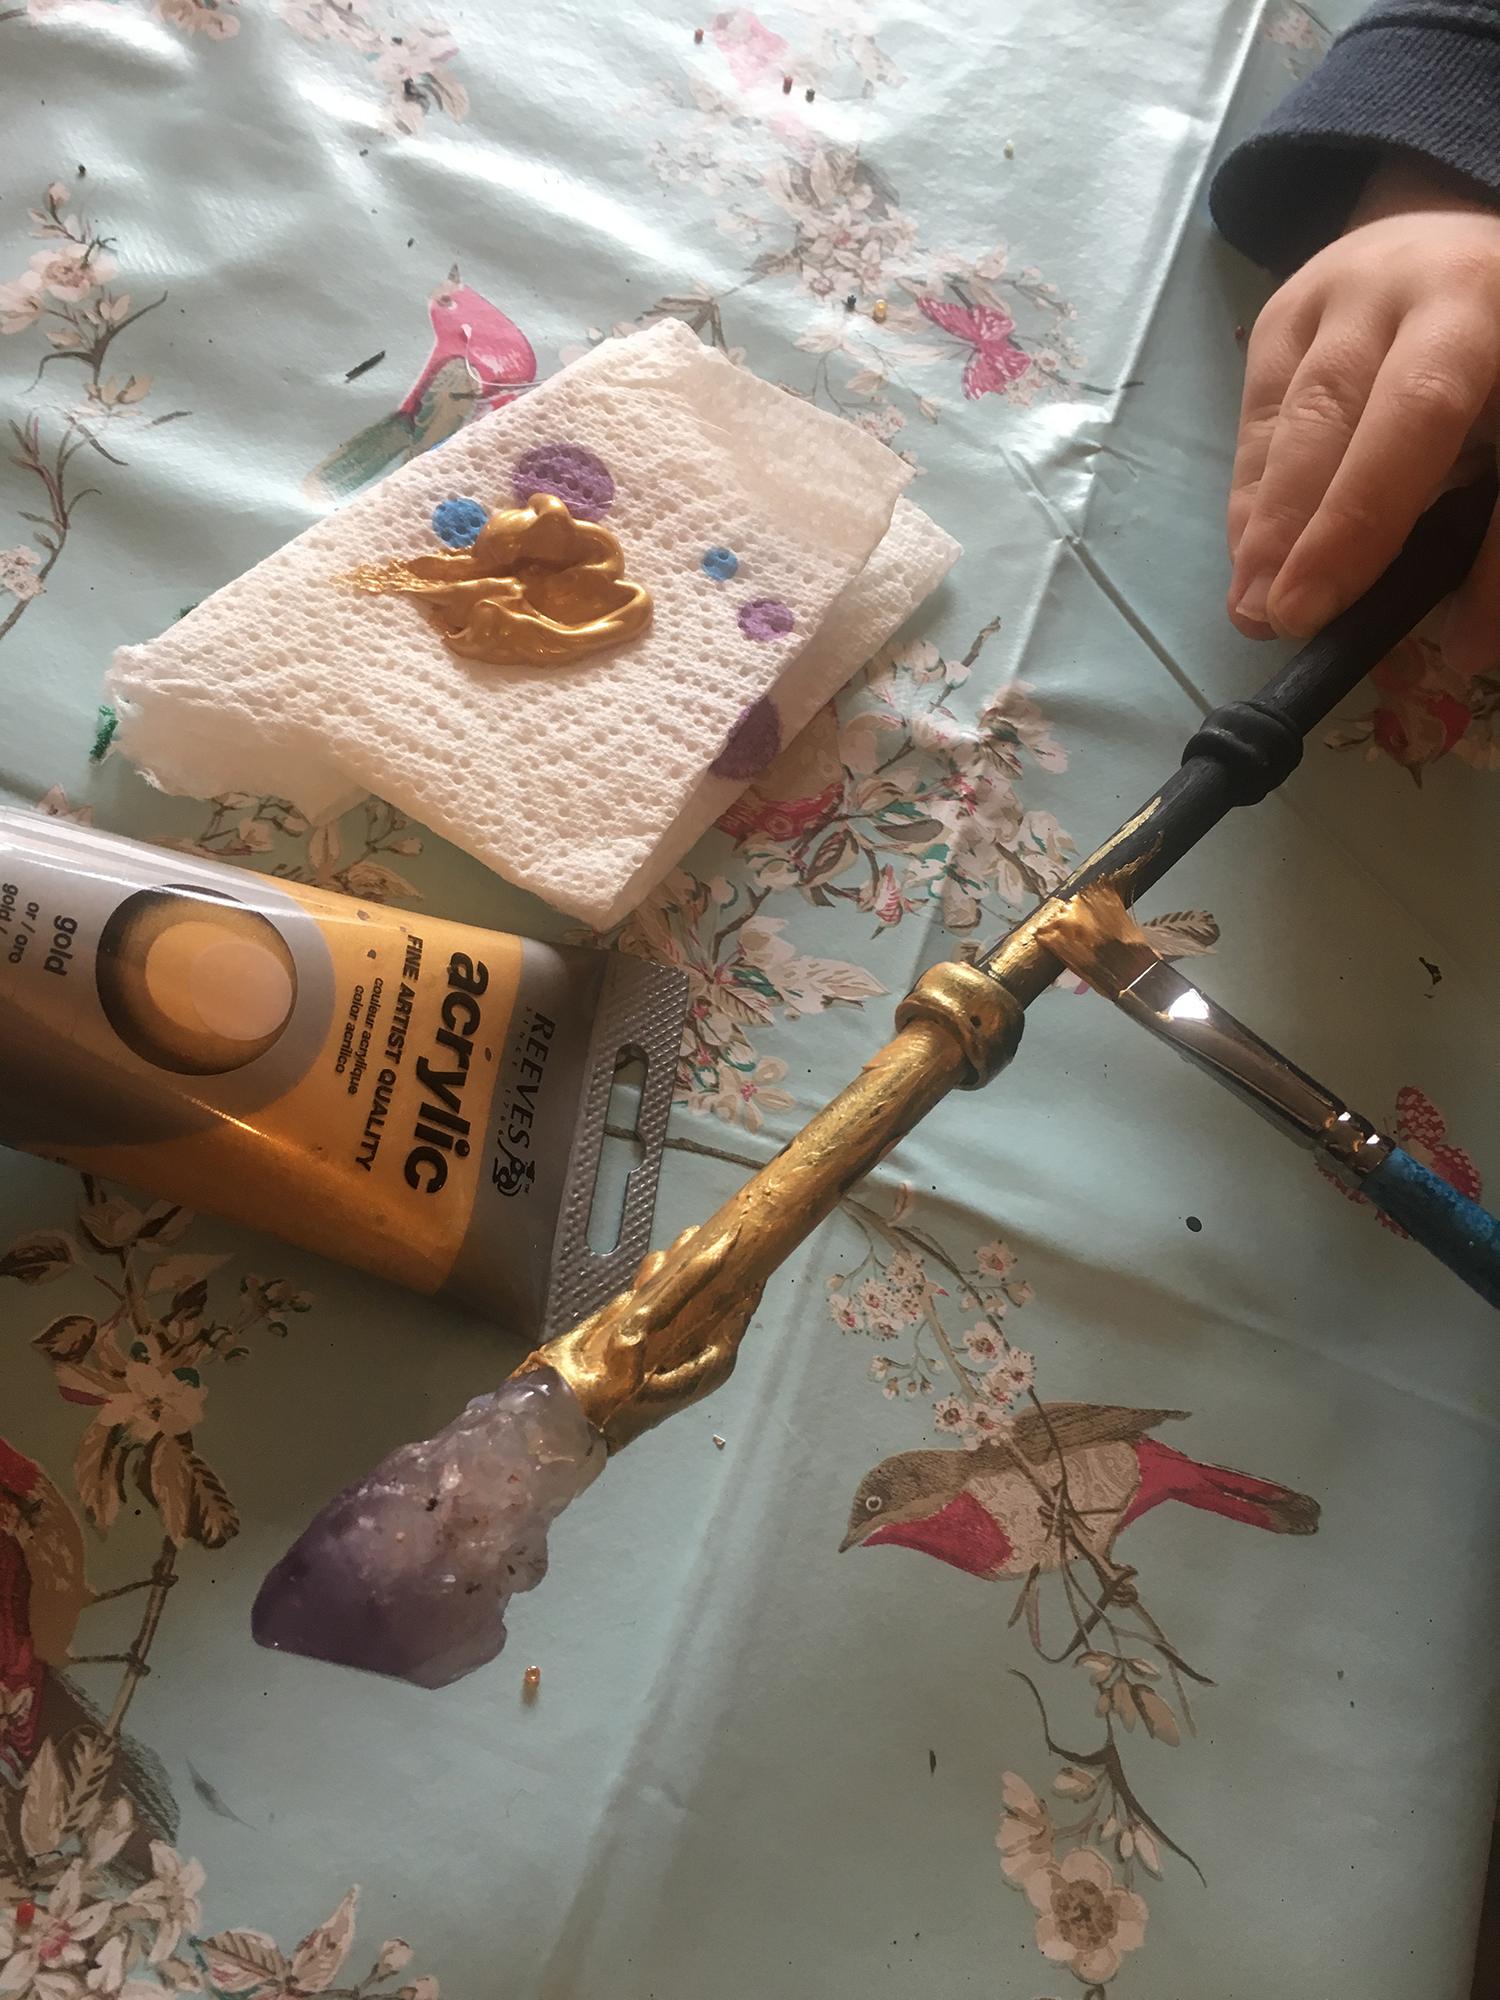
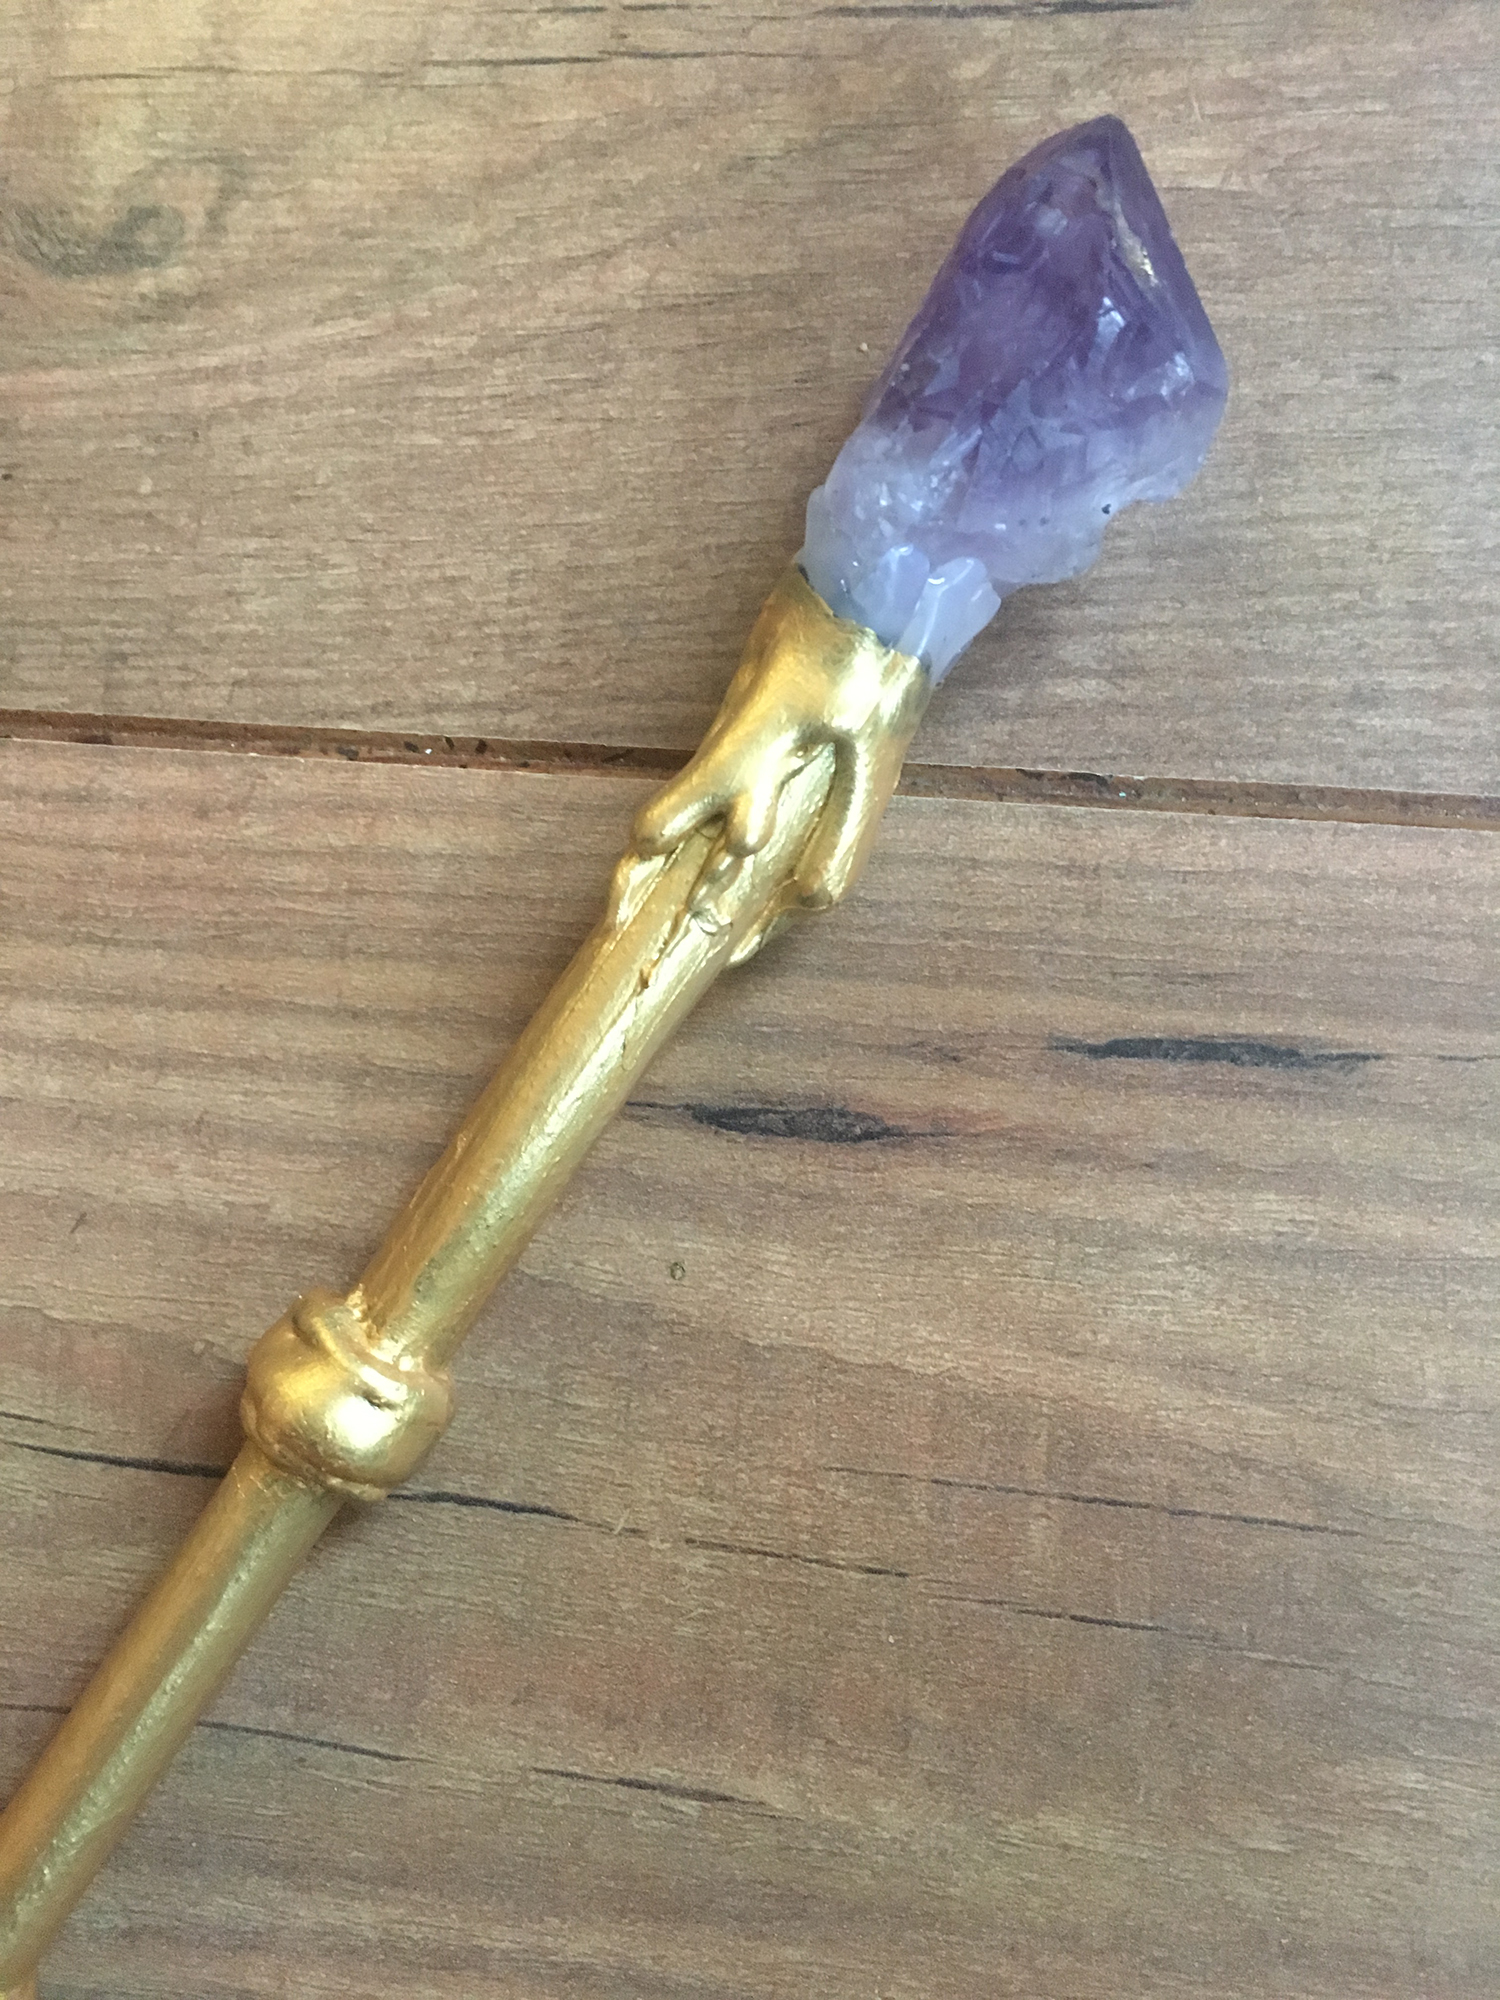
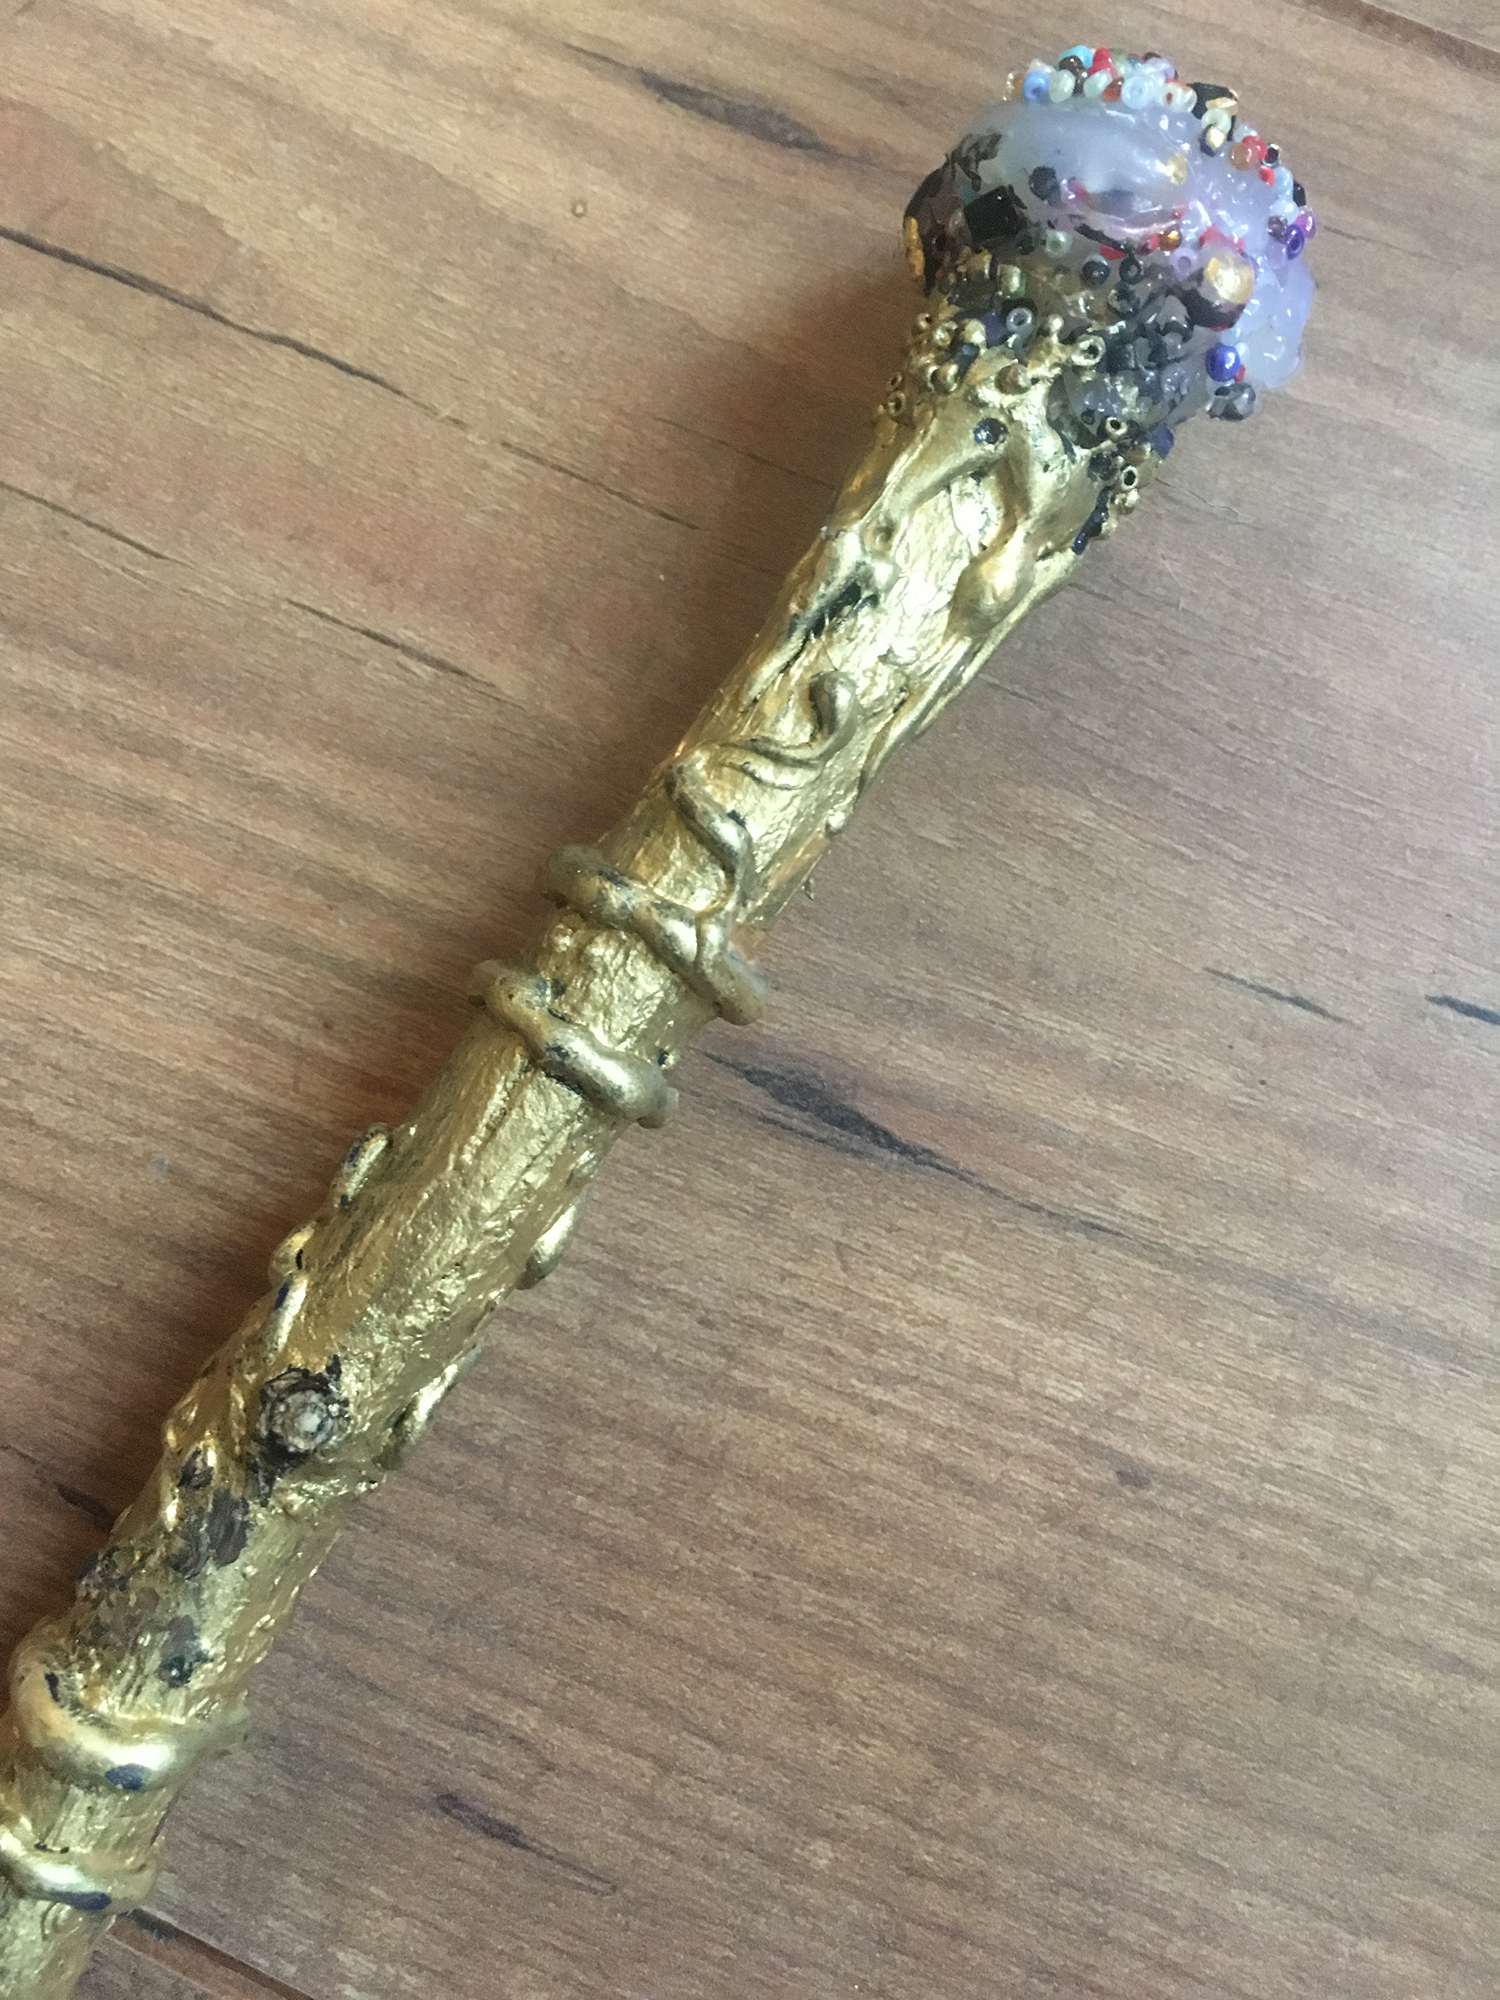
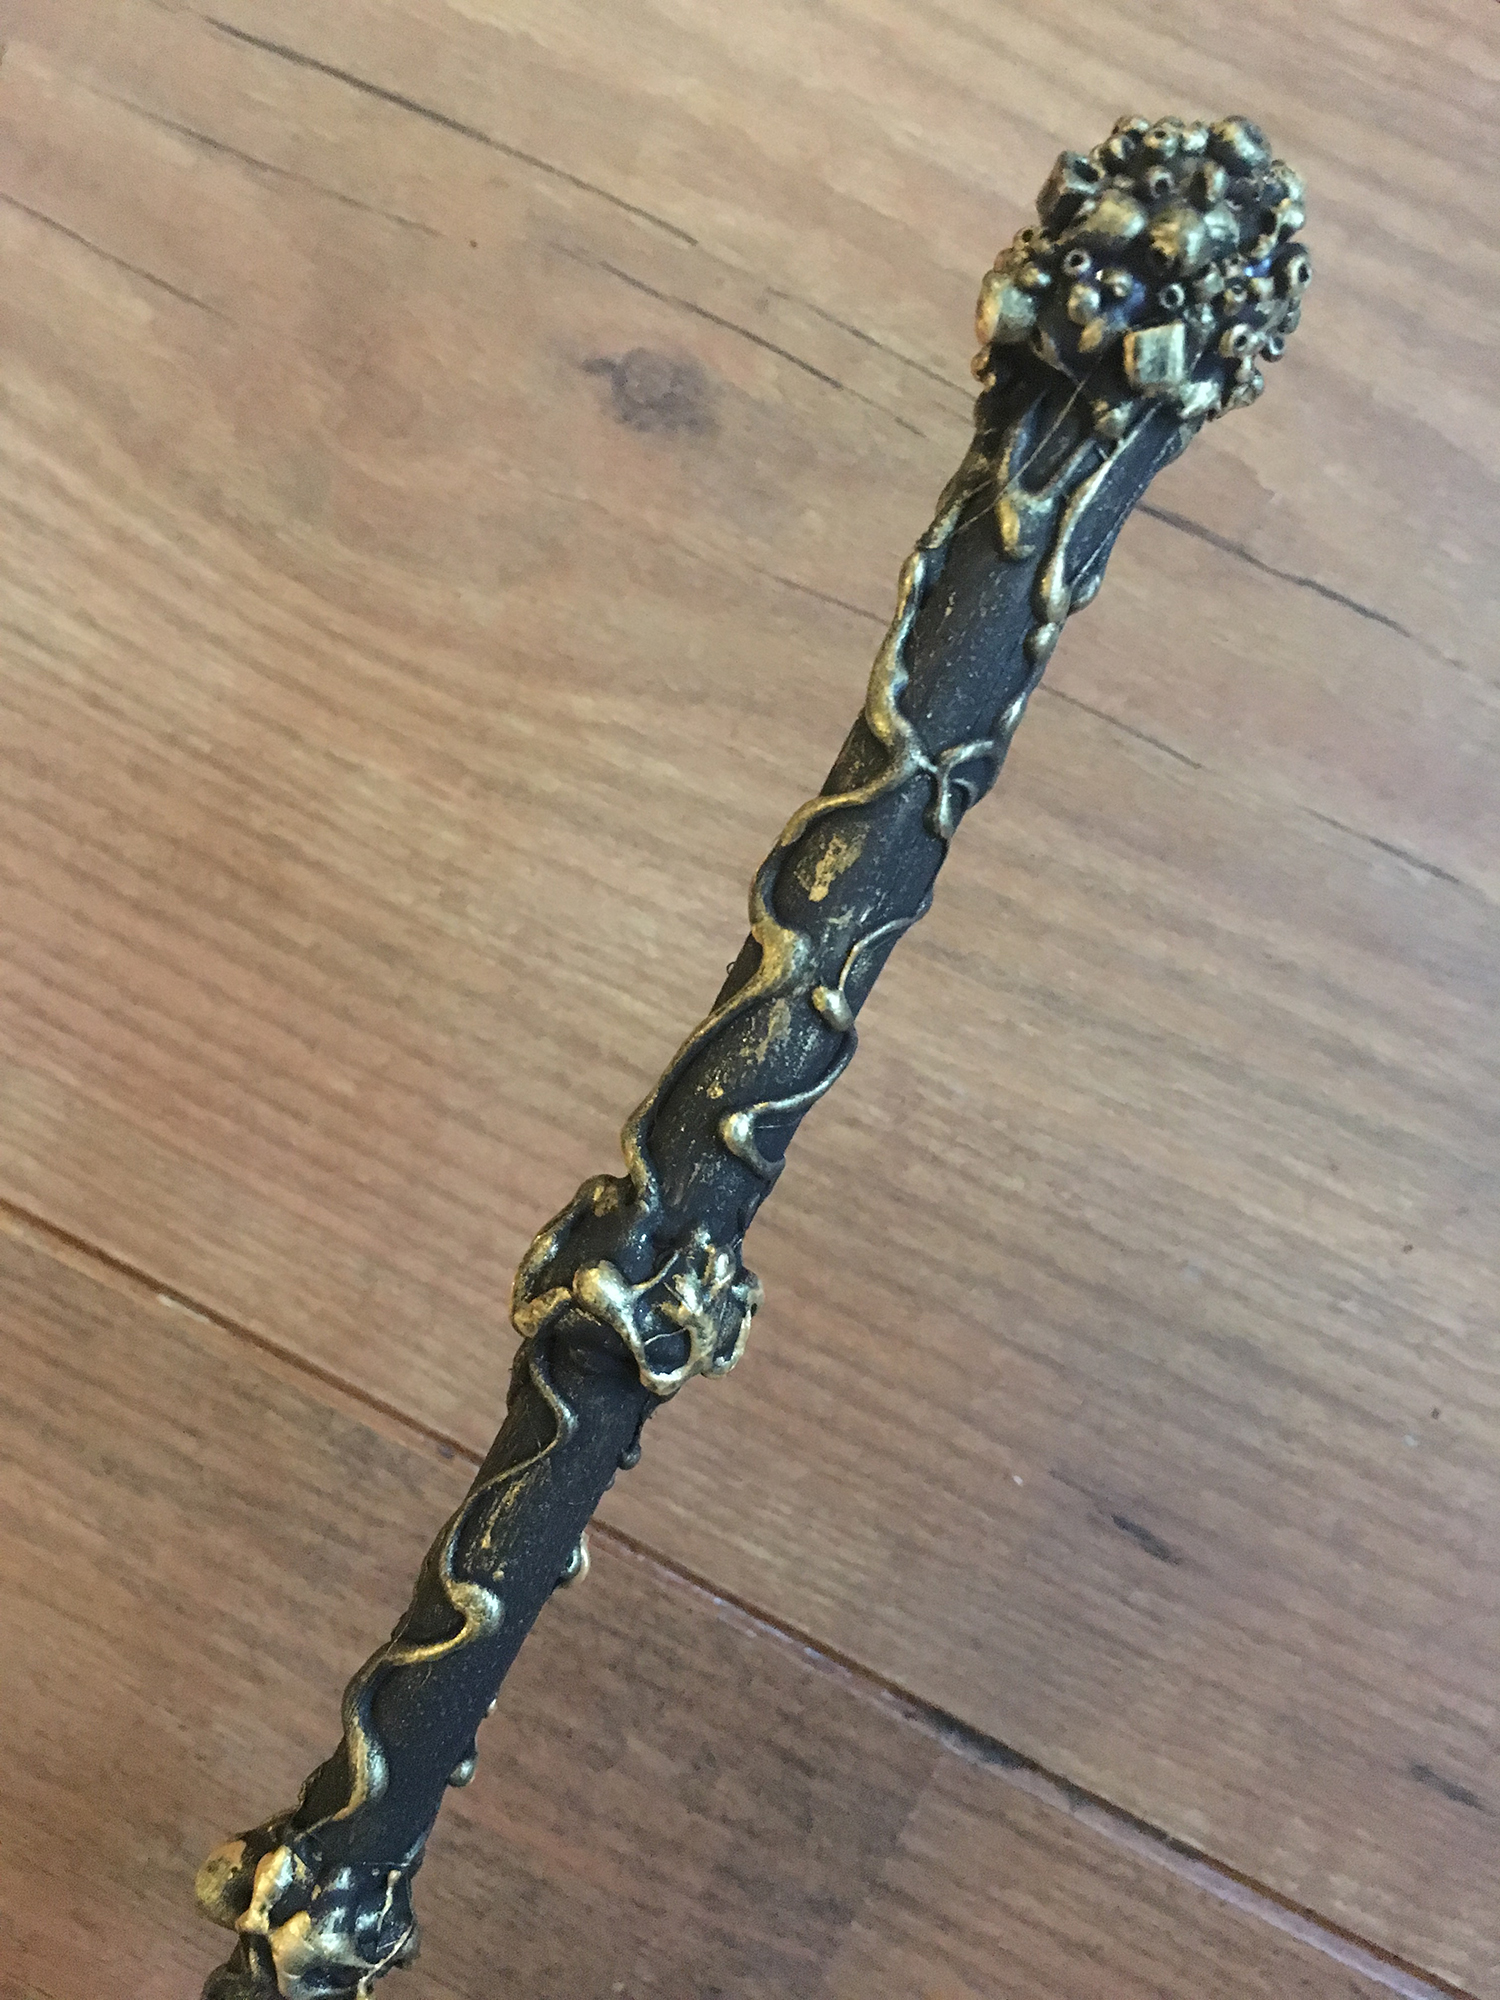
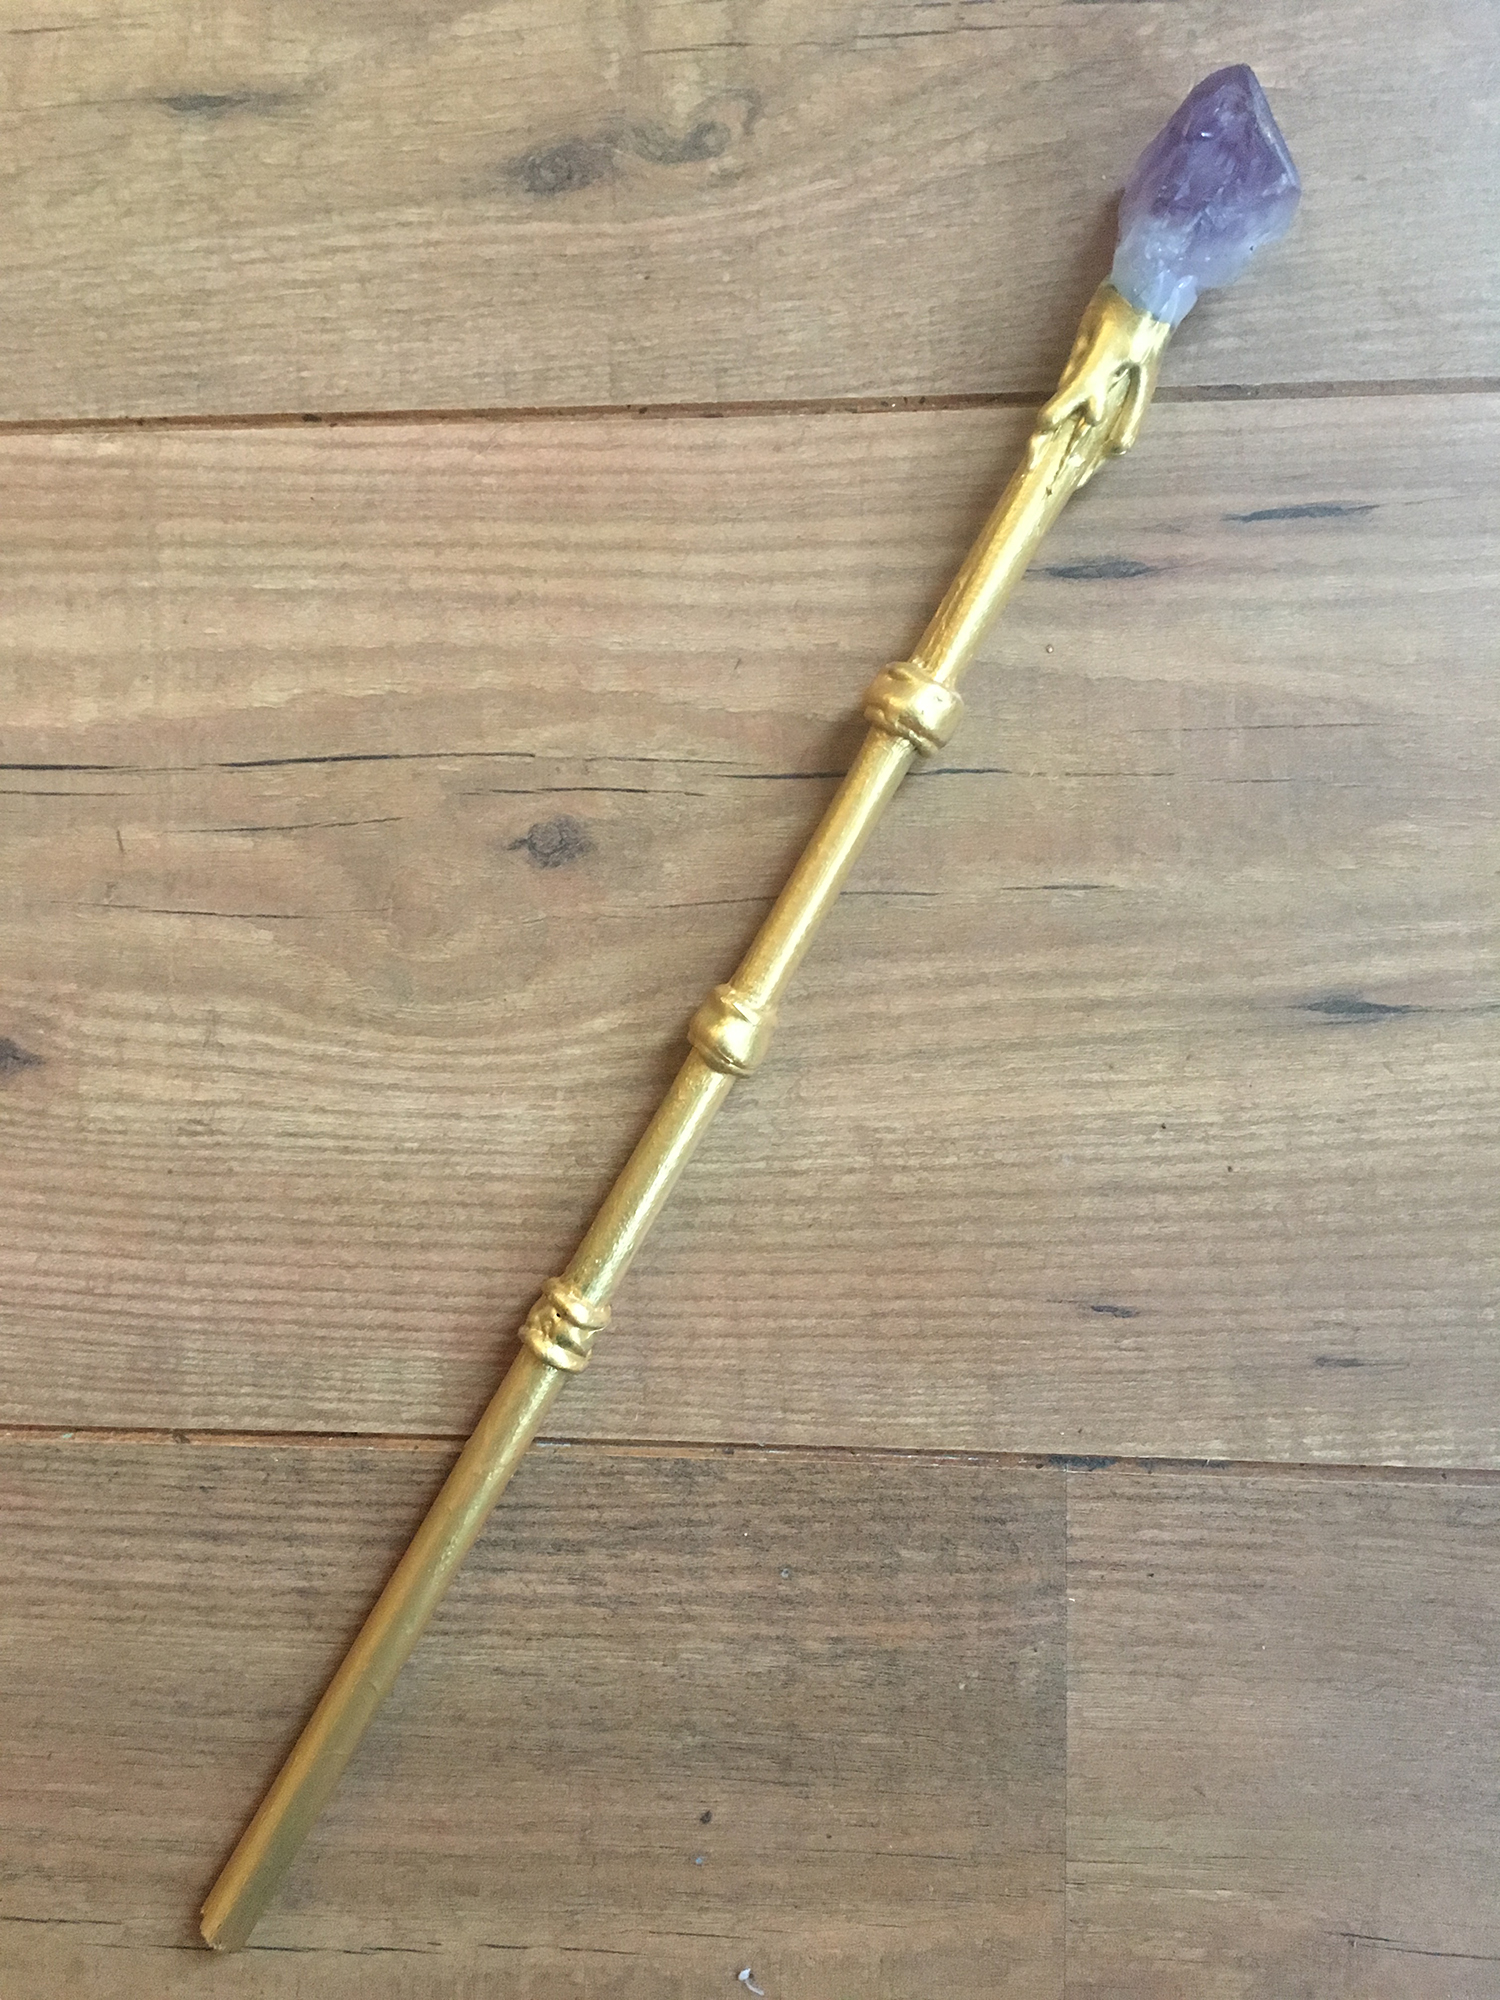
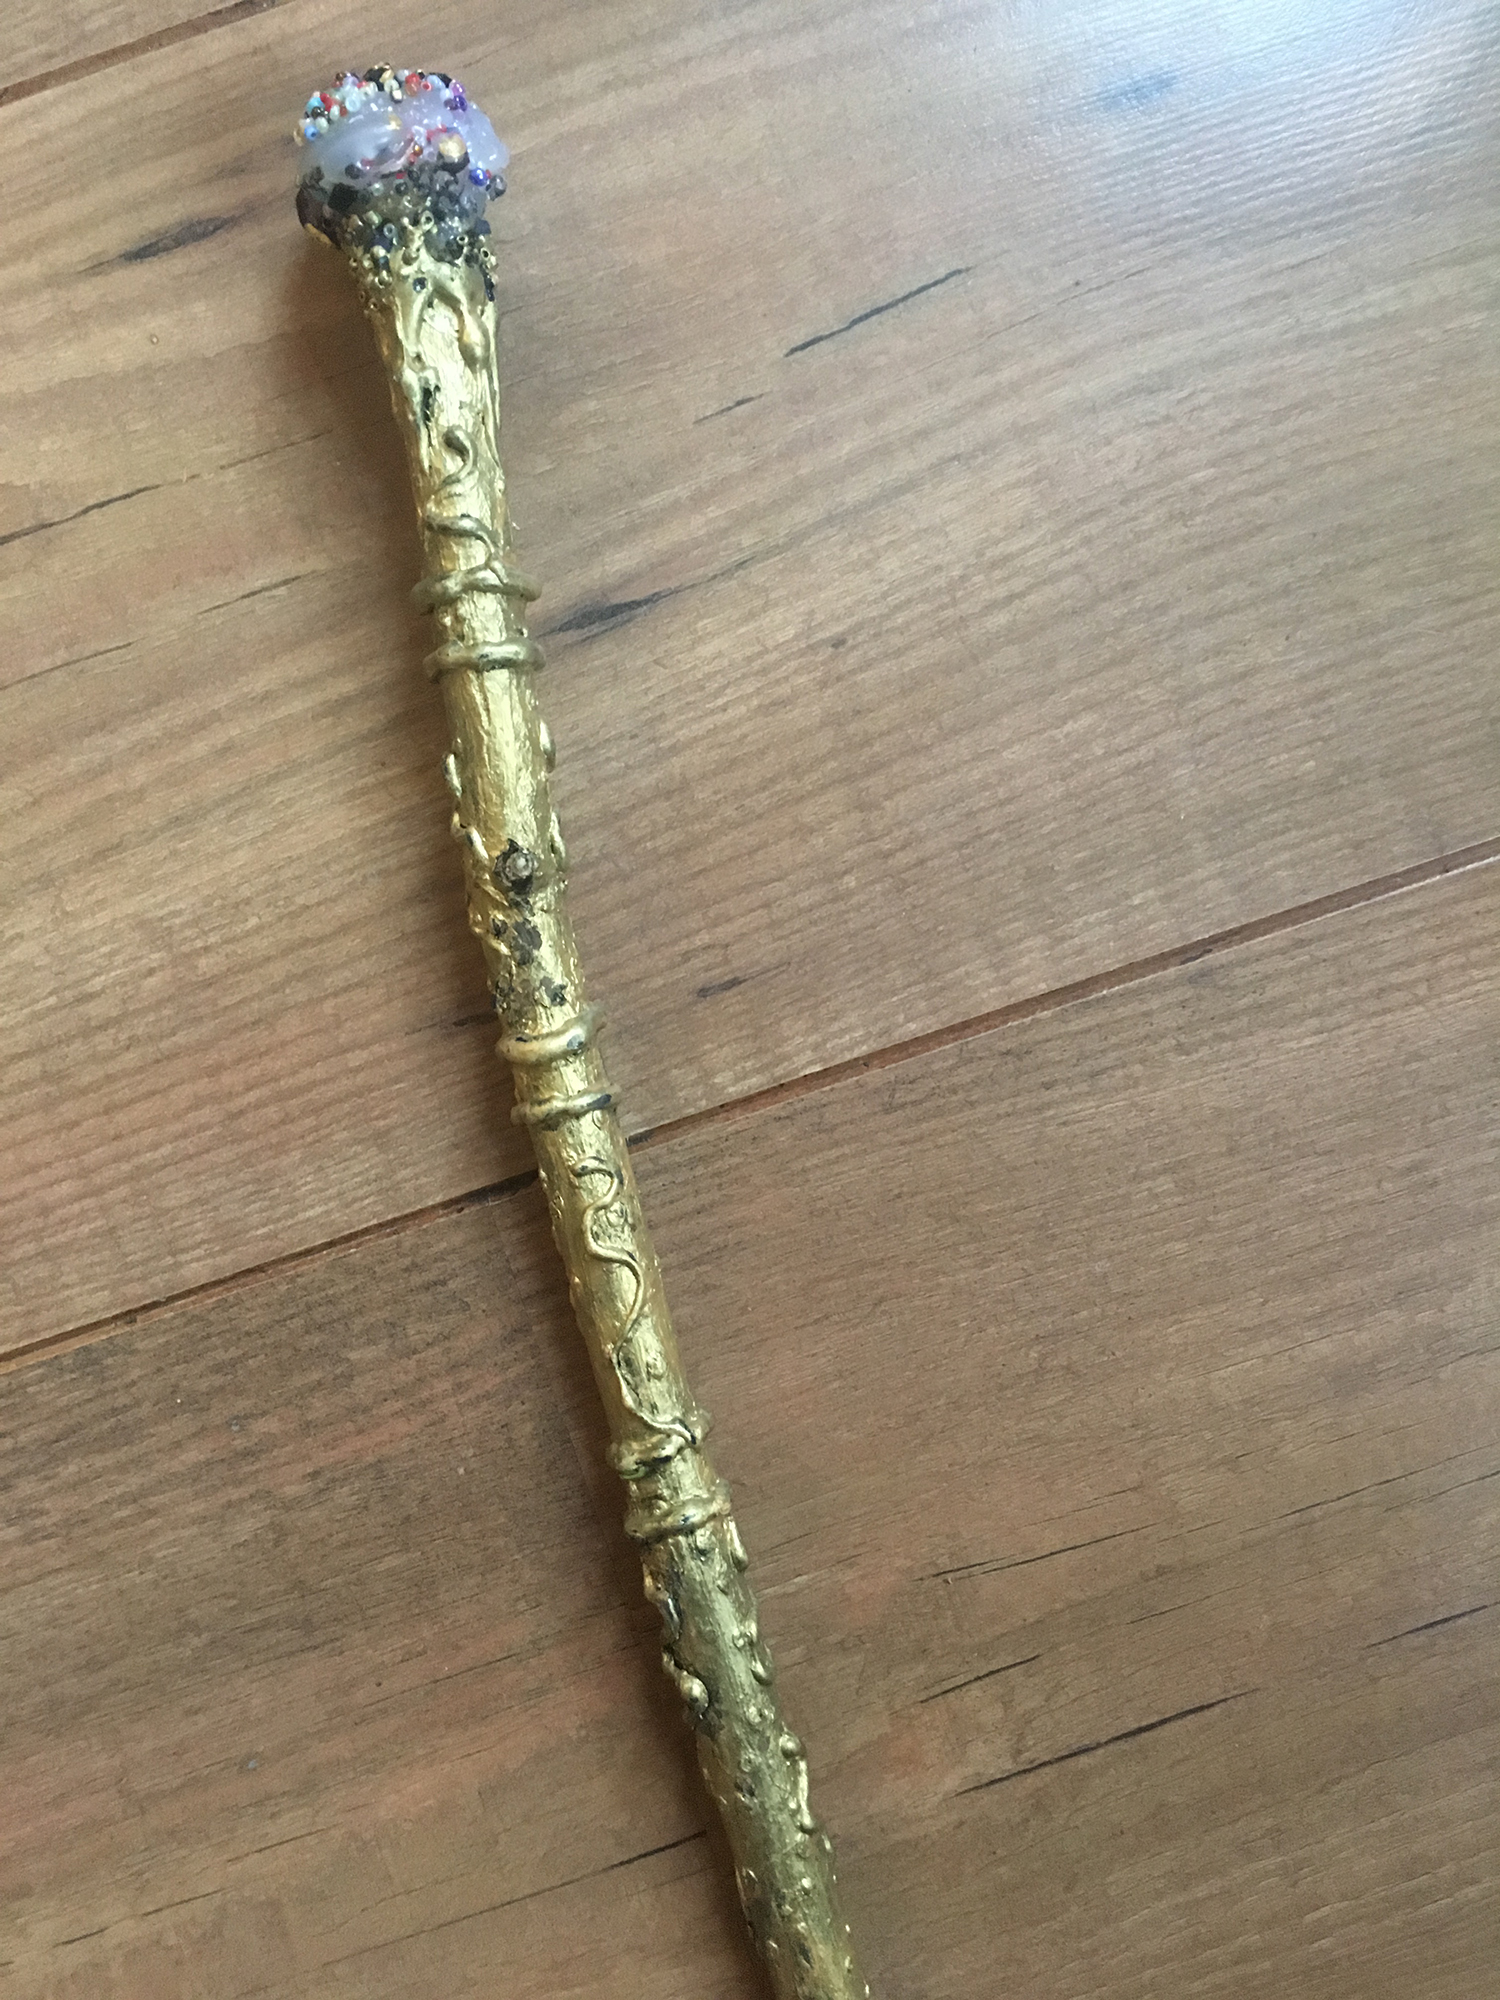
Once your low melt glue gun has warmed up, begin by squeezing glue onto the tip of the stick to create a feature shape or ball at the end. At this point, you may wish to add more detail using beads; they will stick in place better whilst the glue is still warm. Add detail down the stick’s length by adding lines and swirls of glue.
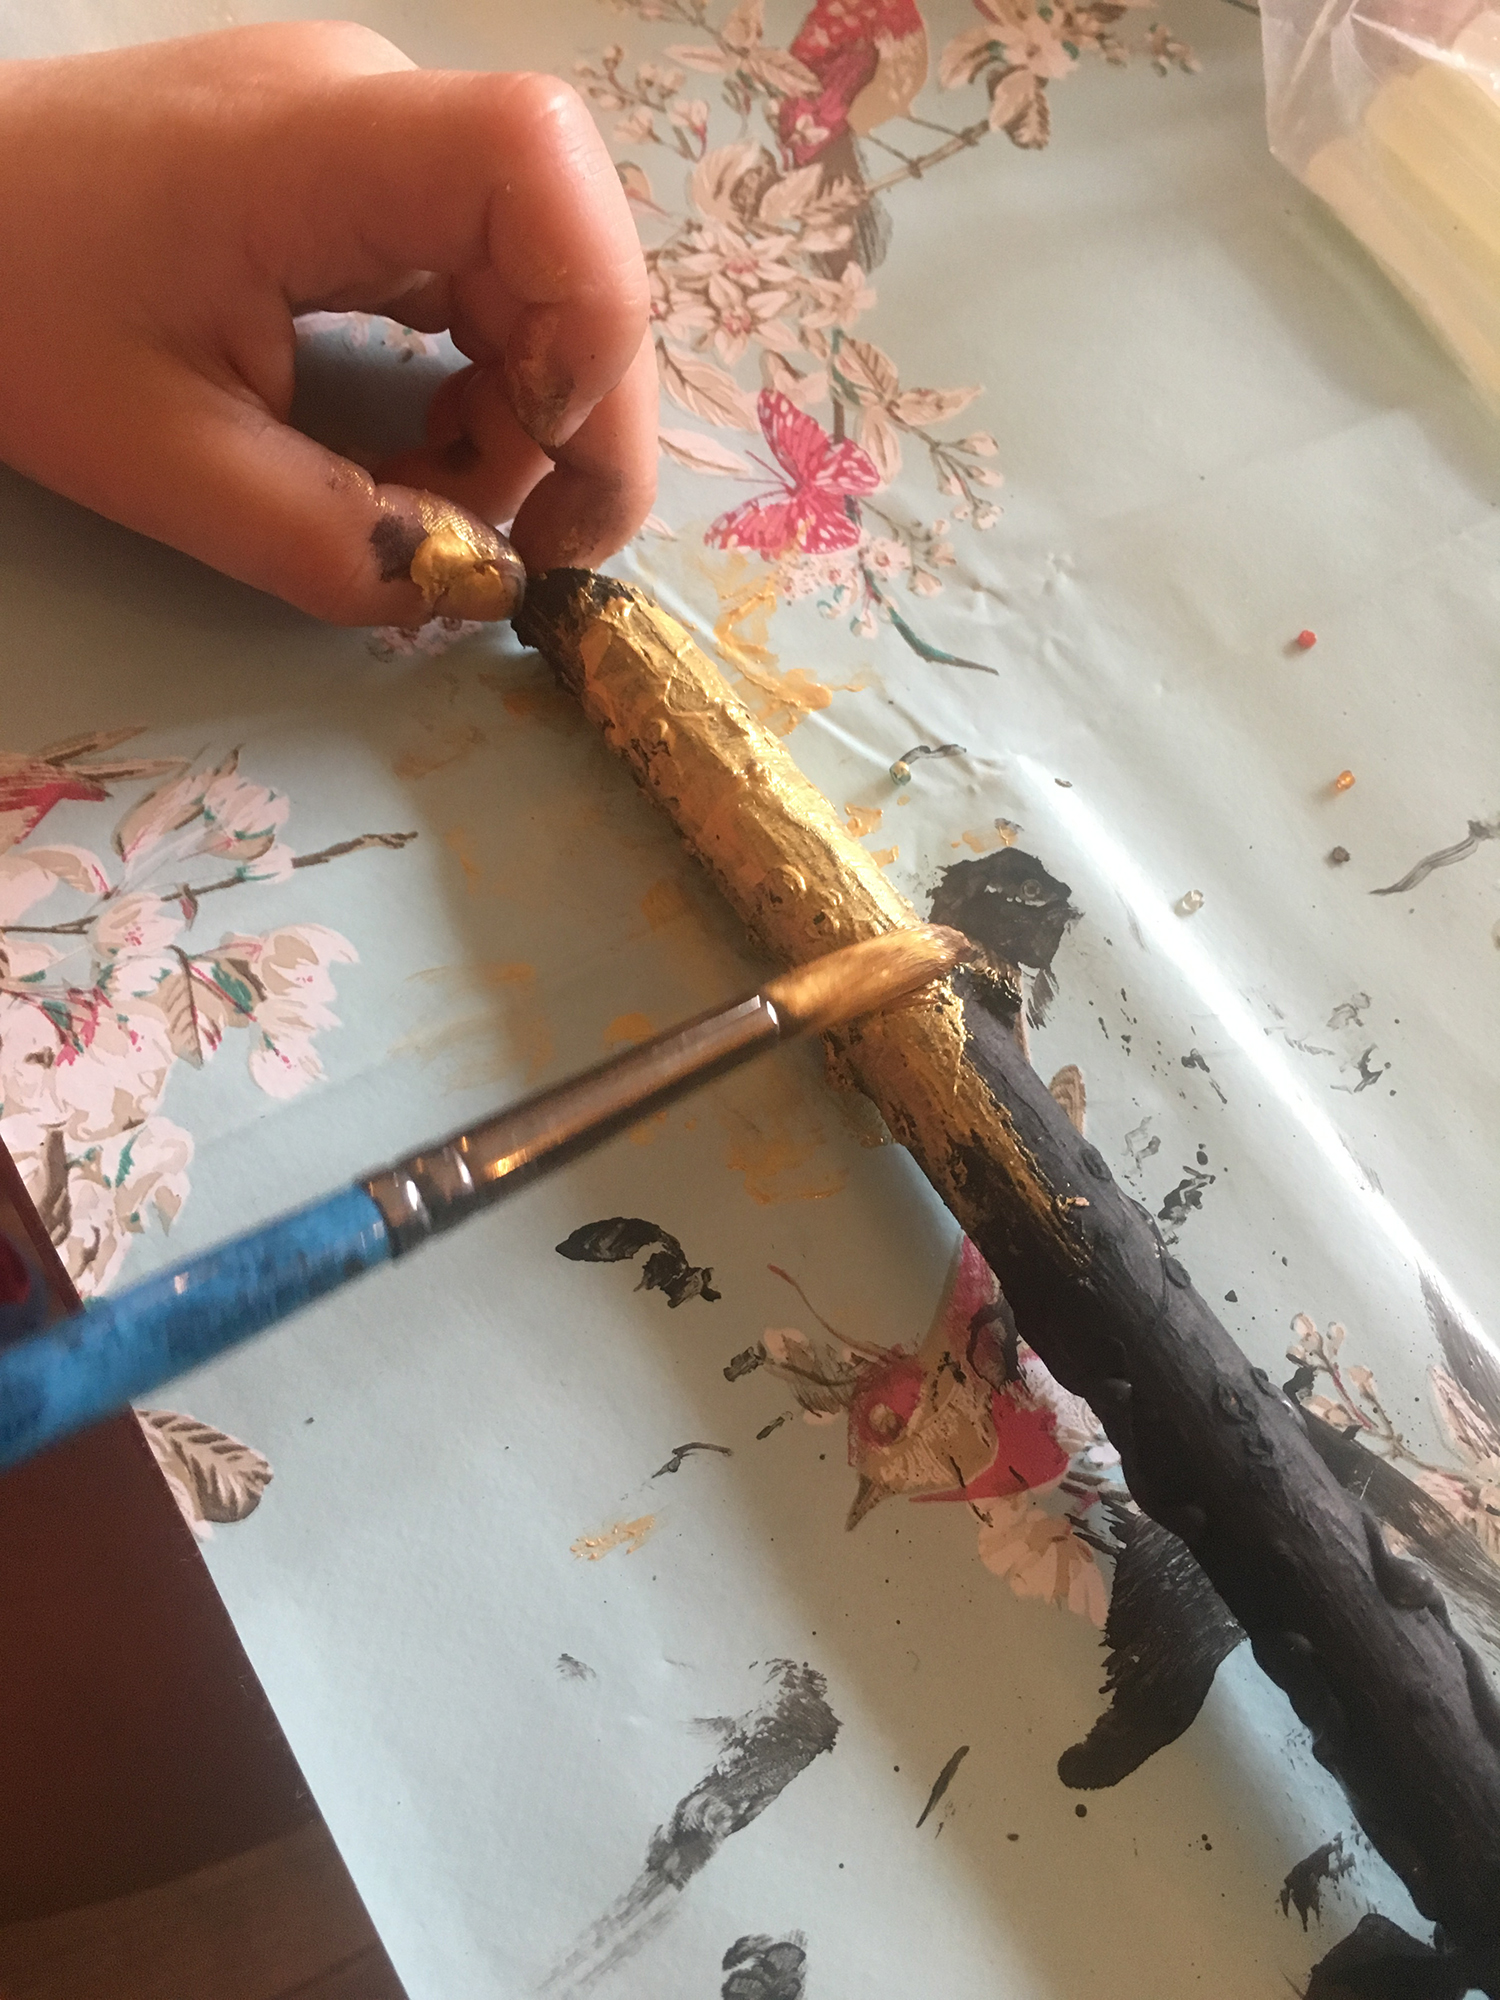
Step 3
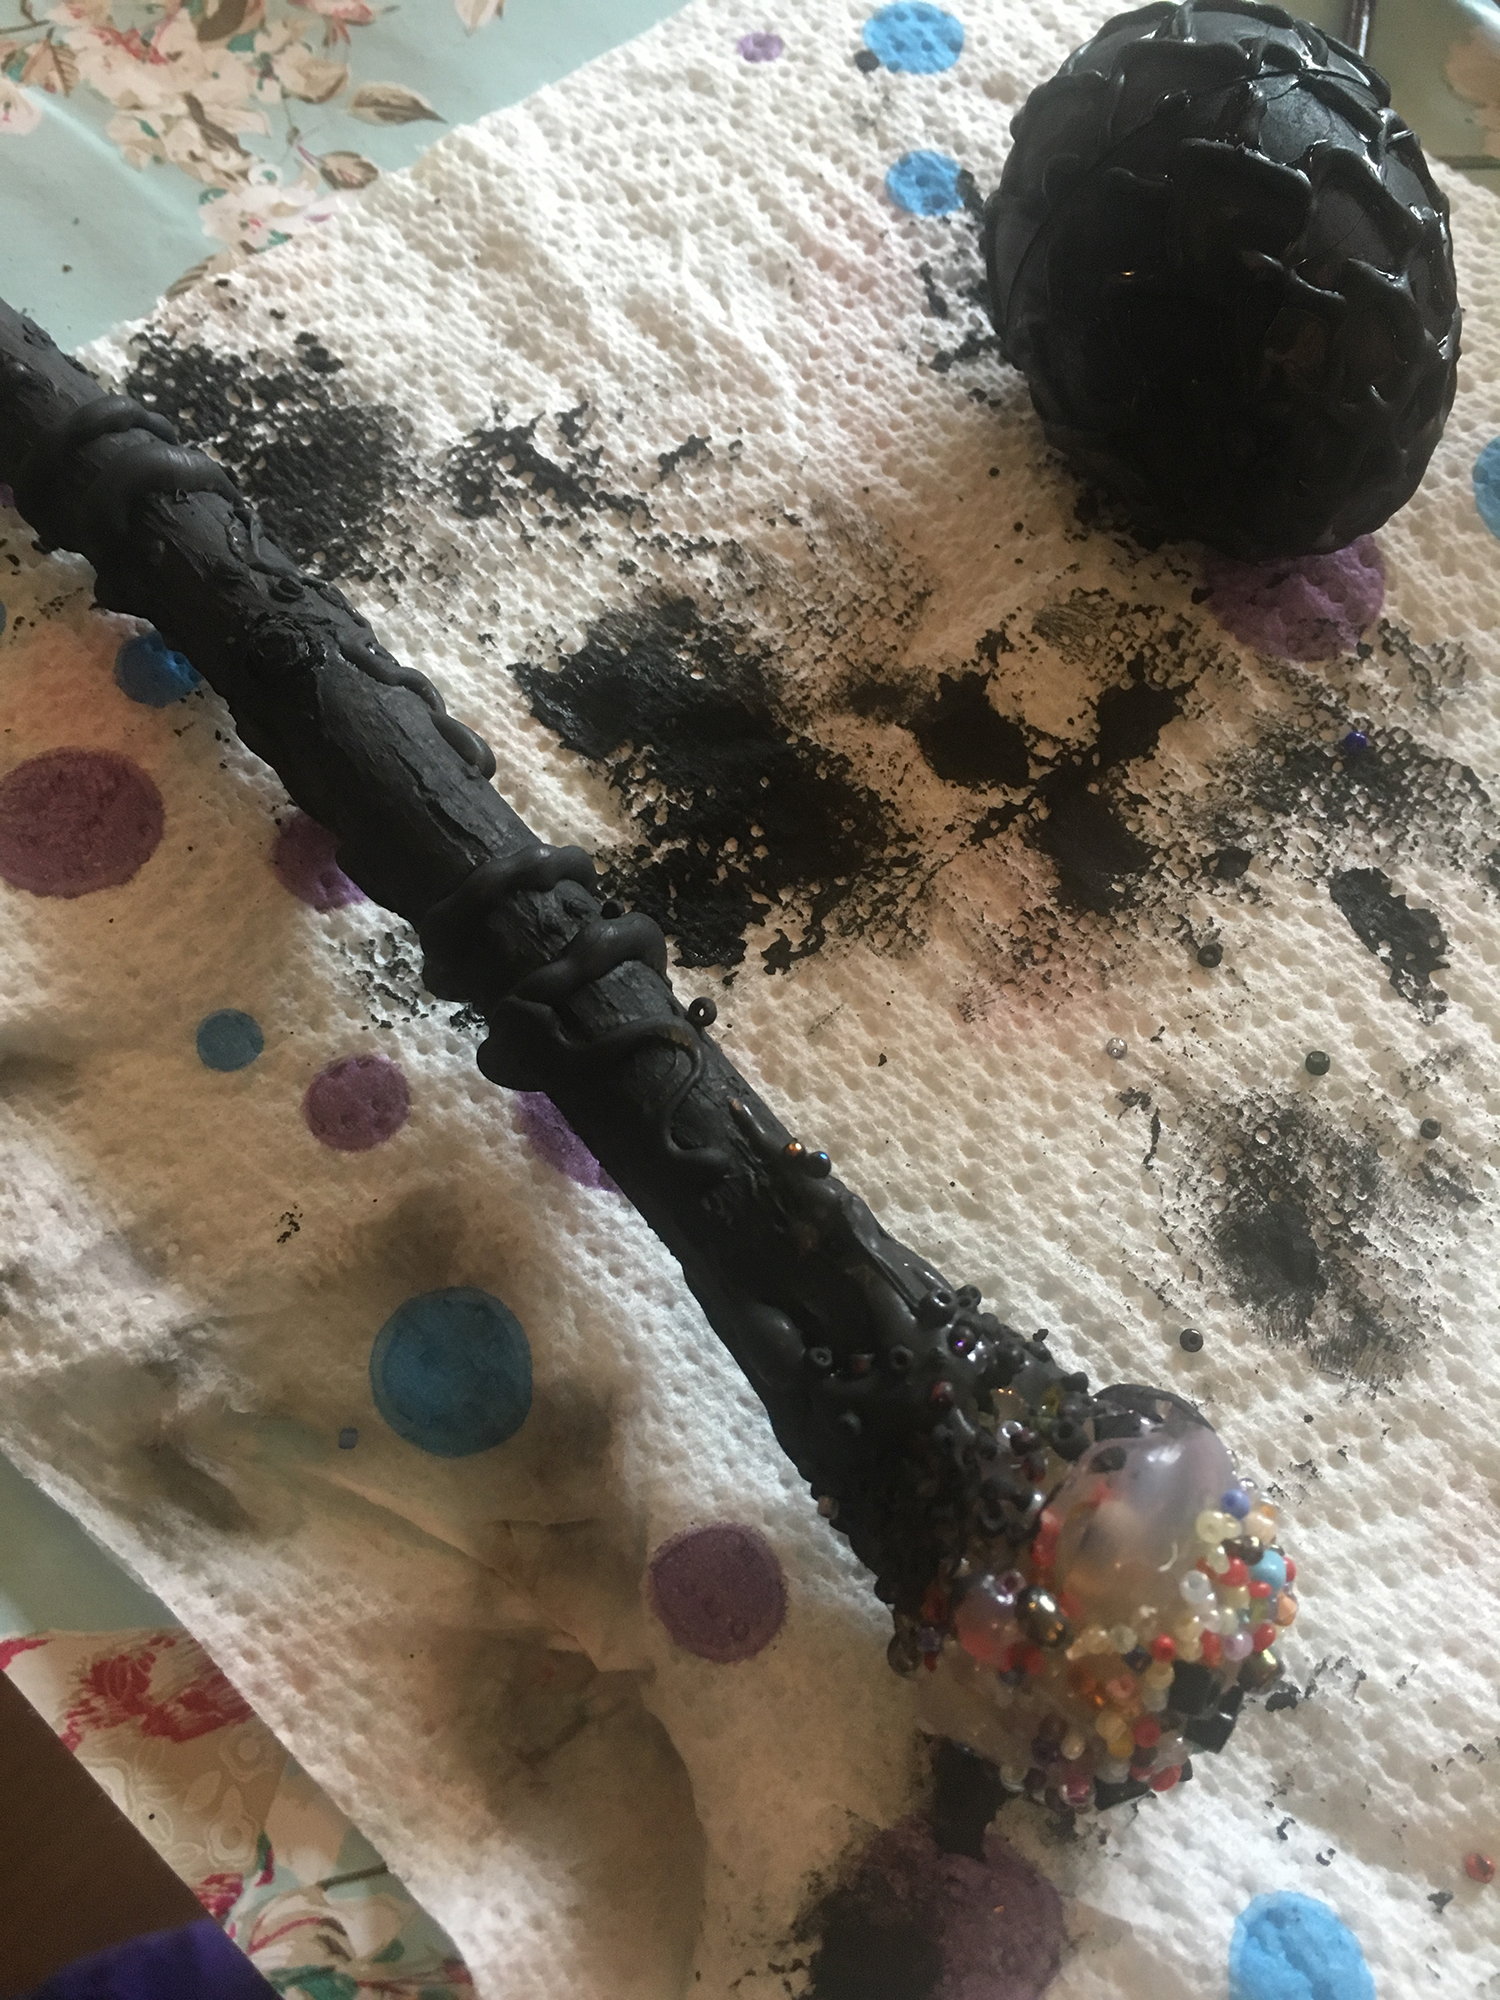
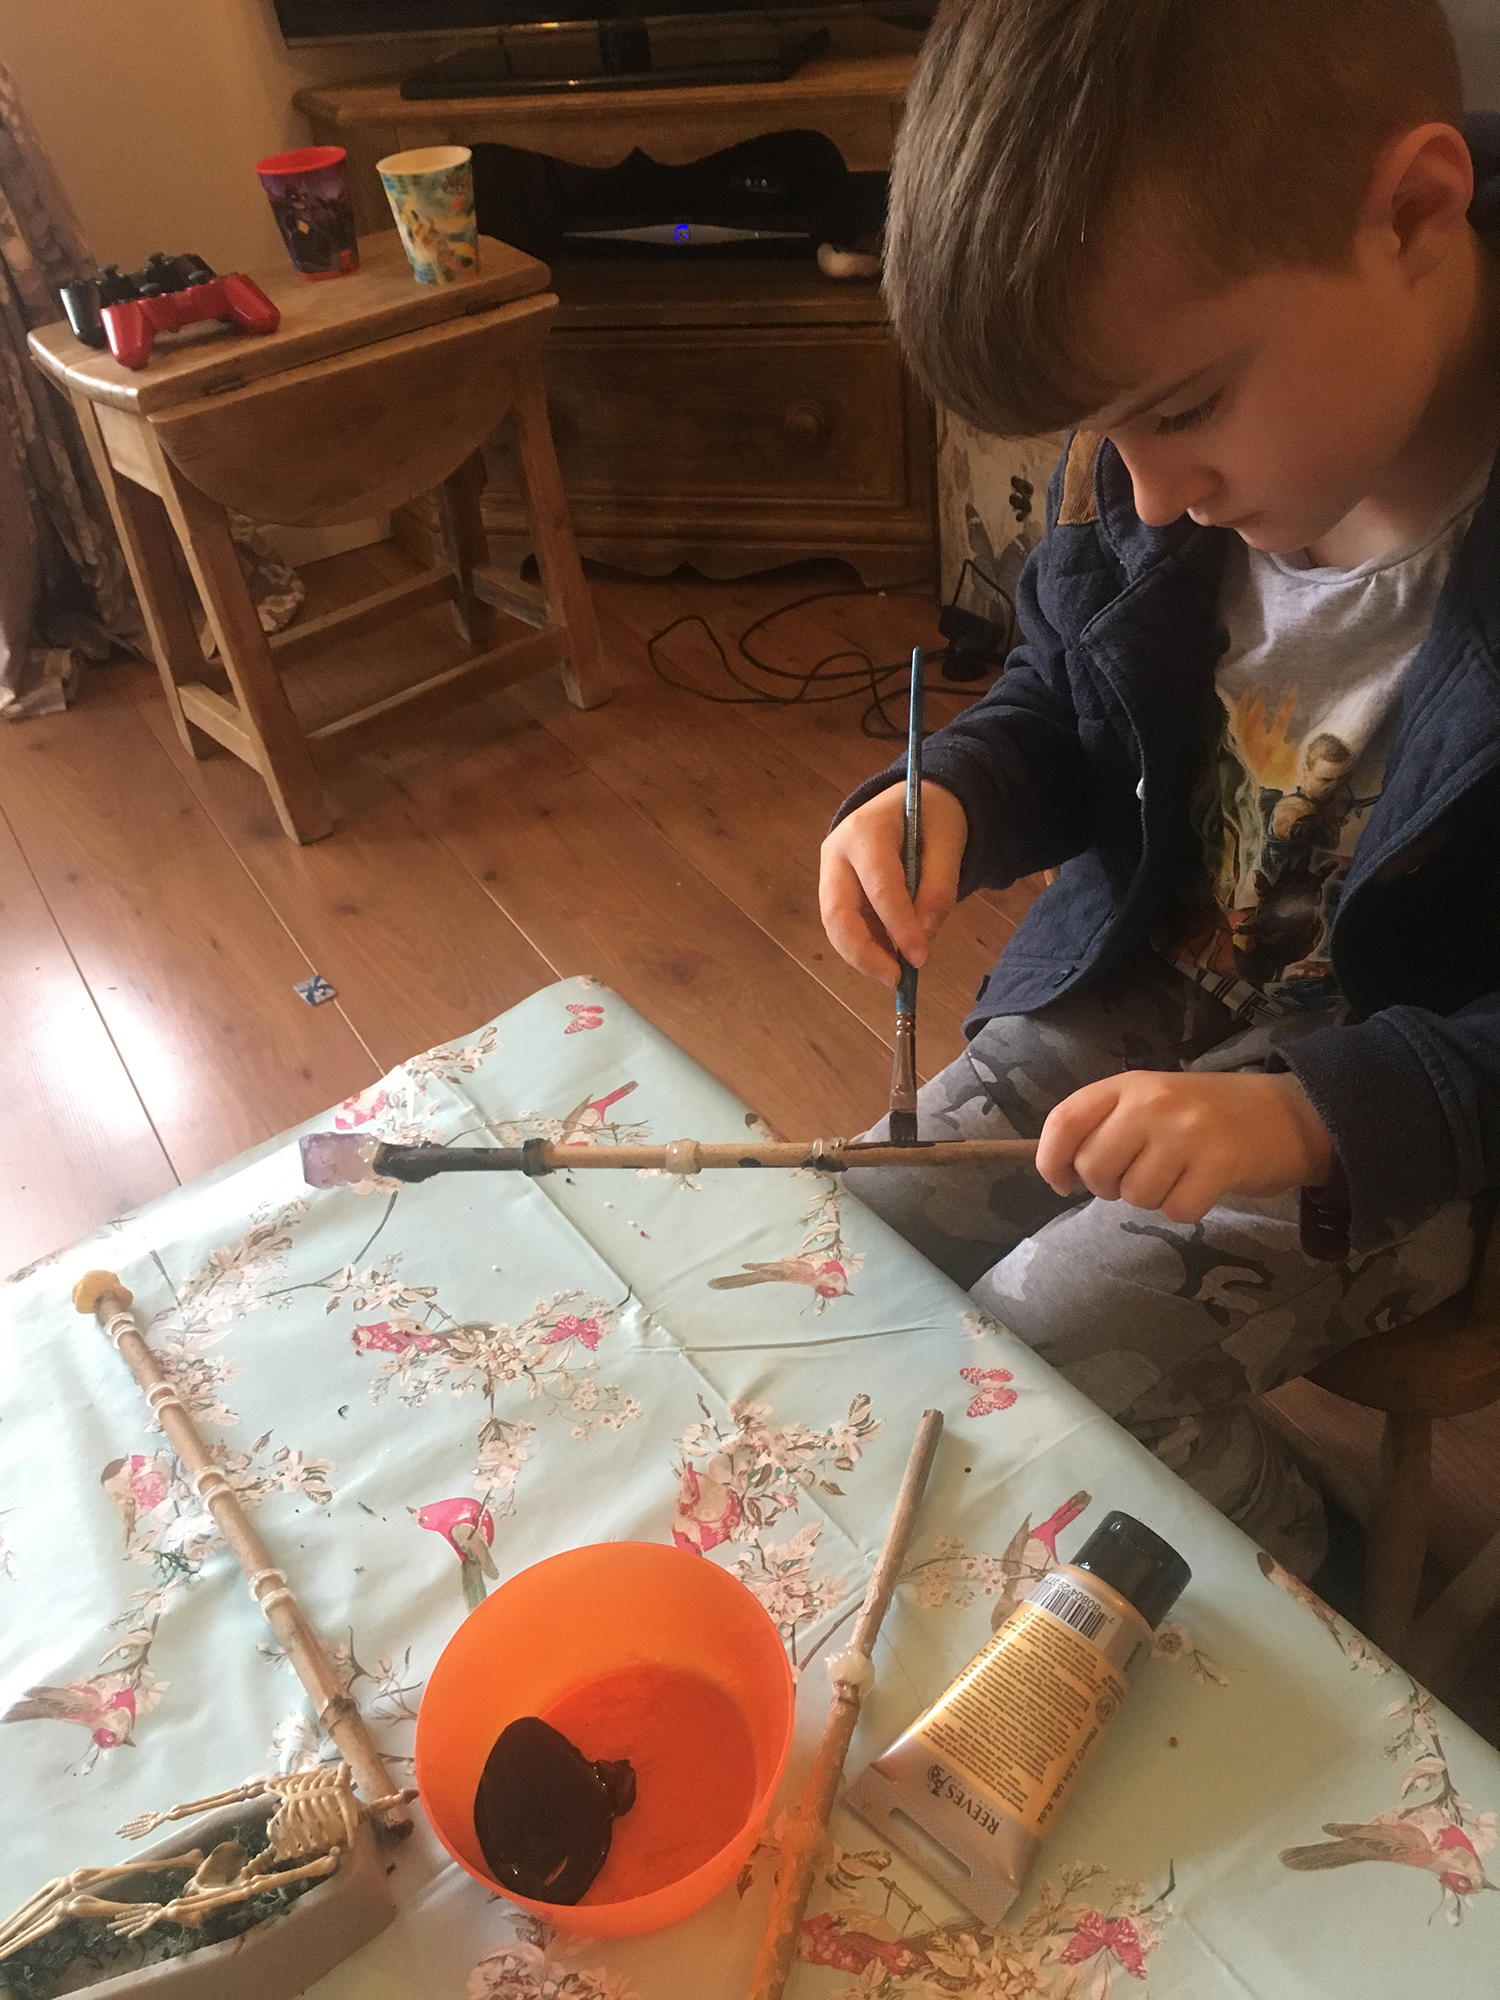
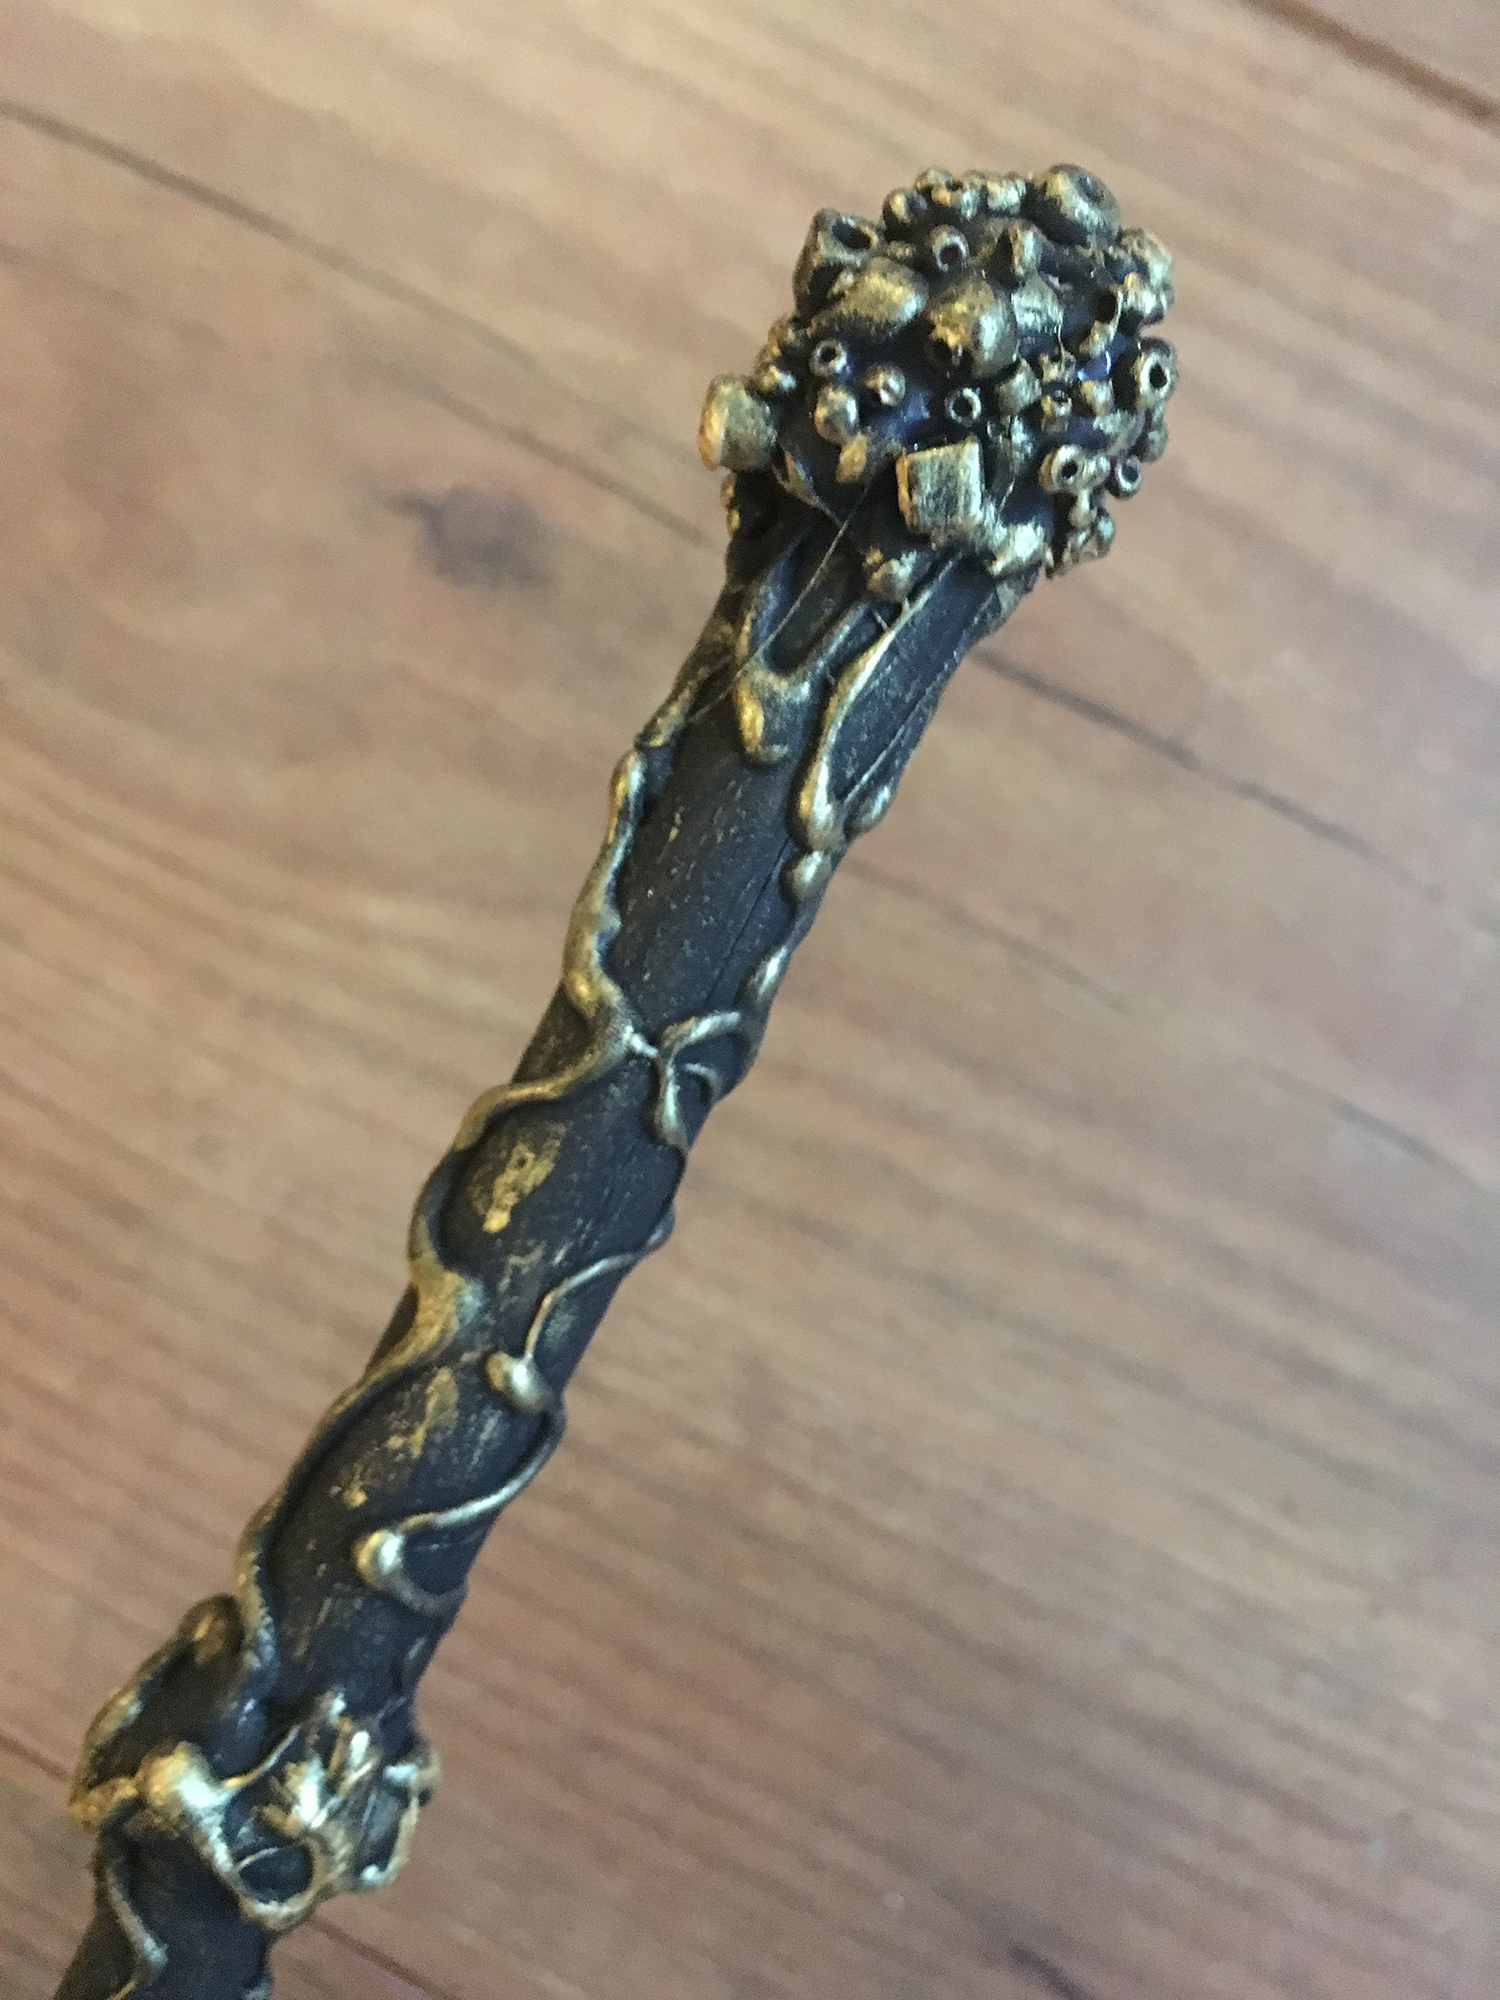
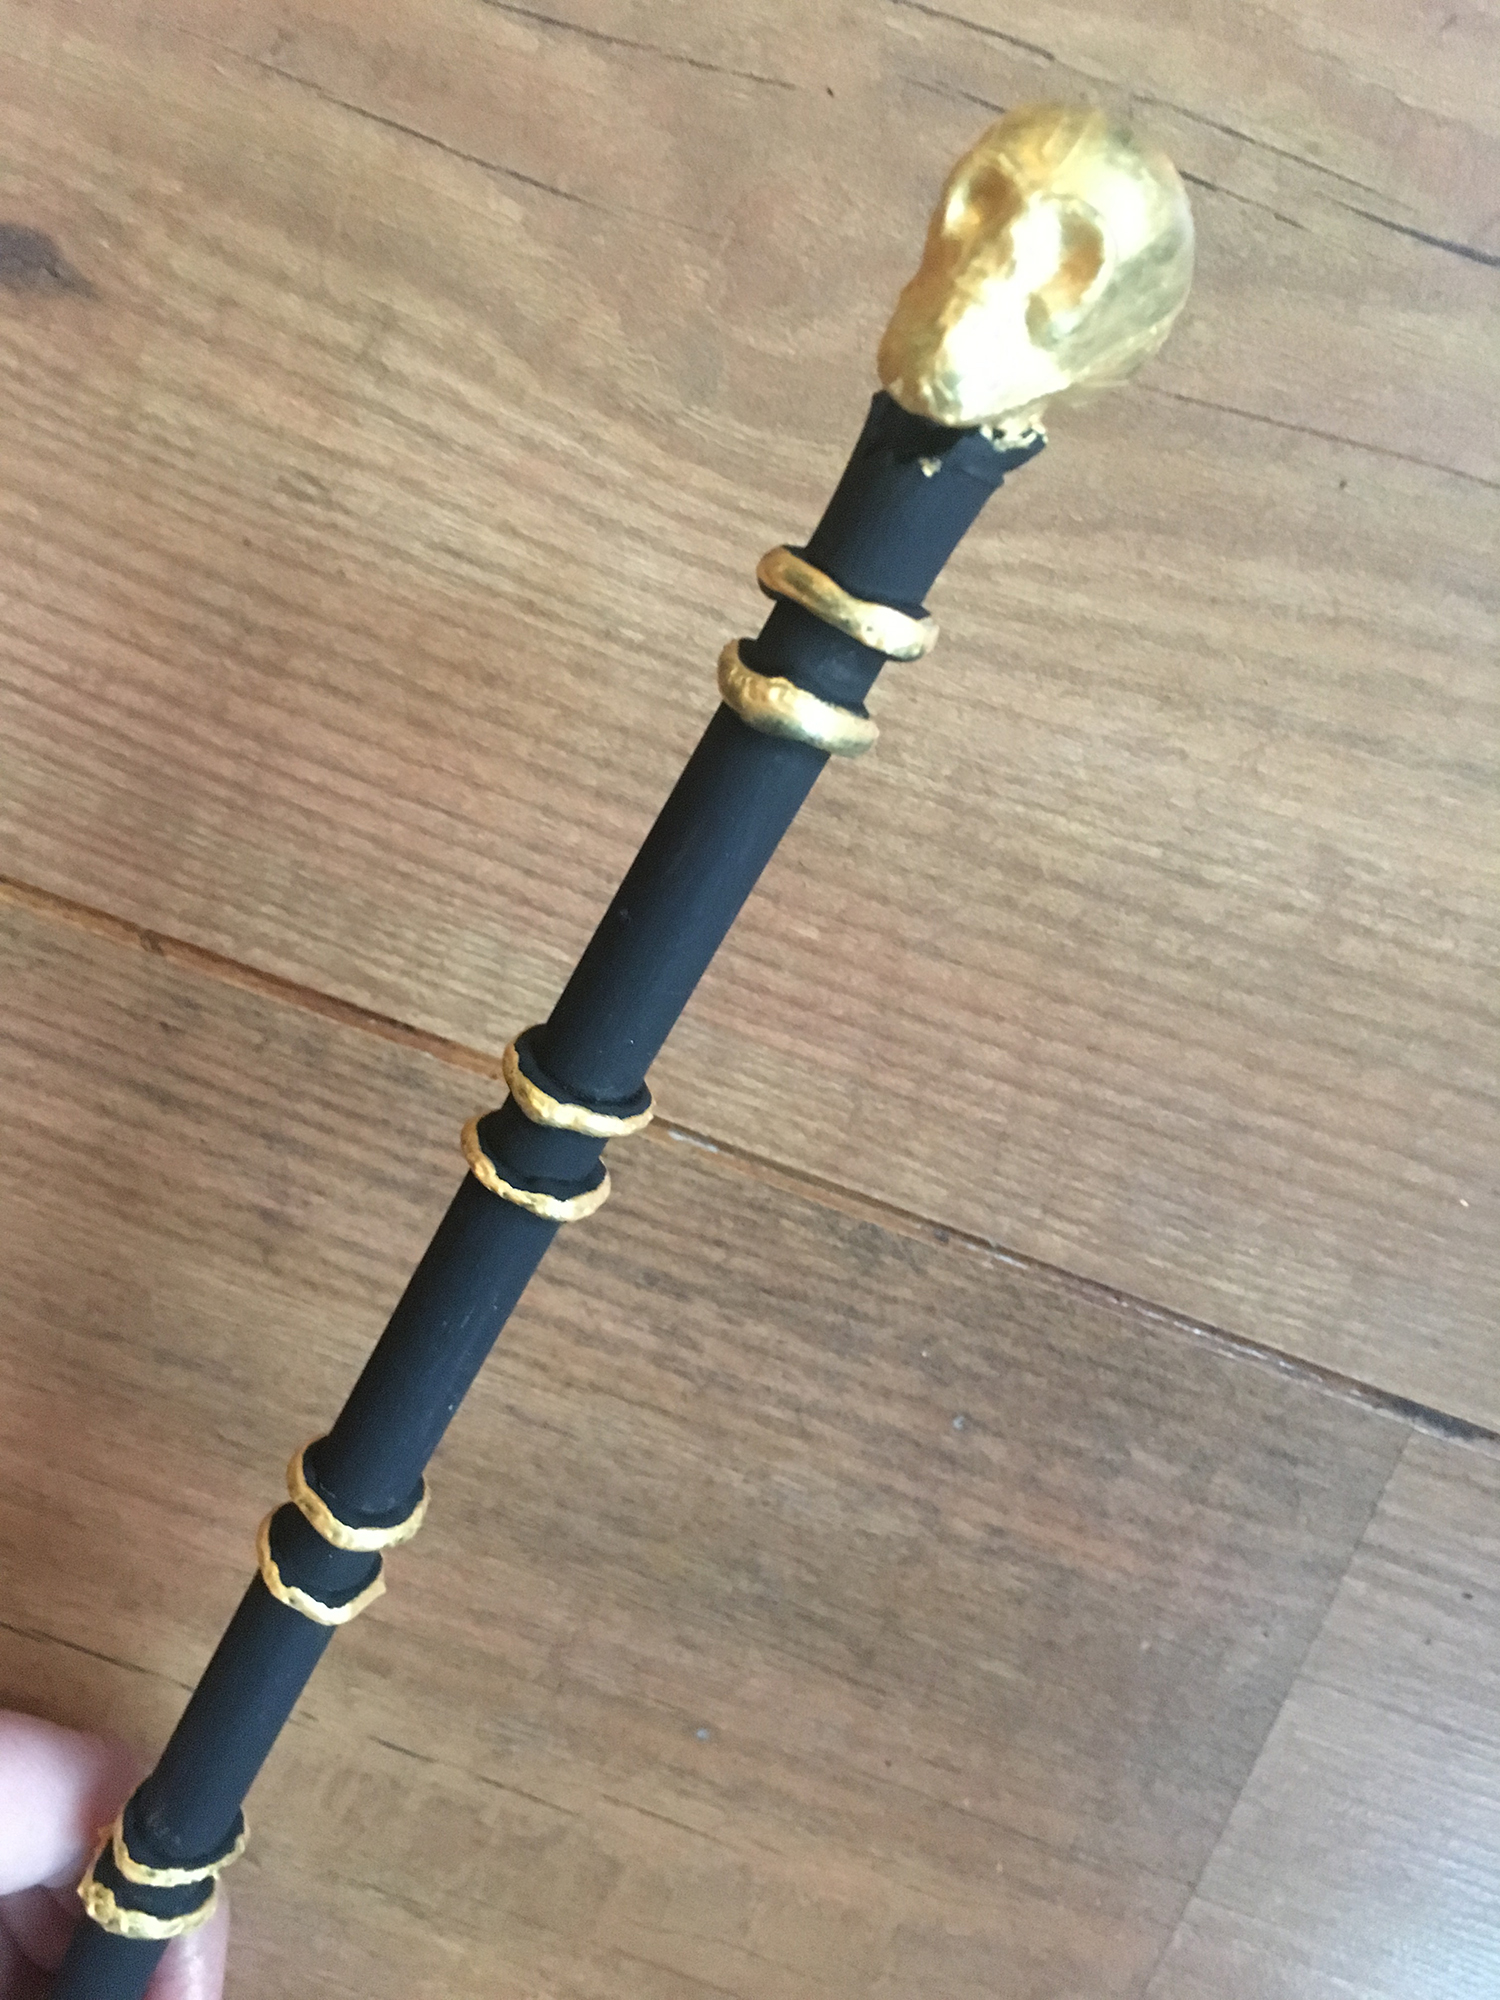
Once the glue is dry, you can begin to paint. Add a base colour initially and once this is dry, add tones and/or other colours. We painted ours black, followed by a dry brush effect with metallic acrylic paint.
Step 4
Coat with a protective layer of Mod Podge or strong PVA glue.
Step 5
Begin casting spells, but be very careful, as these wands contain powerful magic!
Magic wands for Early years children:
We love this simple idea by @anideaontuesday over on Instagram. Sticks, Play dough and Buttons – simple as that!

