
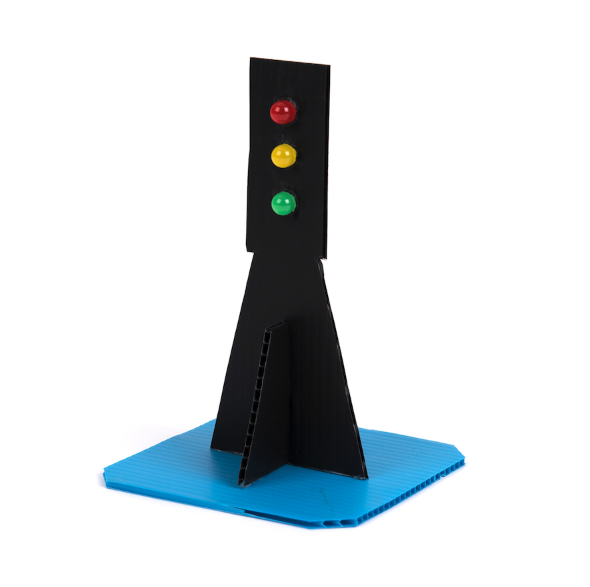
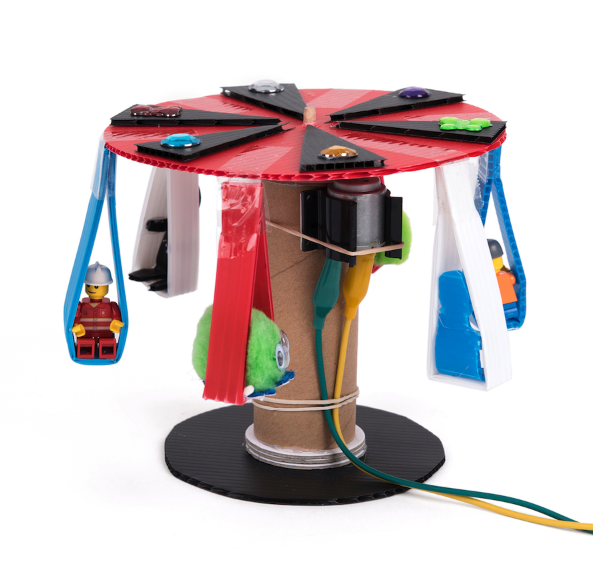
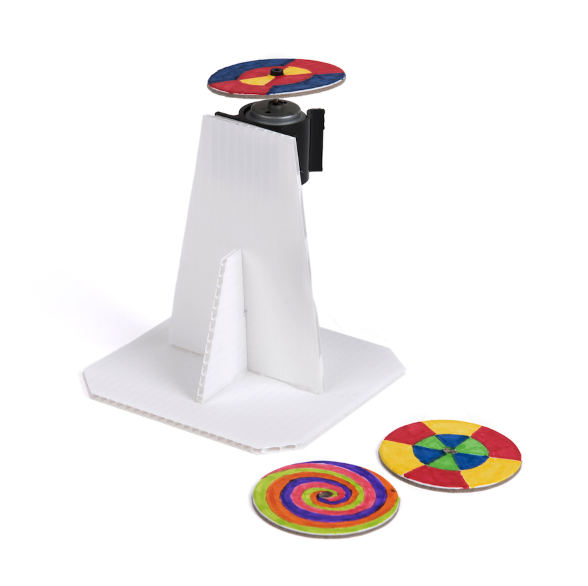
With this fabulous class kit children will apply their understanding of computing to program, monitor and control their products, which include a coloured spinner, LED traffic lights, chair-o-plane and a light which comes on in the dark.
The Crumble controller is ideal for Key Stage 2 pupils. It is robust and easy to connect up, uses a simple drag and drop programming language and directly drives motors, lamps and LEDs. The controller unit is re-used for all four projects in order to keep costs to a minimum.
In this first blog post we look at how to set up and program the Crumble controller.
You will need:
-
- 1 sheet of corrugated plastic
- 1 Crumble controller
- 1 micro-USB cable
- 4 crocodile leads
- 1 battery holder 2 x AA
- 1 snap battery connector
- 1 motor
- 1 motor mount
- 1 bulb
- 1 bulb holder
- 1 LED
Other parts, tools and consumables
- 1 computer with internet connection (Netbook computers will work, but not Chromebooks)
- 2 AA cells (zinc chloride, not alkaline or re-chargeable)
- Pencil
- Ruler
- Large scissors
- Double sided sticky tape
- Low melt glue gun
Topics:
- Computing
- Programming
- Electric circuits
- Forces
- Materials
- Mechanical systems
- Design and make
Step 1
Screw the bulb into the bulb holder and clip the motor into the motor mount. Use the ruler and pencil to draw a square 12.5 cm x 12.5 cm on the corrugated plastic sheet, then cut it out with the large scissors to make the base.

Step 2
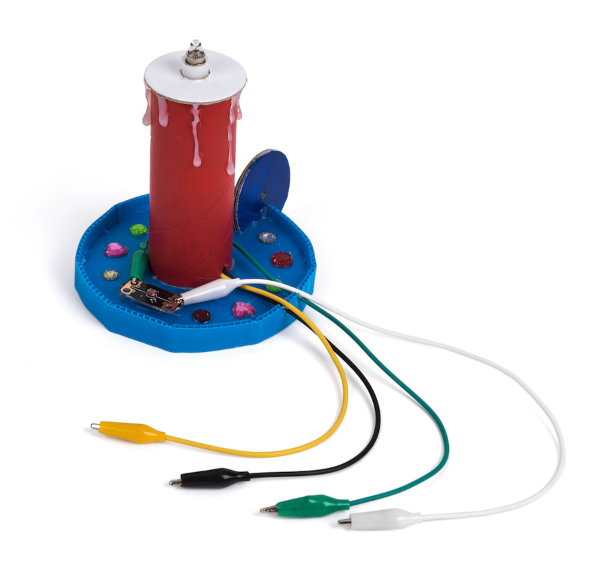
Draw and cut out a rectangle of corrugated plastic sheet 1.2 cm x 5 cm. Stick a strip of double sided tape onto one side of the rectangle, remove the plastic backing and stick the rectangle to the Crumble controller as shown. Make sure you attach the rectangle to the side of the Crumble without components on.

Step 3
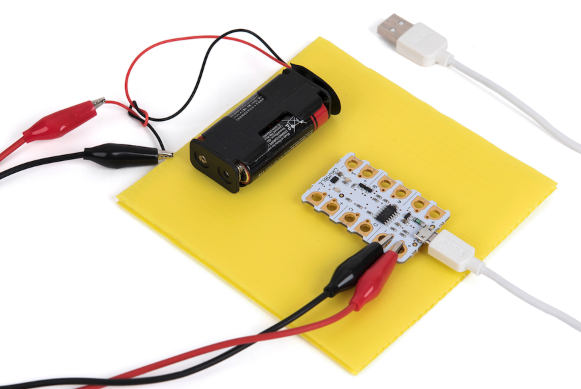
Glue the other side of the plastic rectangle to the base in the position shown. The purpose of the rectangle is to allow space for the crocodile clips to attach to the Crumble contacts. Plug one end of the micro-USB cable into the socket on the Crumble controller (first look carefully at the plug and socket to make sure they are the same way up). Plug the other end into a USB port on your computer.

Step 4
Set up a destination folder called ‘Crumble’ on your computer where you want to install the software, e.g. on your Desktop. Download the Crumble software onto your computer from here. Double click on the downloaded file and run the set-up wizard. Click ‘Next’ then when asked where to install the Crumble software click ‘Change…’ and choose the destination folder you set up earlier. Navigate to your destination folder and double click on ‘crumble’. The following window should appear.

Step 5
Construct a program to run the motor at 75% for 5 seconds as follows. Drag commands from the list on the left hand side of the screen and drop them into the blank space on the right. Each command needs to attach to the one above it. First drag ‘program start’ across. Then attach ‘motor 1 STOP’ to it. Click on ‘STOP’ and it will change to ‘FORWARD at 75%’. Attach ‘wait 1 seconds’, then click on the ‘1’ and type in ‘5’. Attach ‘motor 1 STOP’ again to finish.

Step 6
Click on the green arrow (top left of the screen) to run your program. Motor 1 LED on the Crumble should glow red for 5 seconds and then switch off. Save your program in the Crumble folder – call it ‘Run motor’.

Step 7
Tie the battery snap wires in a reef knot as shown, so the metal ends point away from each other and don’t accidentally short circuit your battery by touching. Push the battery snap firmly onto the battery holder.

Step 8
Connect up the circuit shown below. Fit the cells into the battery holder (the right way round). Glue the battery holder to the base.

Step 9
Run the program (click on the green arrow) and check the motor shaft turns for 5 seconds and then stops.

Step 10
Disconnect the crocodile clips from the motor terminals and clip them onto the lamp holder terminals (screw heads) instead. It doesn’t matter which way round you connect them. Run the program and check the lamp comes on for 5 seconds and then goes off.

Step 11
Disconnect the crocodile leads attached to the lamp. Use them to connect the LED up to the Crumble as shown (make sure the metal ends of the crocodile clips aren’t touching each other). Notice that the LED has a longer and a shorter leg. The longer leg needs to be attached to output A, and the shorter leg to the negative (-) terminal next to it. It doesn’t work if you connect it back to front.

Step 12
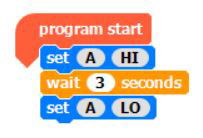
Start a new program (click on File, New). Drag across ‘program start’, then ‘set A HI’. Next attach ‘wait 1 seconds’ then click on 1 and change it to 3. Finally attach ‘set A HI’ and click on ‘HI’ to change it to ‘LO’. Run the program and check the LED comes on for 3 seconds and then goes off. Save the program – call it ‘Light LED’.

Step 13
Disconnect the LED and its crocodile leads from the Crumble. Unclip the snap battery connector from the battery holder to avoid draining the battery when not in use. Your ‘Crumble controller unit’ is now ready to use for the coloured spinner, traffic lights, chair-o-plane or nightlight.

With thanks to Caroline Alliston, a mechanical engineer and award winning STEM educator for writing this post. Caroline is best known for her successful “Technology For Fun” series of books. After 25 years working in industry, she decided to use her knowledge and skills to develop fun, exciting design and build projects to inspire a new generation of scientists and engineers. Caroline also runs hugely popular workshops for children, teachers and STEM ambassadors.

