
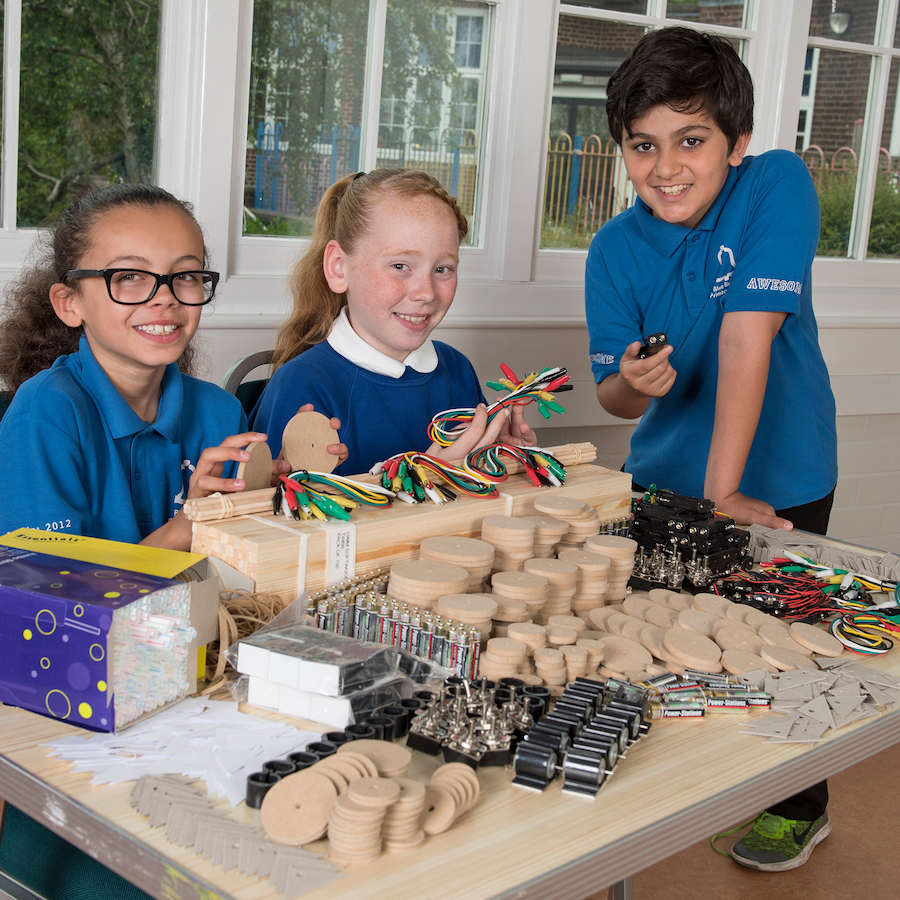

What You’ll Need
Components and Materials
- Battery holder with 2 AA zinc chloride cells (do not use alkaline or rechargeable cells, if accidentally short circuited these can get extremely hot)
- Battery snap
- Toggle switch
- Motor
- Motor mount
- 3 crocodile leads
- Rubber band ~ 1.5mm x 1.5mm x 8cm
- Small plastic pulley
- Wooden pulley 34mm diameter
- 4 wooden wheels 35mm diameter
- 2 jumbo plastic drinking straws 6mm diameter
- 8 cable ties 20cm long
- 16 card triangle axle supports
- Balloon
- Wooden dowel 5mm diameter x 30cm long
- Square section wood 8mm x 68cm long
Tools
- Ruler
- Pencil
- Pointed scissors
- Junior hacksaw and vice
- Sandpaper
- Low melt temperature glue gun

Step 1.
Make the circuit and check the motor shaft rotates when you switch on.
Be careful not to short-circuit your battery (i.e. connect the wires from your battery directly together). They must go via the motor. If you tie the wires from your battery snap in a reef knot you are less likely to accidentally short circuit your battery.
Step 2.
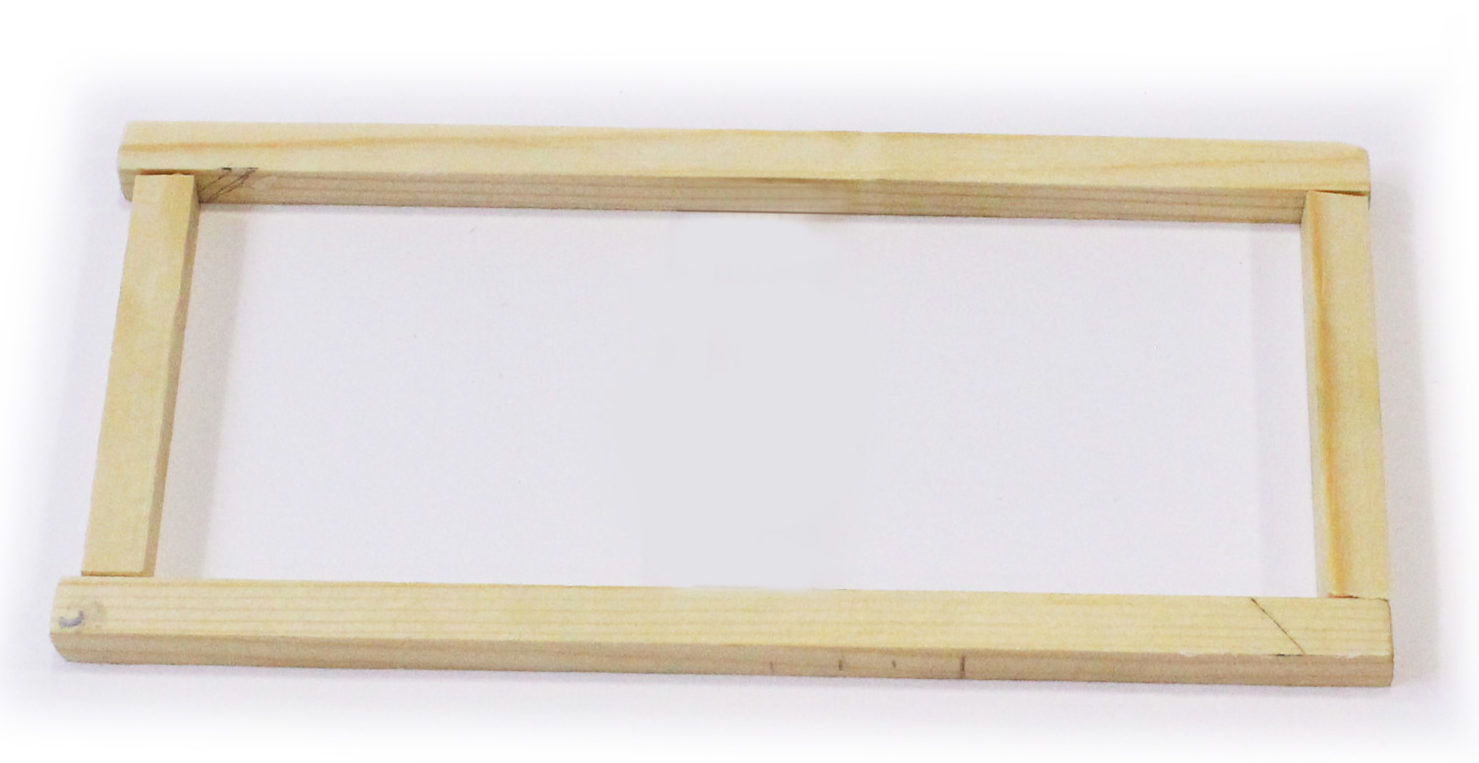
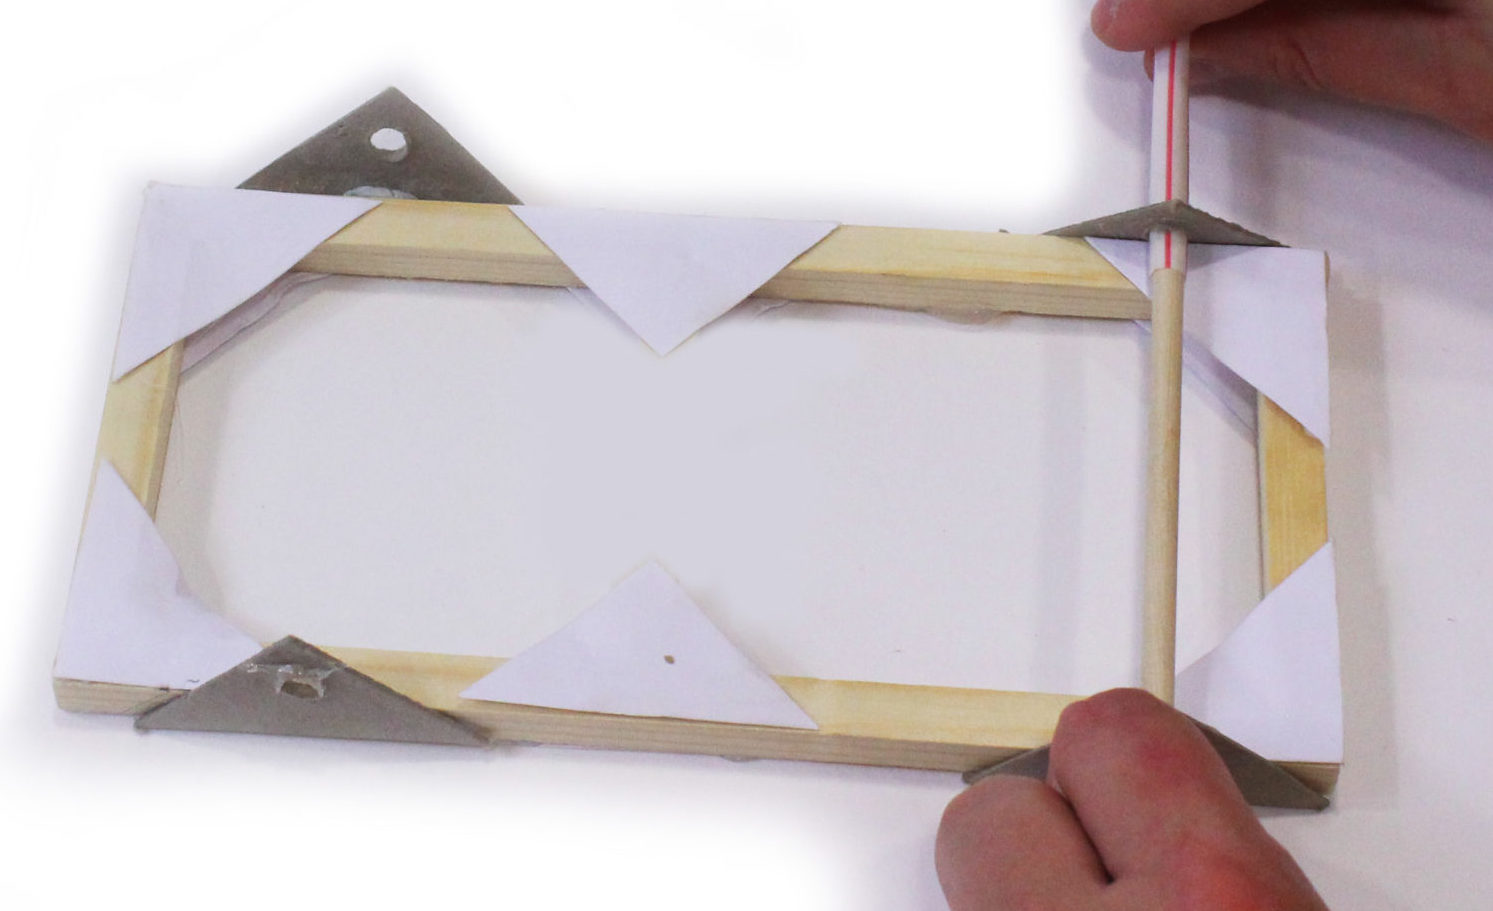
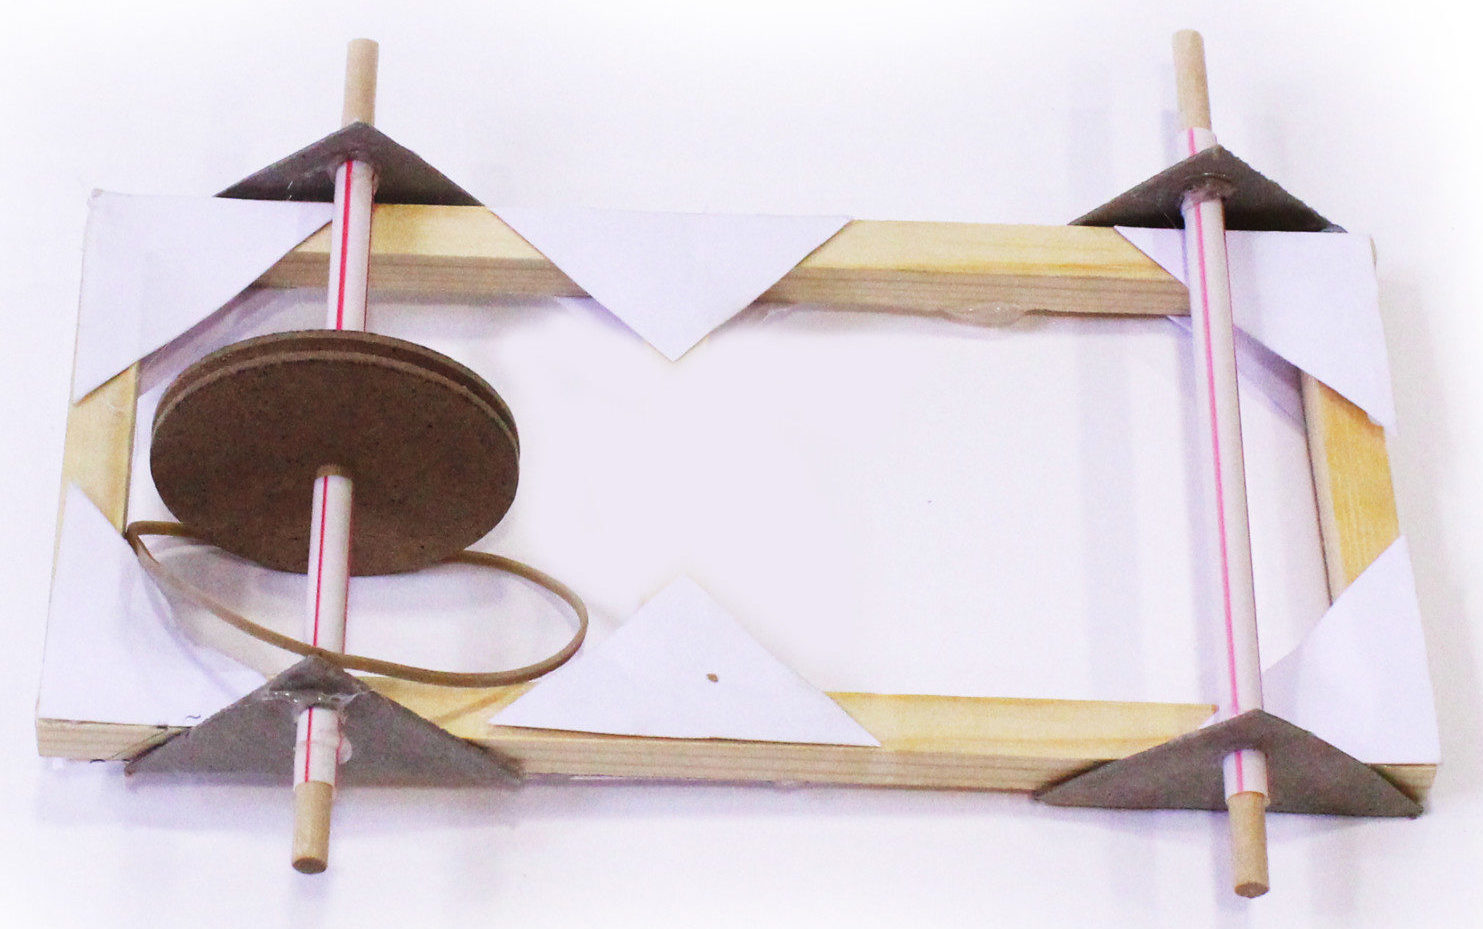
Cut two 20cm lengths and three 9cm lengths of square section wood. Smooth the ends with sandpaper. Set one of the 9cm lengths aside. Use the glue gun to make a rectangular frame with the other four lengths as shown below. Reinforce the corners with card triangles and attach four card triangle (Jinks) axle supports; try to make them symmetrical.
Step 3.
Cut two 15cm lengths of dowel to make the axles, and smooth the ends. Push a wheel onto the end of one of the axles; it should be a tight fit. Cut 13cm length of straw to make a bearing, and slide over the axle. Slide the axle and bearing assembly through a pair of axle holders; you will need to enlarge the holes in the axle holders very slightly. Don’t make the hole too big as the straw needs to fit tightly. Check the axle rotates easily in the straw.
Step 4.
Glue the straw to the axle holder to stop it sliding about when in use (without getting glue on the axle). Take the axle out of the straw and fit one of the wheels. Put it back and fit the second wheel. The wheels should be a tight fit on the axle. Adjust so that there is roughly a 1mm gap between the wheels and the ends of the straw. Hold the frame and spin the wheels to check the wheel/axle assembly still rotates freely.
Step 5.
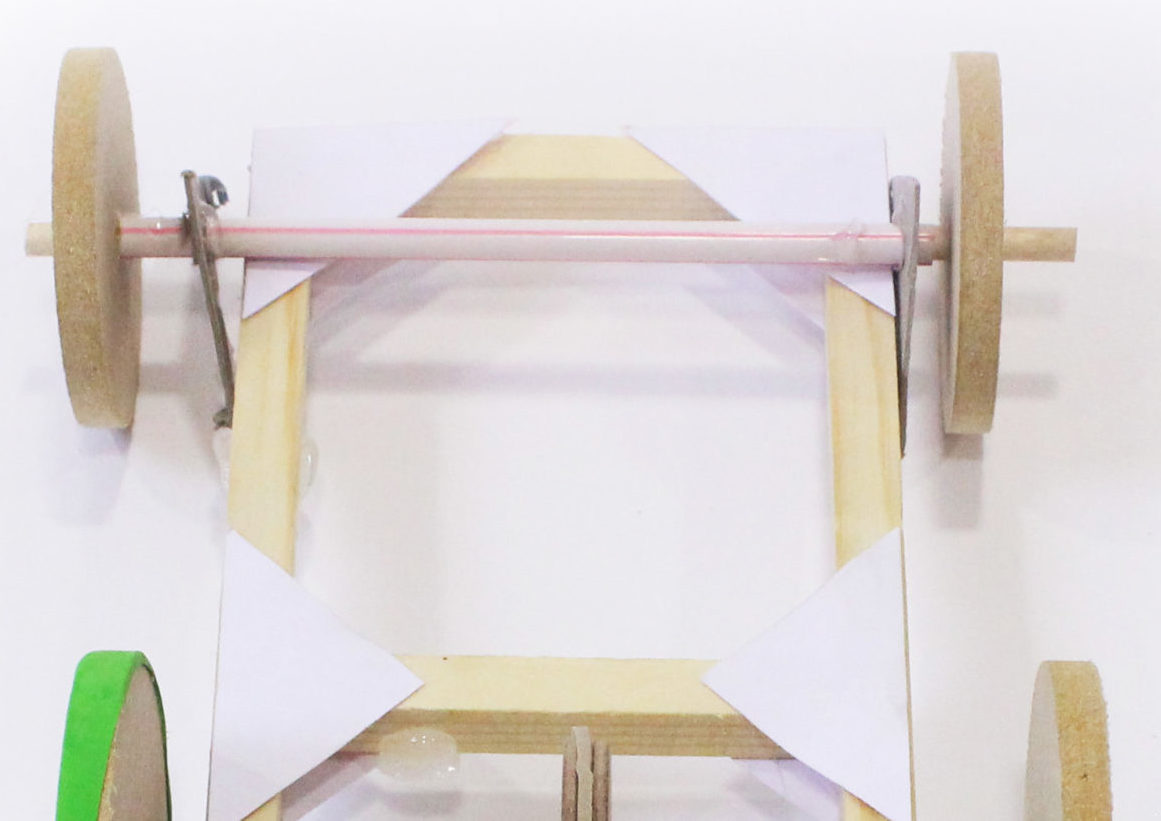
Slide the wooden pulley to the centre of the second axle; it should be a tight fit. Fit the rubber band over the pulley. Cut two 6.5cm lengths of straw. Enlarge the hole in the axle holders very slightly until the straw will just slide in; it should fit tightly. Slide the axle assembly into the two axles holders as shown.
Step 6.
Slide on the two straw pieces, then fit the wheels. Adjust until there is roughly a 1mm gap between the ends of the straws and the pulley and wheels. Hold the frame and spin the wheels, to check the wheel and axle assembly rotates freely, whilst the straws remain stationary. Glue the straws in place, without getting glue on the wheels or axles.

Step 7.
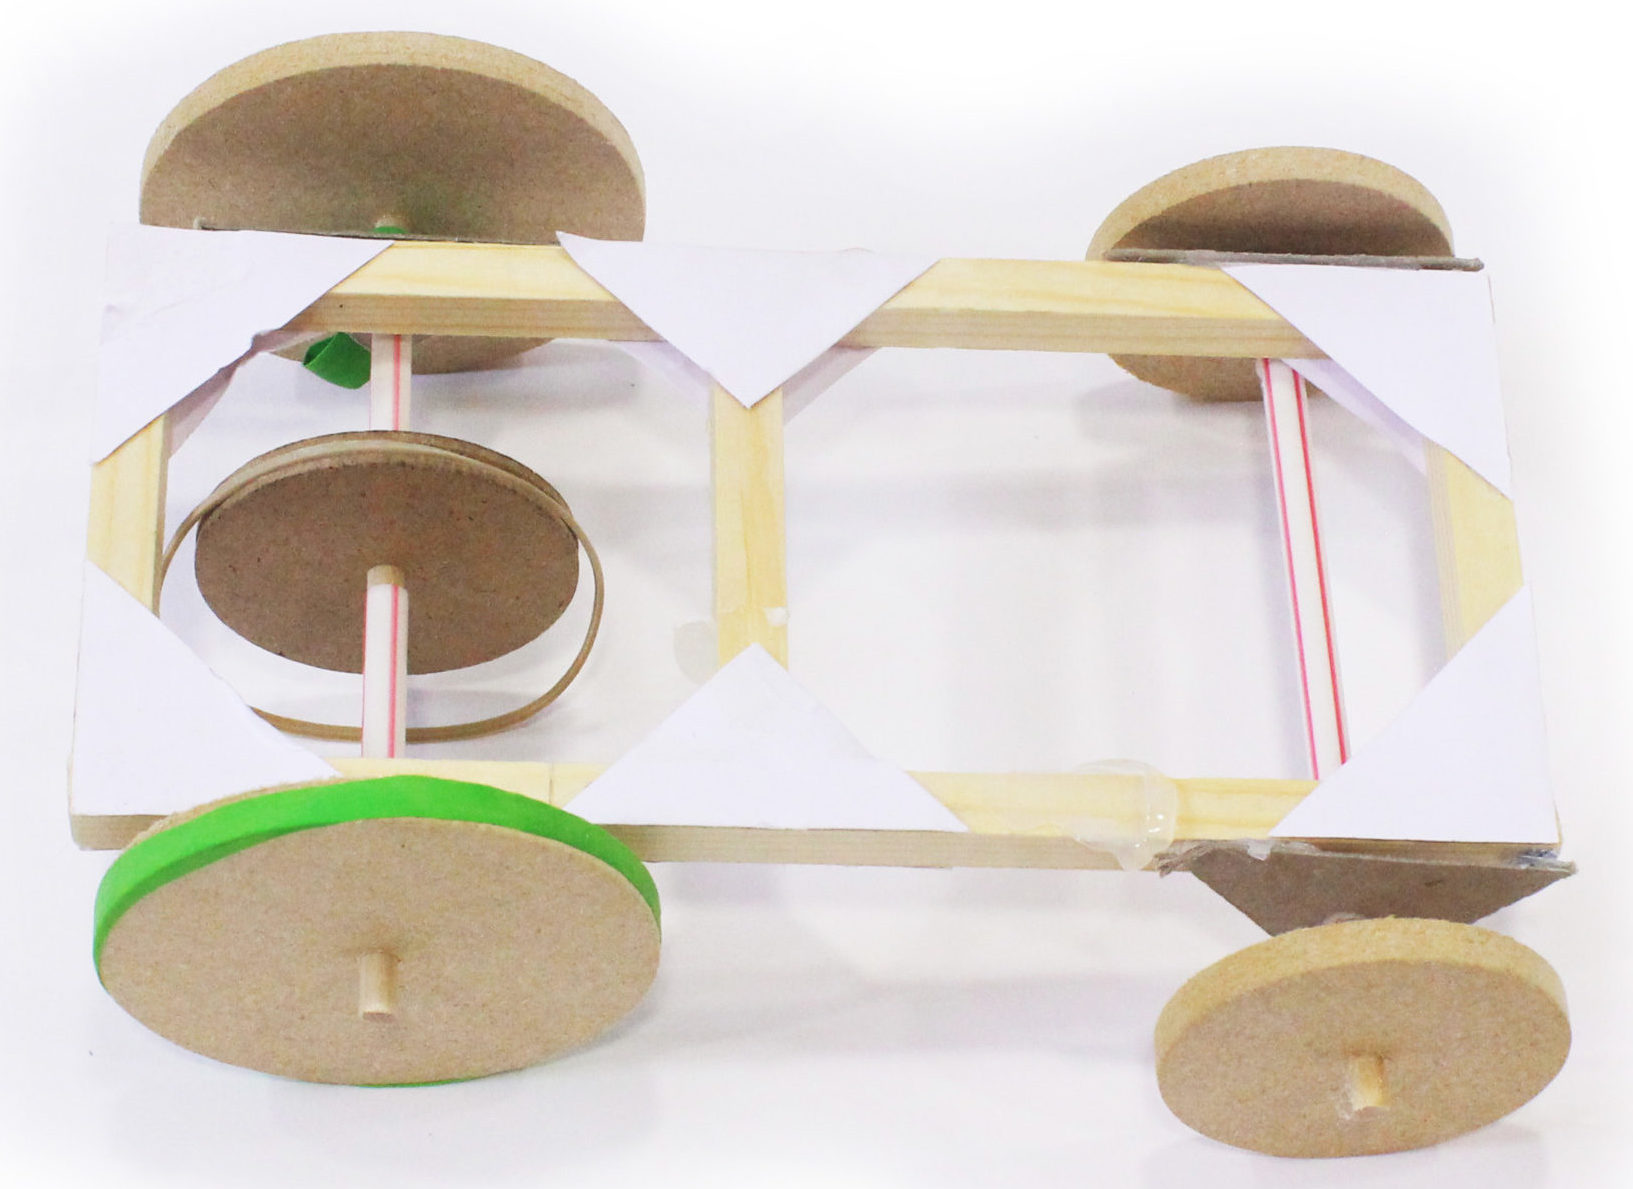
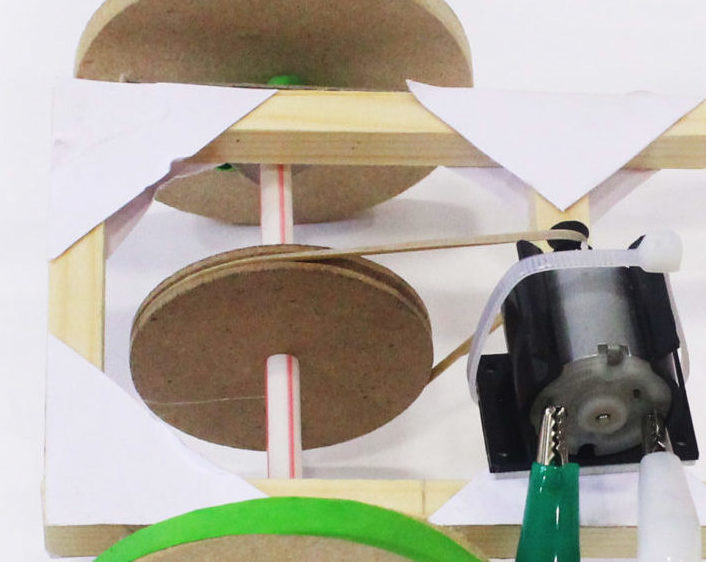
Press the small pulley onto the motor shaft, and clip the motor into the motor mount. Fit the rubber band onto the small pulley and position the motor so that the rubber band is just tight but not stretched. Mark the centre line of the motor on the wooden frame as shown below on the left. Make another mark 1cm further along the frame, as you will need to tension (i.e. stretch) the rubber band. Glue the final 9cm length of wood across the frame with the centre in line with your second mark as shown below right.
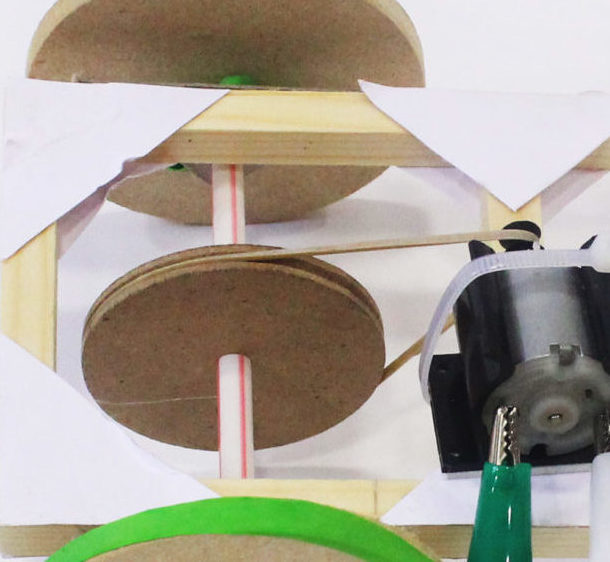
Step 8.
Reinforce with card triangles, but before gluing cut about 1.5cm off the card triangle where the motor will fit, so that the motor has a flat surface to mount onto. Place your motor chassis the right way up (i.e. so that the wheels are on the bottom), and stick your motor assembly to the top of your crosspiece so that the two pulley centres are exactly in line, and then cable tie it firmly in place. Fit the rubber band onto the pulley.
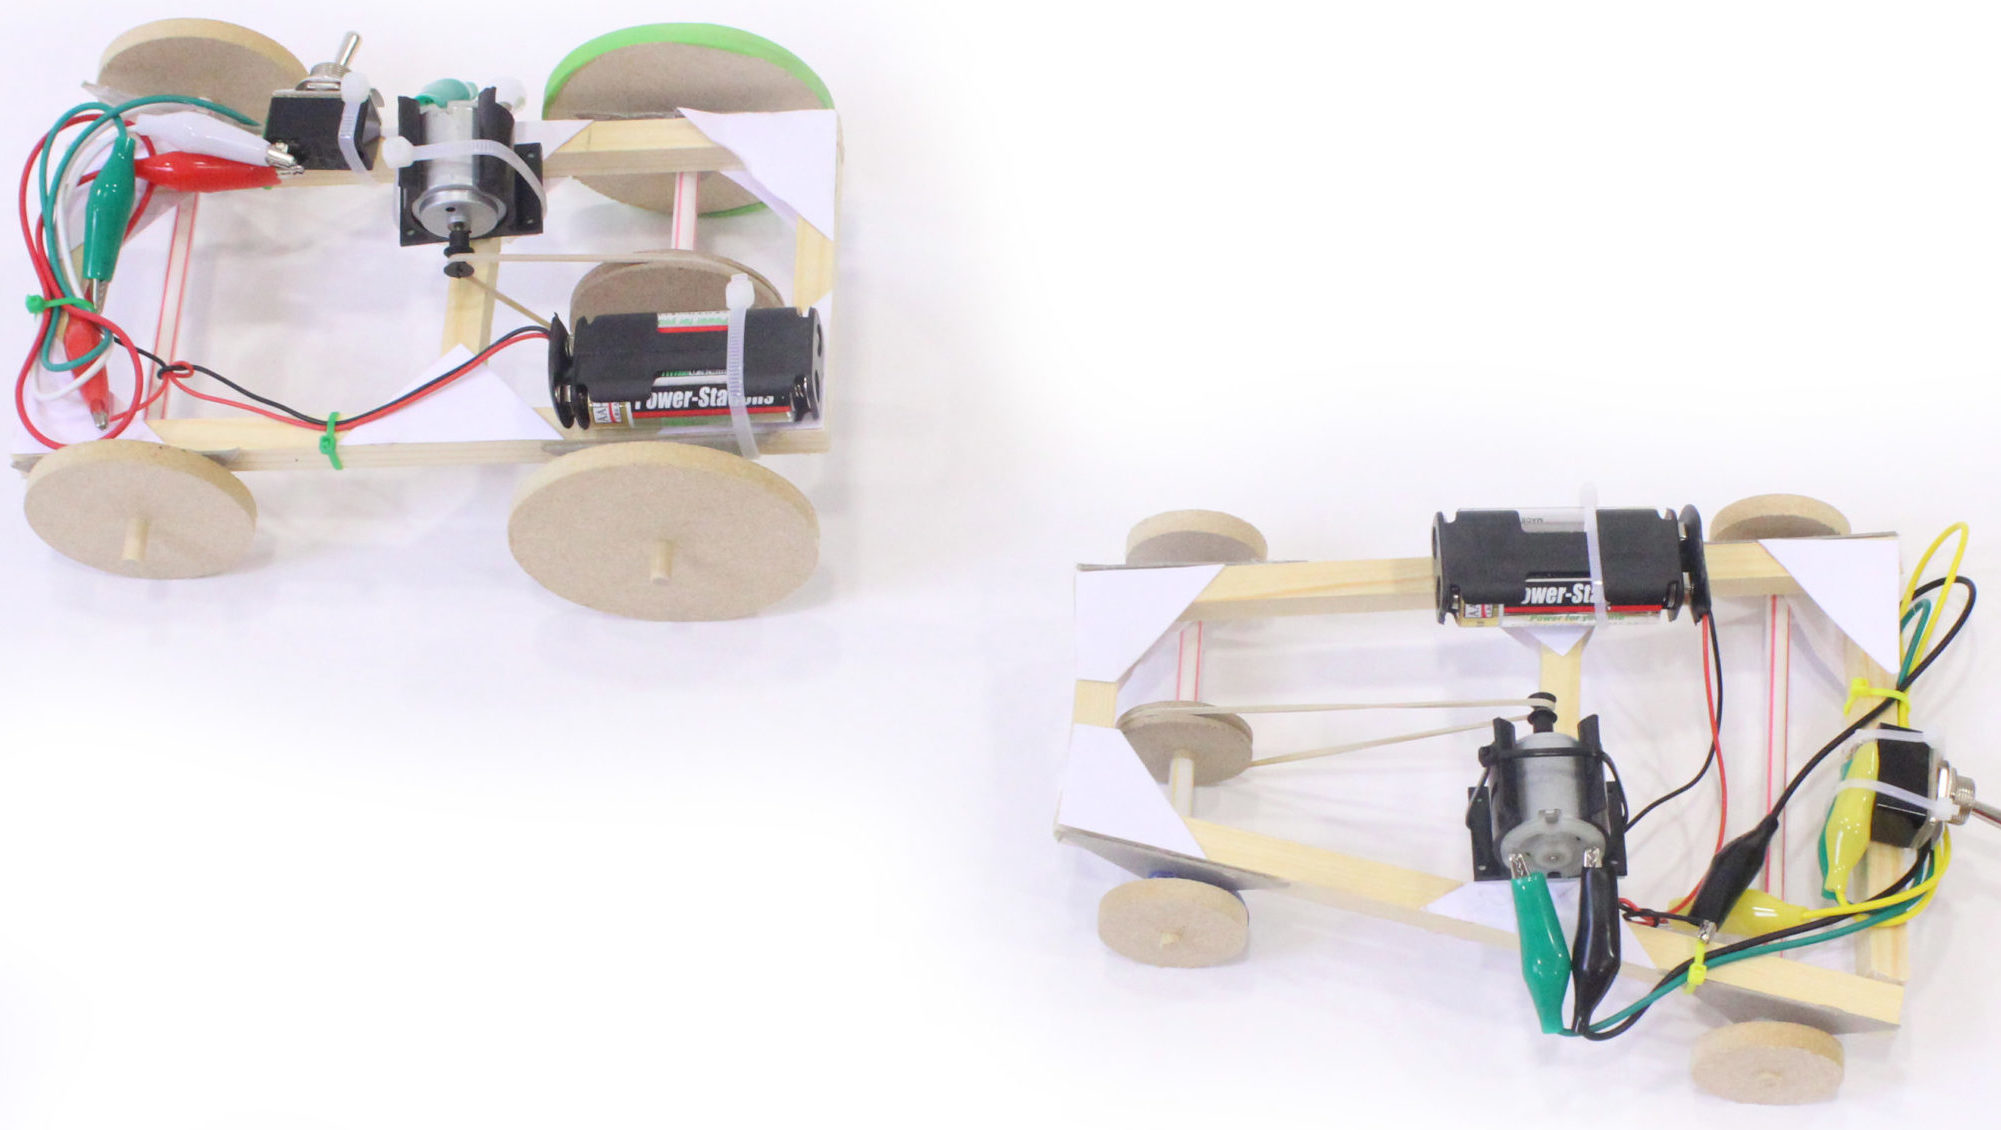
Step 9.
Work out where to attach your battery and switch, making sure nothing will interfere with the rotating parts. Glue and cable tie the components firmly to the frame. Tidy up your wires, making sure the crocodile clips don’t touch, and cable tie these as well. Trim off the ends of the cable ties.
Try this:
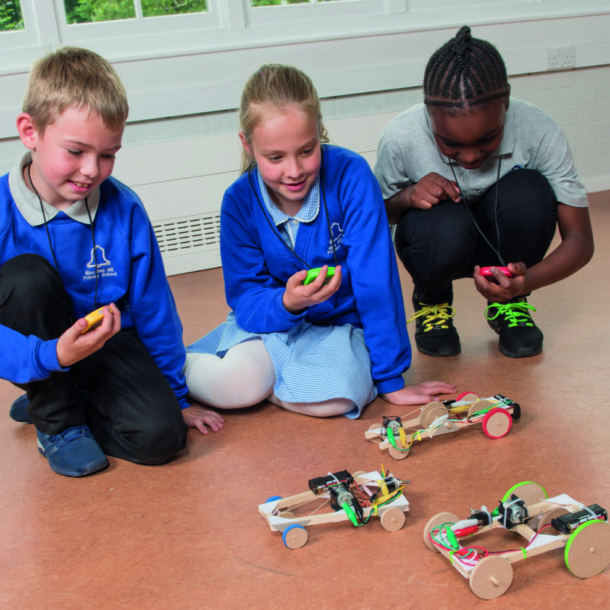
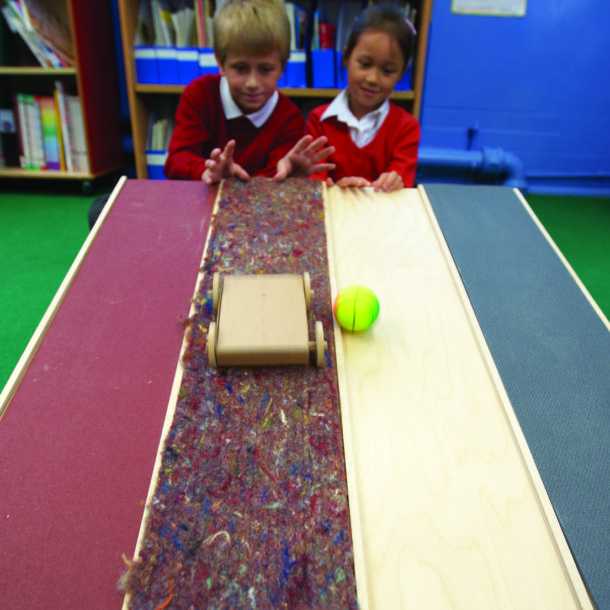
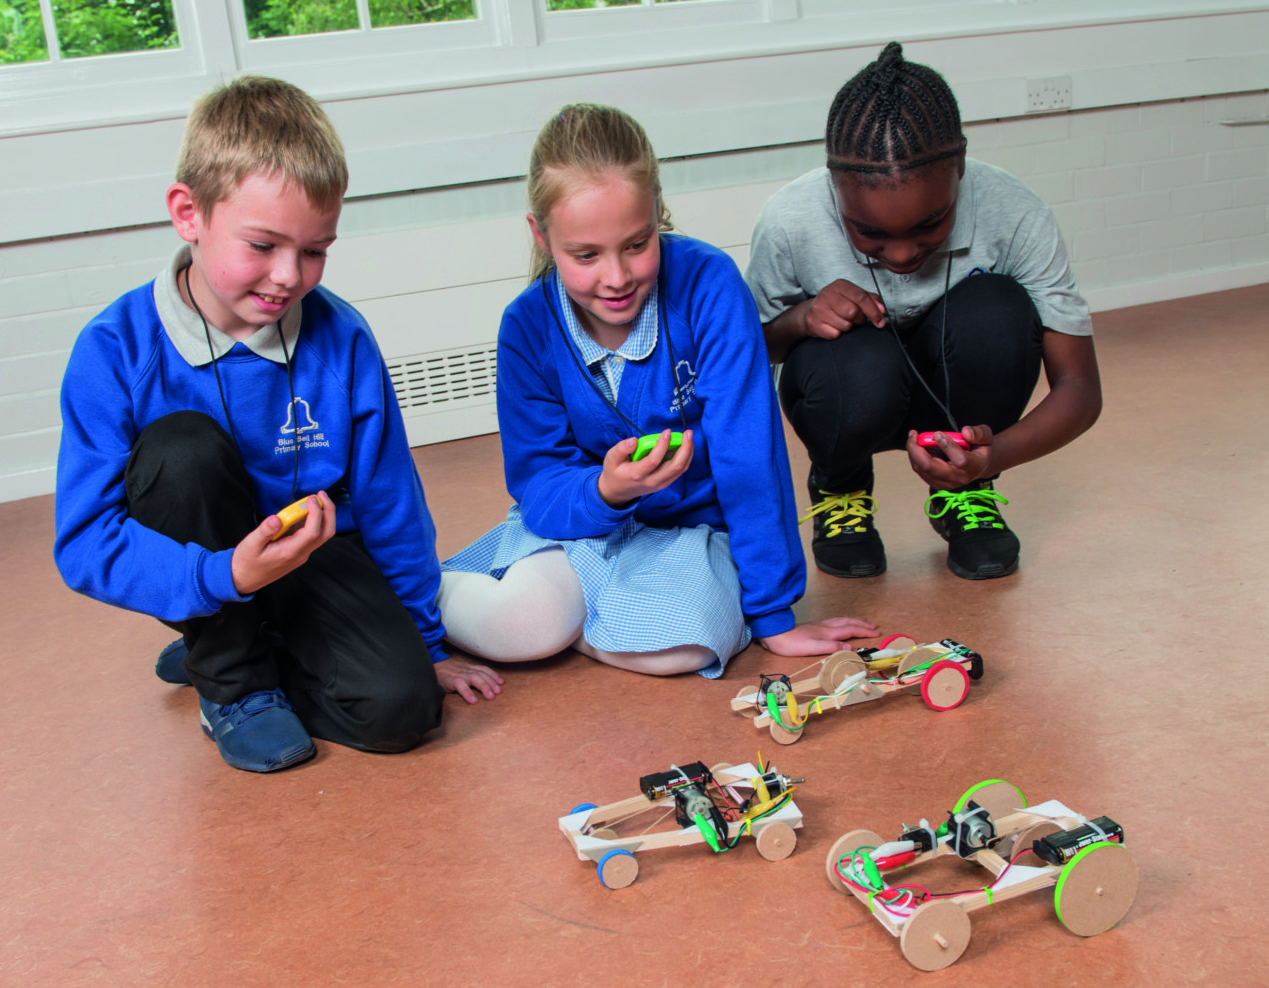
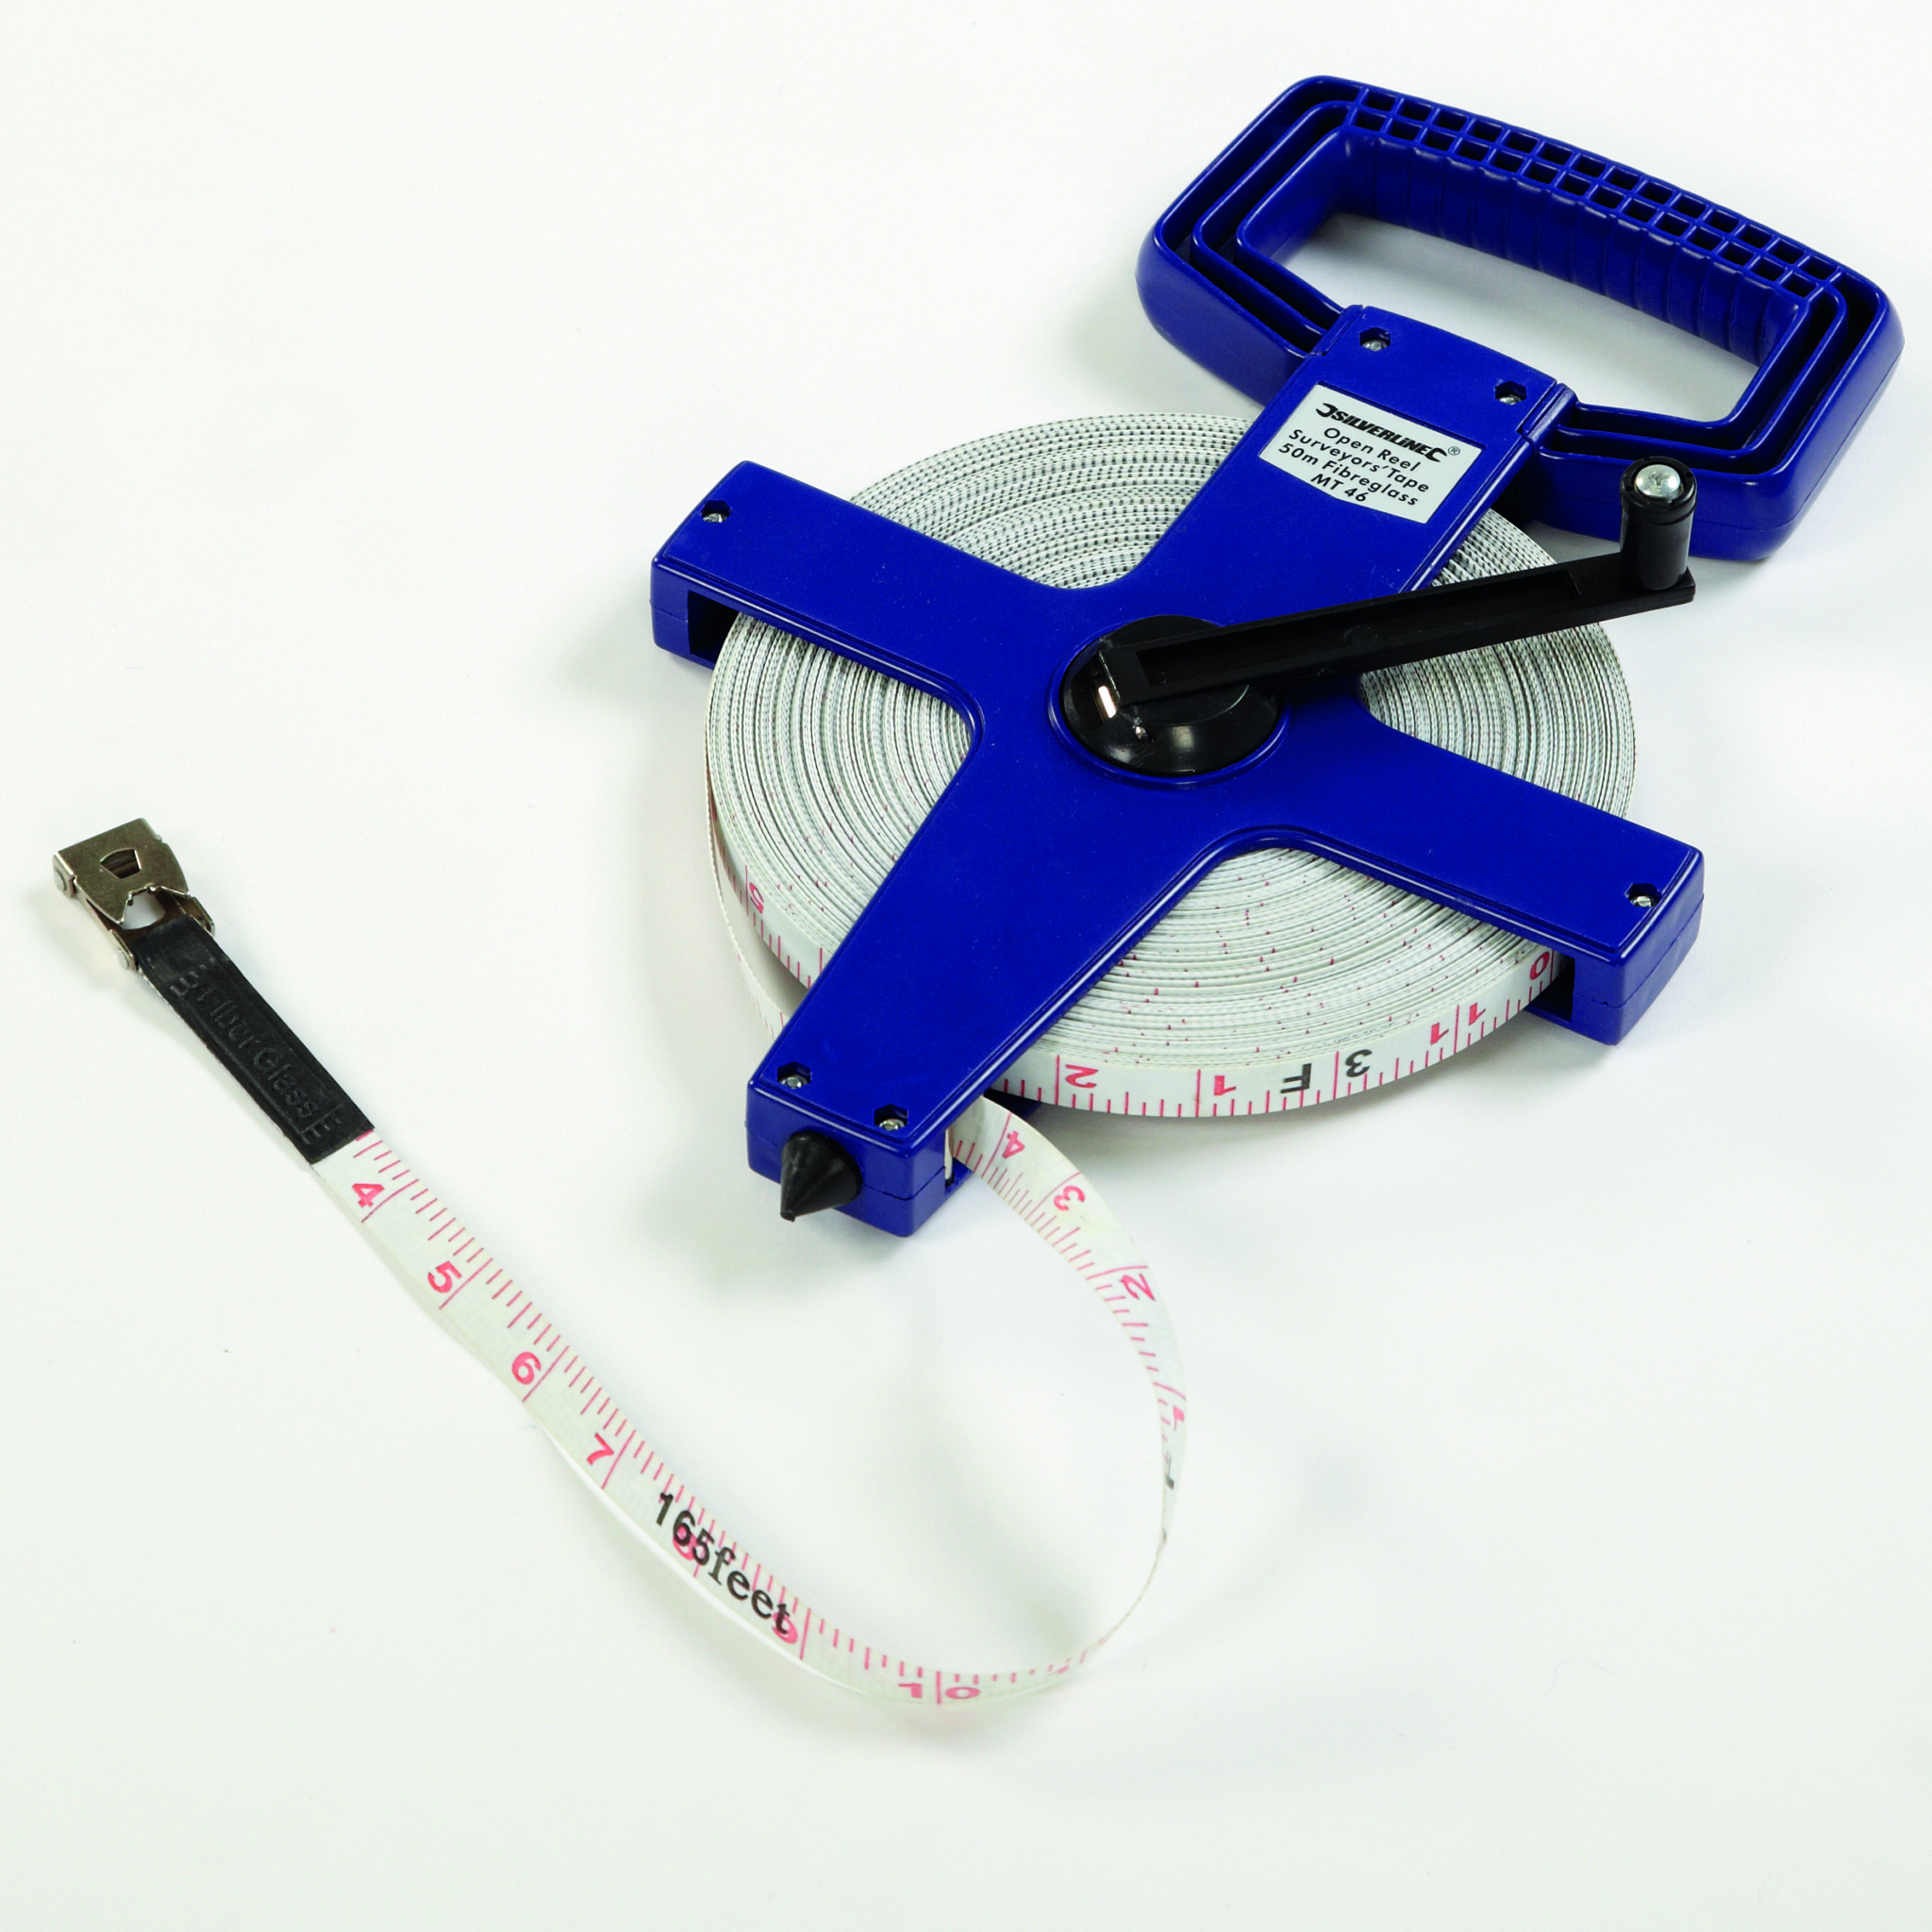
Try out your motorised vehicle on different surfaces. You may find the driving wheels slip on a smooth surface, in which case you can cut sections of balloon and fit them as tyres. You can time your vehicle over a known distance to calculate the speed using a stopwatch and tape measure. You can also use a ramp to find out how steep a slope it can climb. You could try different wheel sizes and compare the performance of the vehicle. If you want your vehicle to go in the opposite direction you can swap over the crocodile clips on the back of the motor.
-
-
-

Try this:
Try out your motorised vehicle on different surfaces. You may find the driving wheels slip on a smooth surface, in which case you can cut sections of balloon and fit them as tyres. You can time your vehicle over a known distance to calculate the speed using a stopwatch and tape measure. You can also use a ramp to find out how steep a slope it can climb. You could try different wheel sizes and compare the performance of the vehicle. If you want your vehicle to go in the opposite direction you can swap over the crocodile clips on the back of the motor.

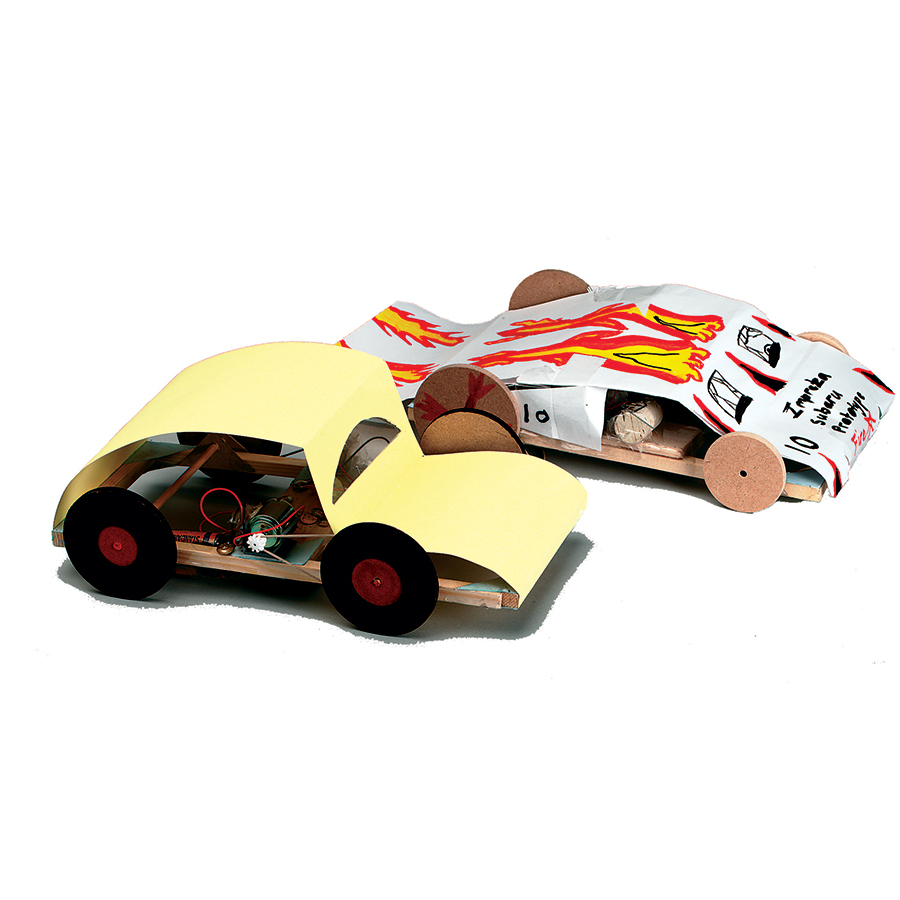
Have fun by getting creative! Finish off and decorate your vehicle to your own design!
-

-
With thanks to Caroline Alliston, Technology for Fun, for writing this blog.
Caroline Alliston, is a professional engineer and technical author with a degree from Cambridge and twenty four years experience in industry. Whilst on a career break to spend more time with her two boys, she started a club at their school to enthuse children about science and engineering. Before long there were more children on the waiting list than in the actual club!
Caroline now spends her time running hugely popular workshops for teachers, pupils, home educated children, holiday clubs, Scout groups etc. Unable to be in three places at once, she has written the Technology for Fun series of books incorporating her favourite and most successful projects, to give even more children the opportunity to have fun making things that really work.
Have fun by getting creative! Finish off and decorate your vehicle to your own design!


With thanks to Caroline Alliston, Technology for Fun, for writing this blog.
Caroline Alliston, is a professional engineer and technical author with a degree from Cambridge and twenty four years experience in industry. Whilst on a career break to spend more time with her two boys, she started a club at their school to enthuse children about science and engineering. Before long there were more children on the waiting list than in the actual club!
Caroline now spends her time running hugely popular workshops for teachers, pupils, home educated children, holiday clubs, Scout groups etc. Unable to be in three places at once, she has written the Technology for Fun series of books incorporating her favourite and most successful projects, to give even more children the opportunity to have fun making things that really work.


