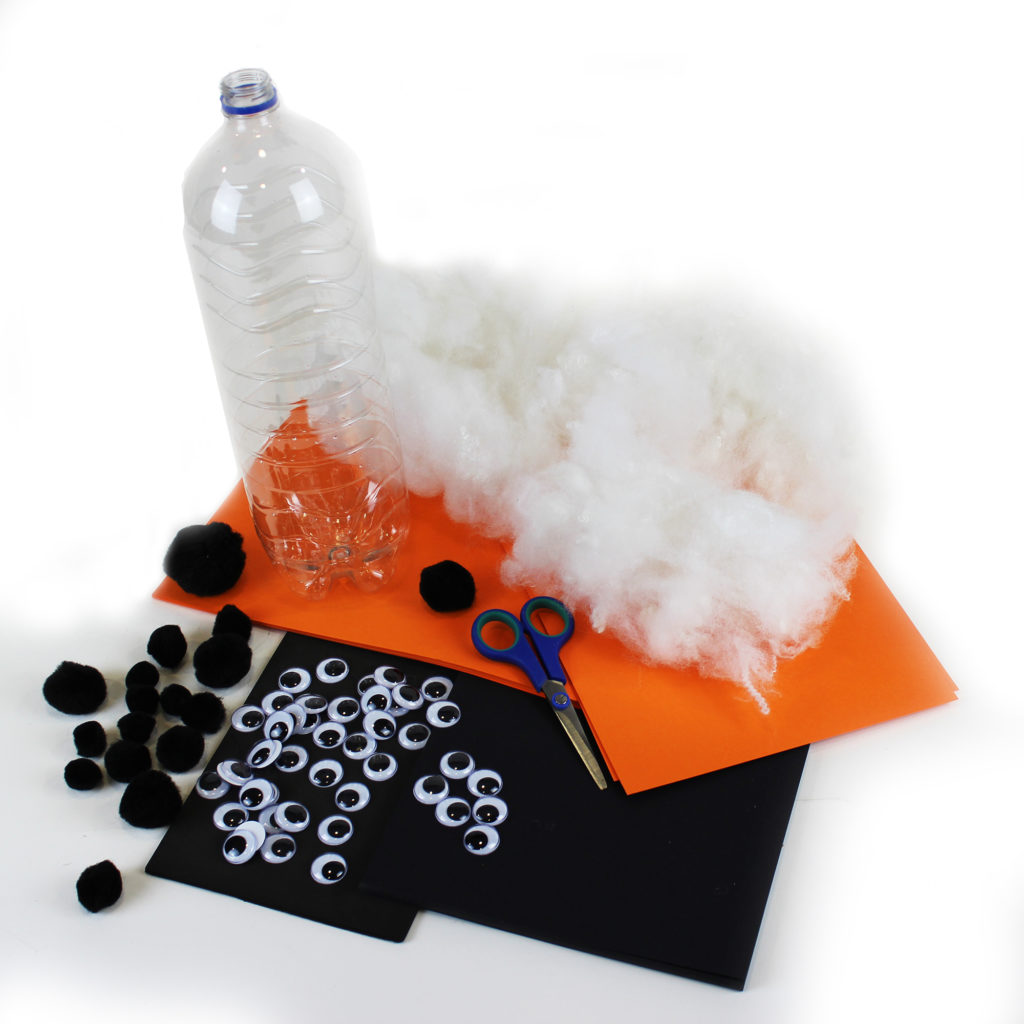
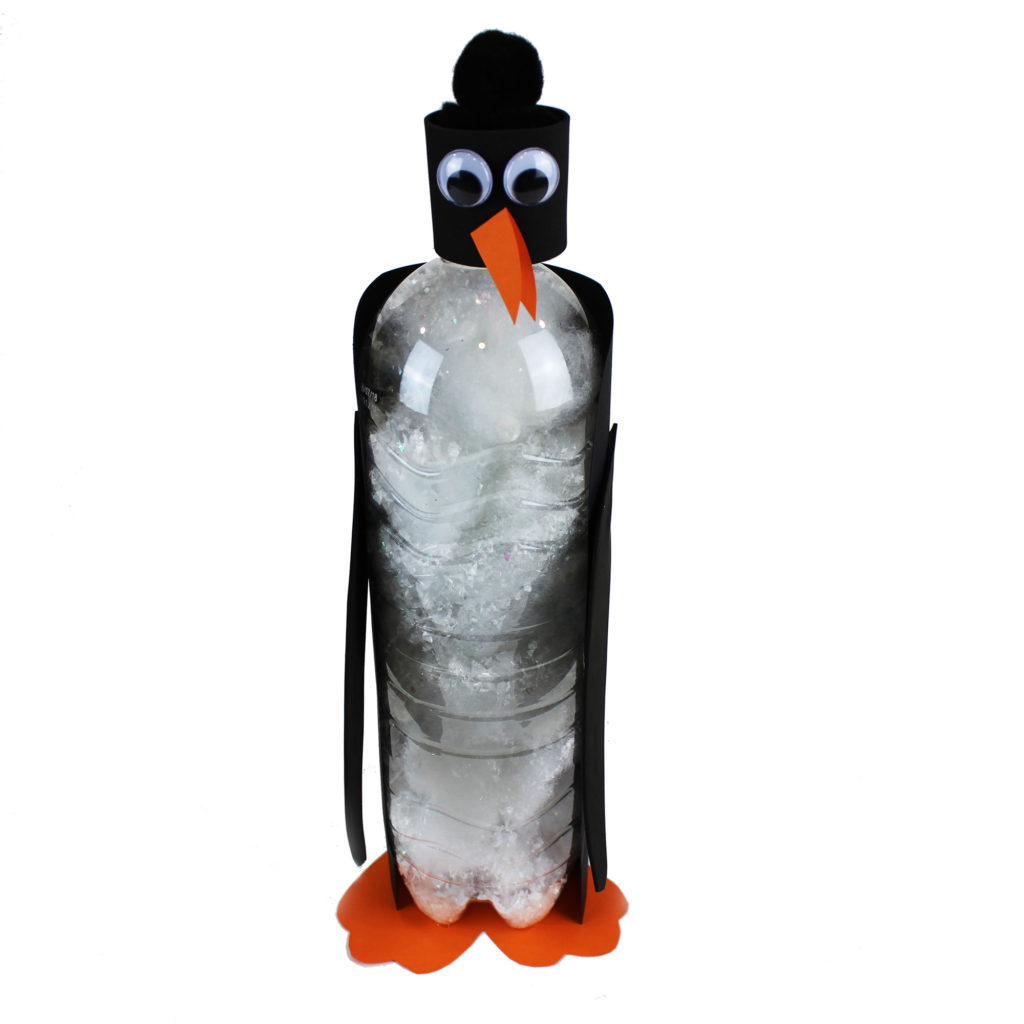
What you’ll need for the penguin:
- 1ltr plastic bottle
- Toy stuffing
- A4 black and orange card
- Black foam or card
- Black pompoms
- PVA glue
- Scissors
- Wiggly eyes
Optional:
- Iridescent snowflakes or silver glitter
- Glue dots
- Masking tape
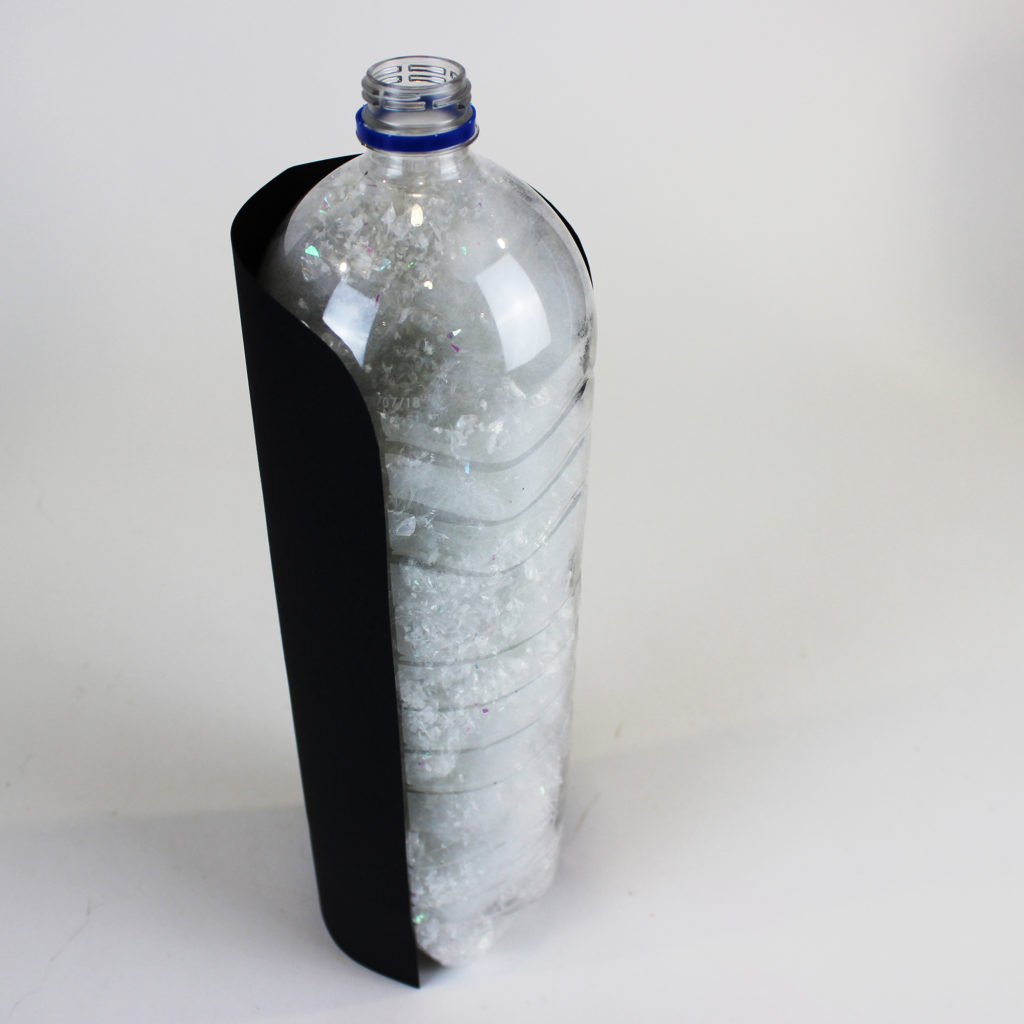
Step 1. Firstly, make sure all liquid is out of the plastic bottle and it is completely dry. Start by stuffing the bottle with small pieces of toy stuffing and pinches of iridescent snowflakes or glitter (we’ve use iridescent snowflakes here). Keep layering until the bottle is completely full.
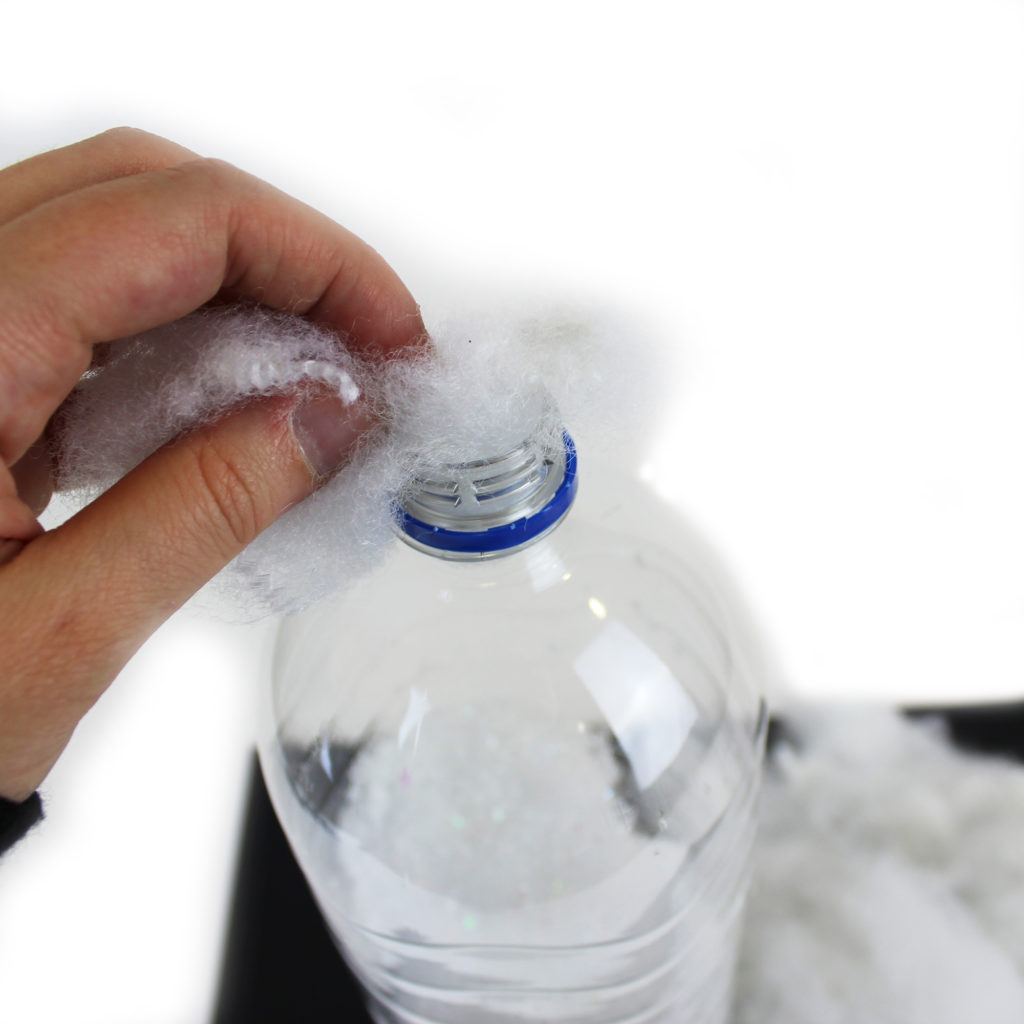
Top tip: Make a cone out of card to help funnel the glitter inside the bottle!
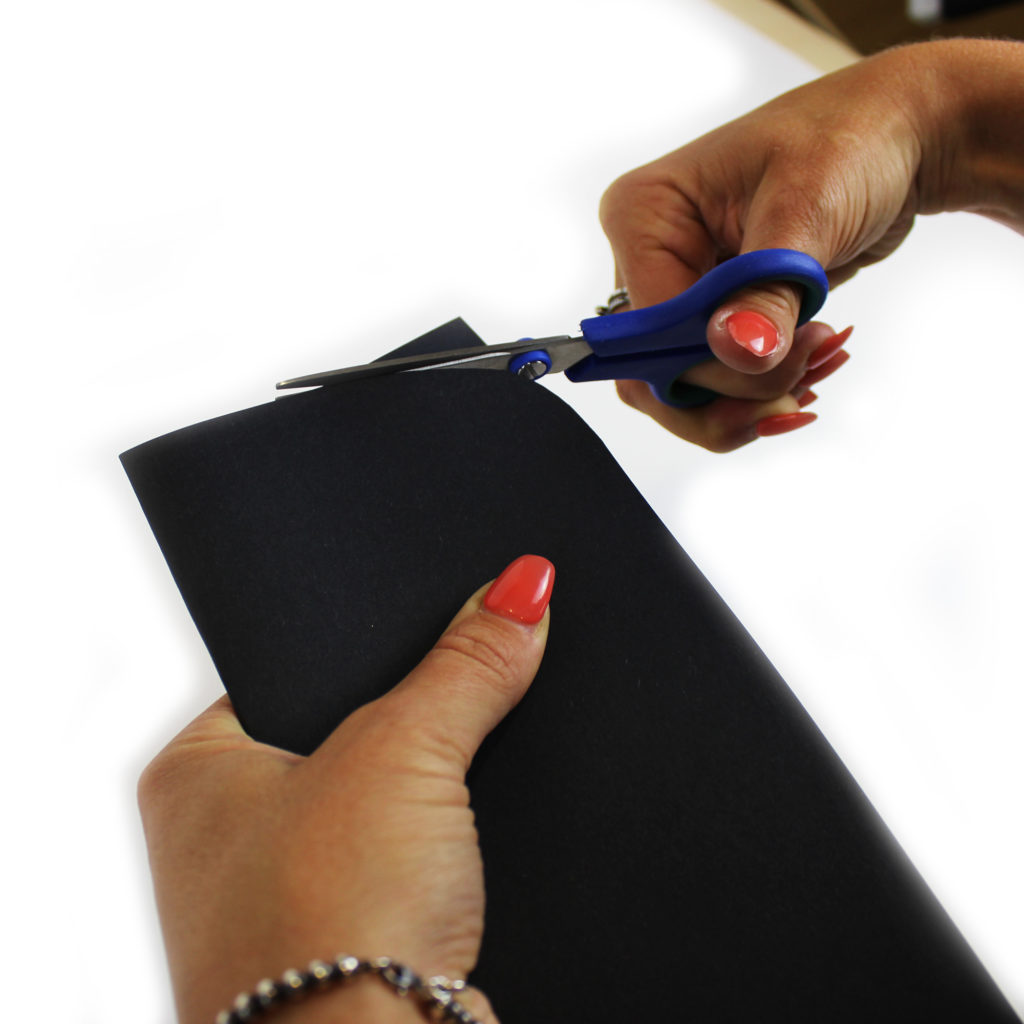
Step 2. Fold a piece of black card in half and cut the corner on the open side to create a rounded edge.
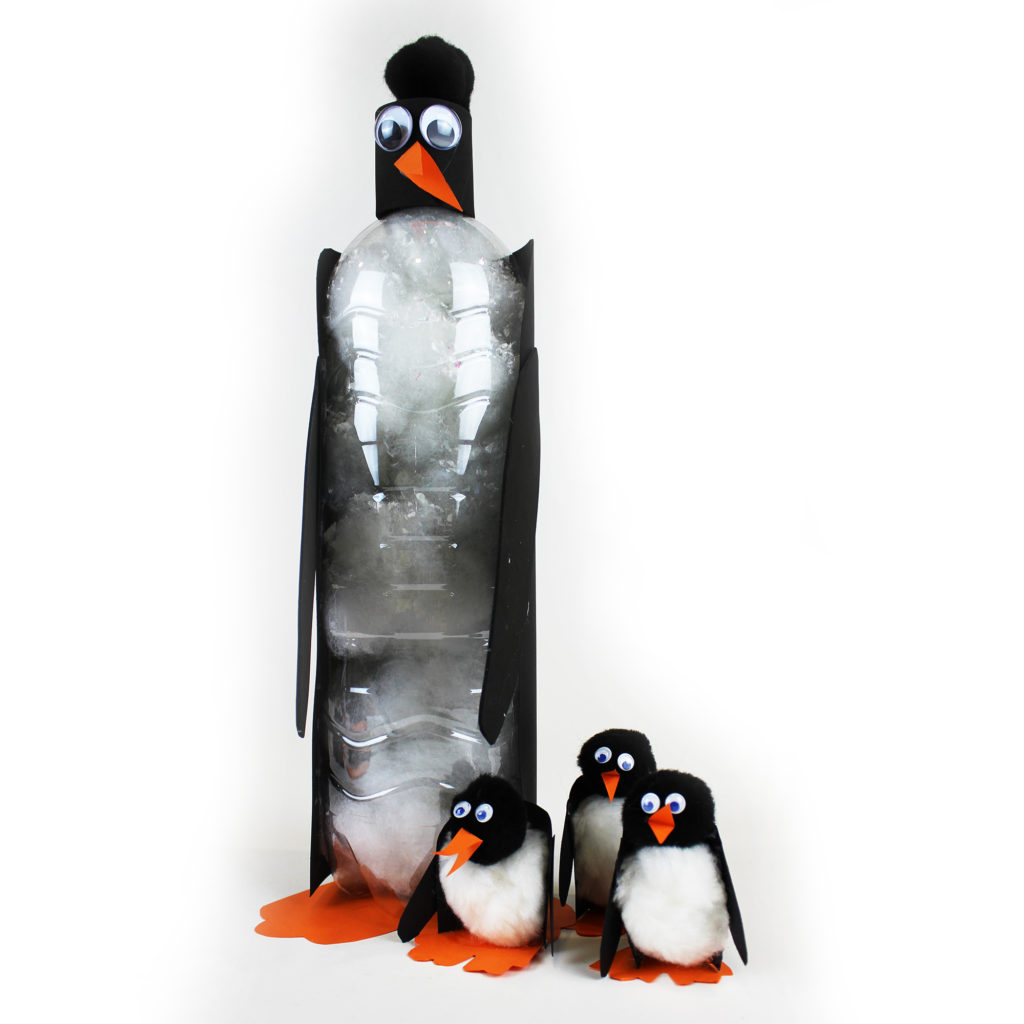
Step 3. Glue the card onto the back of the plastic bottle with the rounded edges facing towards the bottle neck. This is the start of the penguins back.
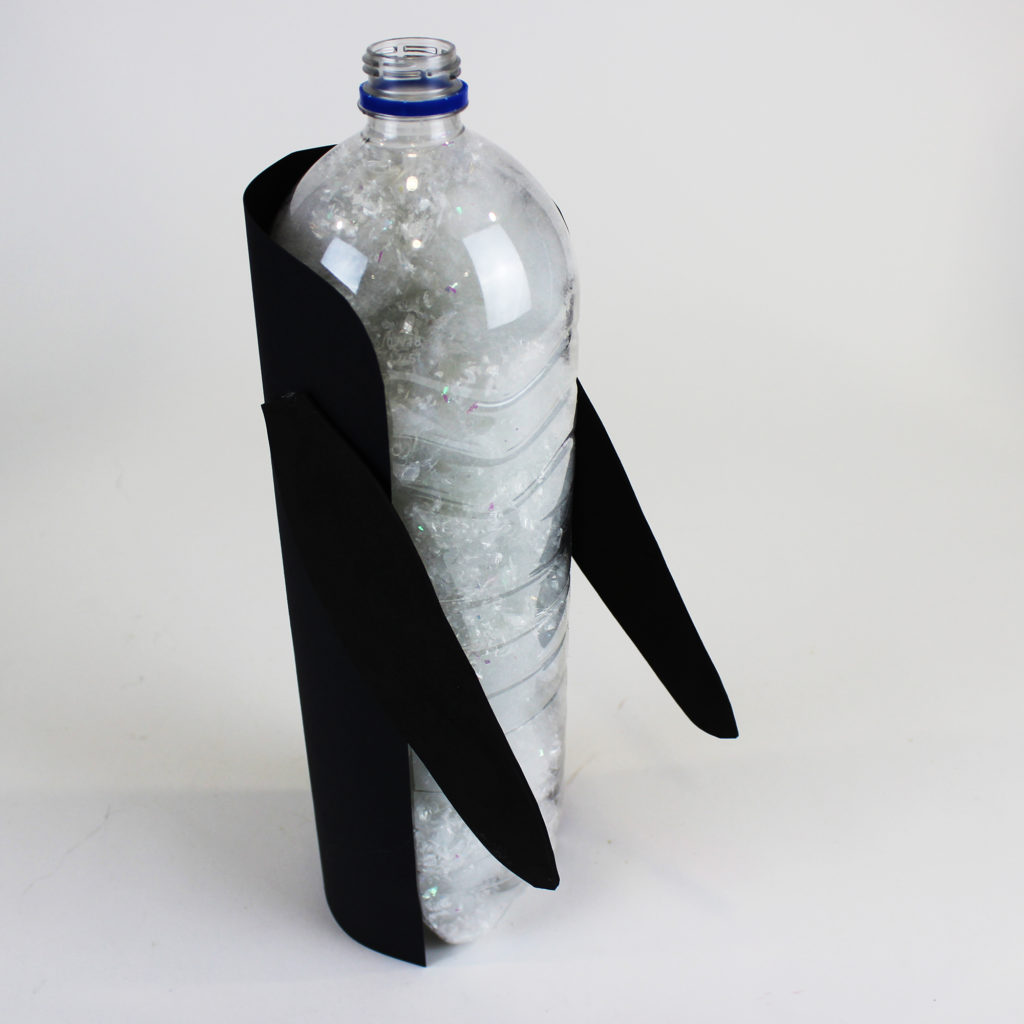
Step 4. Cut the wings from the black foam and attach to each side of the body. Making sure you’re happy with the position before gluing.
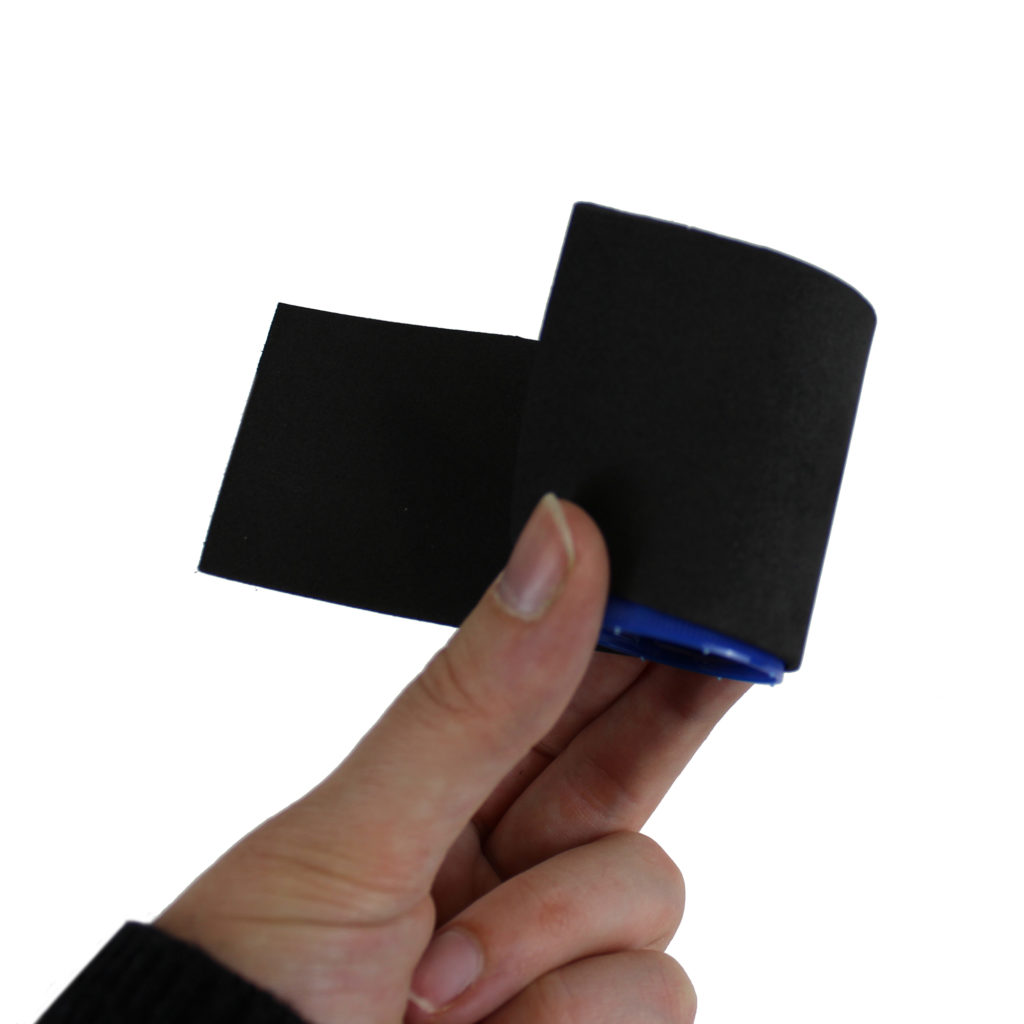
Step 5. Cut a 5cm wide strip from the black foam that is also long enough to cover the circumference of the bottle top. Wrap this around the lid and glue into place. You may want to use masking tape here to secure into place while it dries or use an instant fixing glue such as Glue Dots.
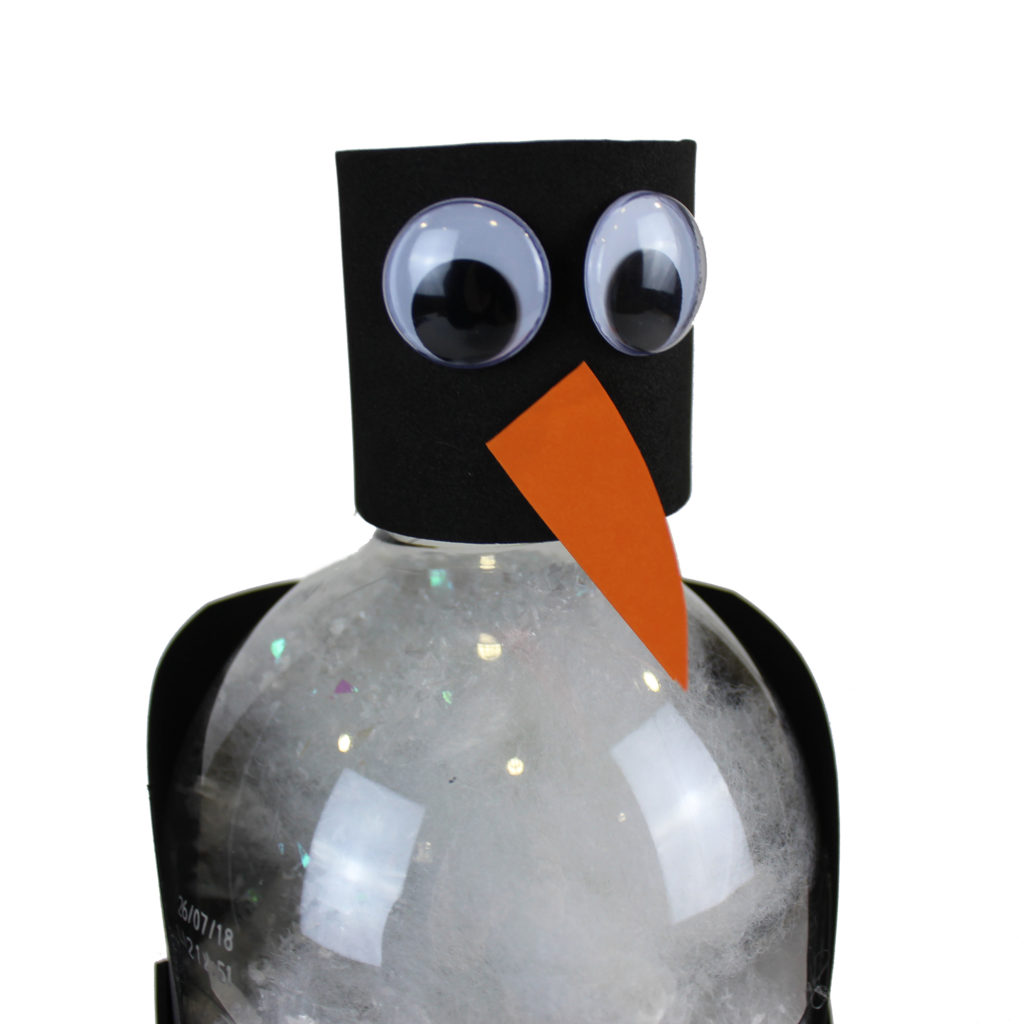
Step 6. Add wiggly eyes and cut a small beak out of orange card. Attach the head onto the neck of the bottle and twist until sturdy and in the right position.
Step 7. Cut the feet from the orange foam and attach to the bottom of the bottle. The bottle will stand up on its own, so the feet can be as small or as large as you like.
Step 8. And finally, add black pom poms on top of the penguins head to fill the gap and make it fluffy.
Not much time? See below for details on how to make these penguin chicks. It only takes a few minutes (4 steps). A great after school or lunchtime make.
Not much time? See below for details on how to make these penguin chicks. It only takes a few minutes (4 steps). A great after school or lunchtime make.
For the chicks you’ll need:
- A4 black and orange card
- Black pompoms
- Large white pompoms
- PVA glue
- Scissors
- Coloured wiggly eyes
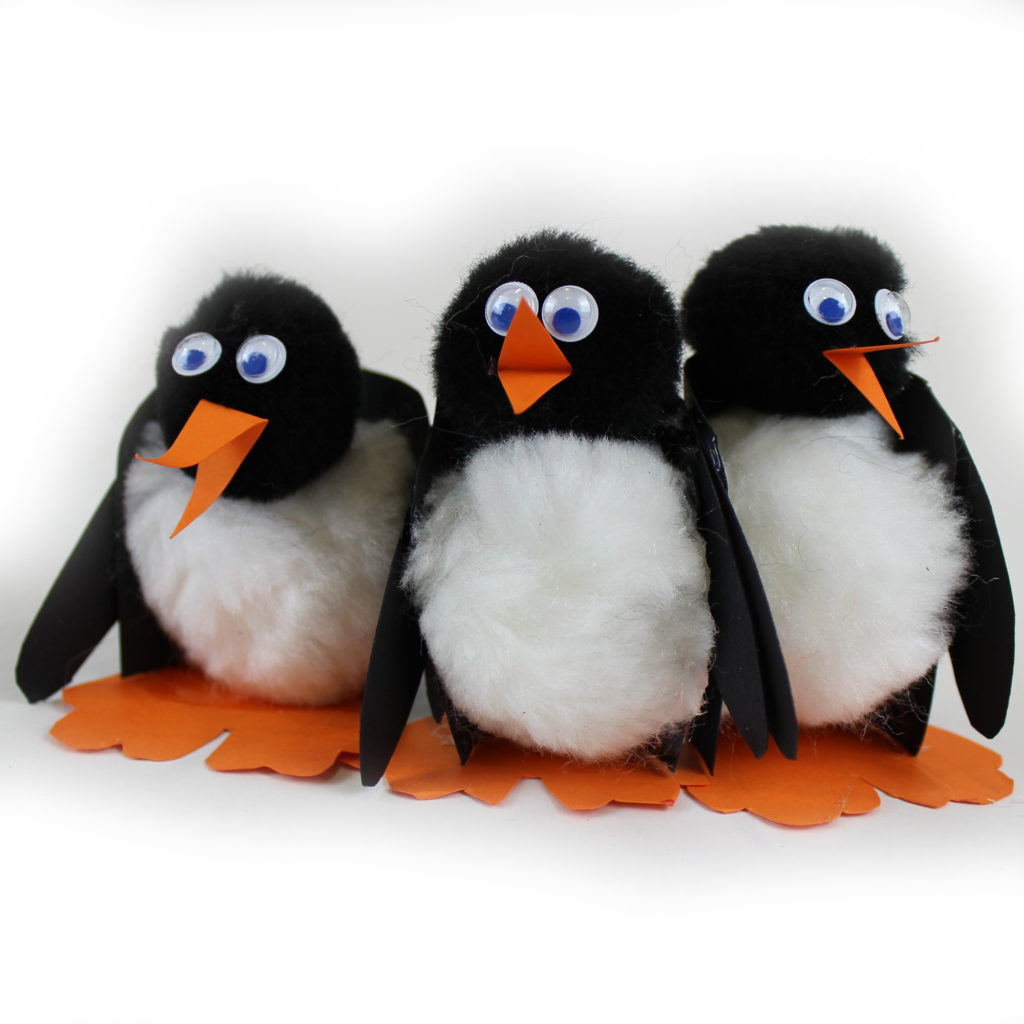
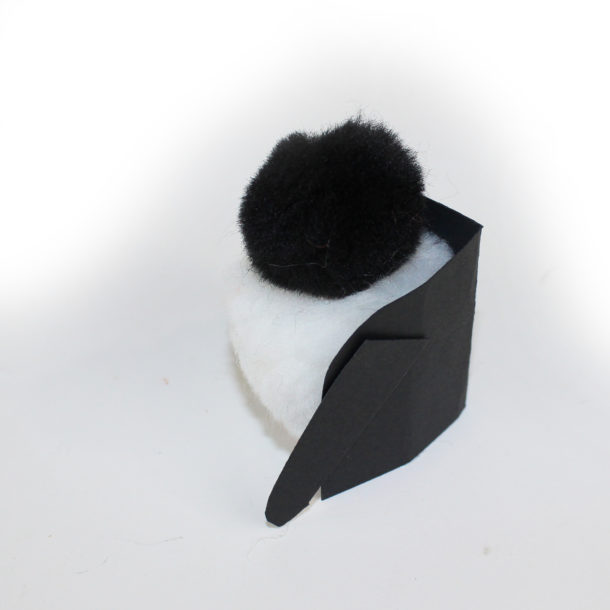
Step 1. To make the body and head of the chick, glue the larger white pom pom to the smaller black pom and wait until dry.
Step 2. Cut out the wings and back from the card with the same technique as before. Making sure that the curved edge is towards the chicks head. Glue this into place making sure you’re happy with the wing position.
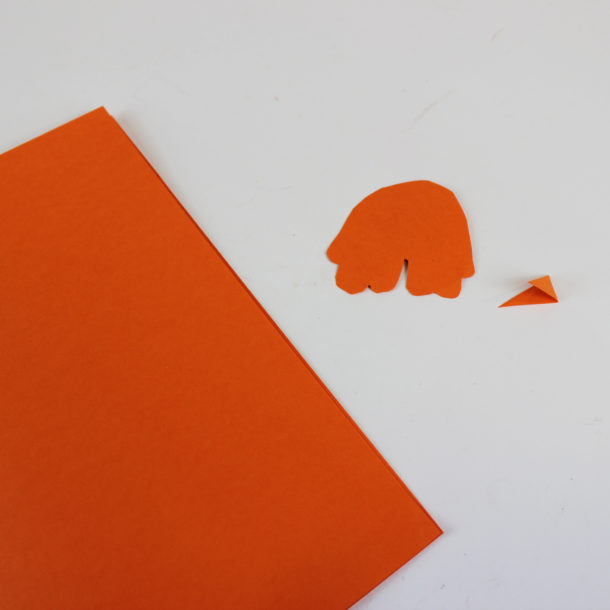
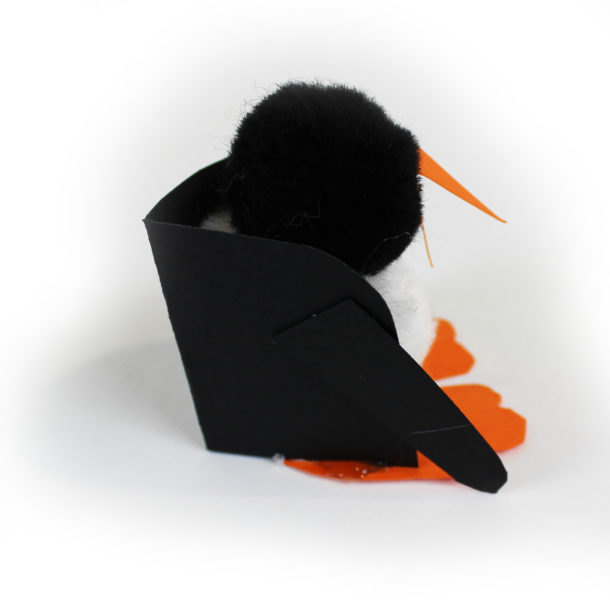
Step 3. Cut out the beak and legs from the orange card. Again, the shape of the feet can be whatever shape you like as the chick will stand up from the back support.
Step 4. Glue the legs and the beak into position along with the coloured wiggly eyes.
A lovely addition to the penguin family!