Materials list:
- Willow
- Masking tape
- Cling film
- Tissue paper
- Cellulose paste
- Acrylic paints
- Cloths
How to make it:
Step 1. You’ll need to show your pupils how to join the willow together. This is done by drying them first with a cloth then wrapping the masking tape around the willow. Pupils often don’t press the tape down hard enough so make sure they know this is important, to make the joint firm.
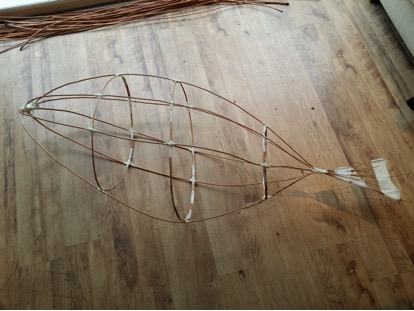
Step 2. Next, they need to make the structure of the fish. This involves bending the willow into circle shapes. If the willow pieces aren’t soaked properly they’ll snap.
Often it requires one person to hold the shape while another makes the joint. I’ve made three circles in my model; a larger one for the centre and two smaller ones for the nose and tail.
Step 3. Now you can fix straight pieces at 90 degree angles to the circles. This needs two people at least; one to hold and another to fix. The more straight pieces you fit, the stronger it will be, but about six is adequate. I use the thin end of the willow for the tail.
Step 4. Tie the tailpieces together about six inches from the end, so that the ends cross over to form a tail section. Fit long pieces of masking tape to these to make the tail sturdier.
Step 5. Now fix the stronger ends of the willow together to create the nose section. Often it’s a good idea to fix them two at a time, so that the joint is strong. Once this is done, you’ve made the basic structure of the fish.
Step 6. You’ll need to wrap the whole shape with cling film now and this can be fiddly. Try taping the first piece to one of the withies so you get a strong grip. This is where teamwork comes into it, because one person needs to hold whilst the other wraps. You can stand the fish on its nose end to make it easier.
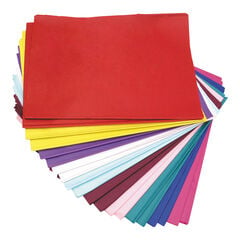
Step 7. Once the fish is wrapped, you can begin pasting tissue paper over it to give it some colour. Use a big paste brush and lots of paste. This part takes time and patience!
Step 8. Ok, so you can begin decorating the fish. I used ripped tissue paper to make stripes on the fish but I find it’s a good idea to show the pupils images of fish, so they get an idea of fish patterns in nature. Use acrylic paint to create extra details.
Step 9. For the eyes and fins I cut shapes out of coloured card and glued them in place with PVA. The tail was made from tissue paper pasted into place. For the top fin I pasted sheets of tissue paper together and left them to dry. Then I cut the fin shape and pasted it onto the body. This has the advantage of creating a strong but light shape, because the stronger card just kept falling off. You can use sticky tape to hold it if it helps. Tie some strong wire to the fish to hang it.
With thanks to Paul Carney for writing this how to post.
Our expert Paul Carney is an experienced art teacher and practitioner with over twenty years’ experience as an advanced skills art teacher, secondary ex-head of subject, primary art teacher and is currently art consultant. He works across the UK in schools for bespoke training and as a course provider for training companies.
See Paul’s website www.paulcarneyarts.com for advice, resources, training courses and lesson plans for teaching art at all ages.


